Things Small and Simple is a participant in the Amazon Services LLC Associates Program, an affiliate advertising program designed to provide a means for sites to earn advertising fees by advertising and linking to Amazon.com.
This post contains some affiliate links. This simply means that if you purchase anything, or take other actions after clicking one of my links, I will receive a small commission. This comes at no extra cost to you. Thanks so much for your support!
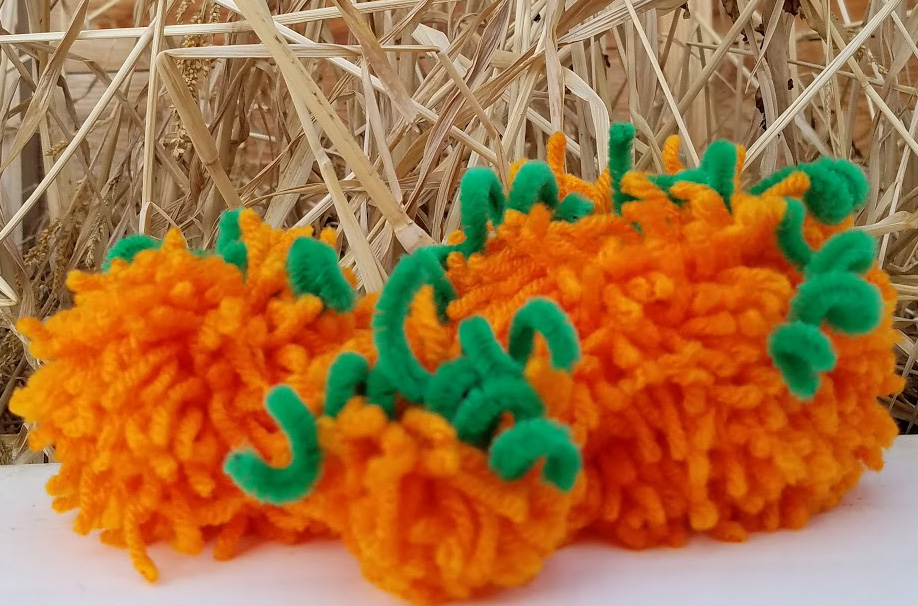
Are you looking for a quick craft? How cute are these pom pom pumpkins! With the right supplies, these can be put together in less than fifteen minutes – perfect for a party craft. Or, if you’re pressed for time, but feel that “I need to create something” bug . . . here you go!

Pom Pom Pumpkins Suggested Supplies:
- Orange Yarn
- Green Pipe Cleaners
- Bucilla Pom Pom Makers – I promise you’ll love these!
- Sharp Scissors – If you want your pom poms to be nice and full, you’re going to be cutting through lots of layers of yarn. Save yourself some frustration and make sure your scissors are SHARP.
Do you have a party coming up? Looking for a craft to keep those party-goers busy? Or, maybe, you just have a few minutes to fill and feel the need to create something. Either way, these little pom pom pumpkins can help you out. As far as craft projects go, this one is super simple and quick, especially if you have the right tools.
Creating a Pom Pom
Step 1:
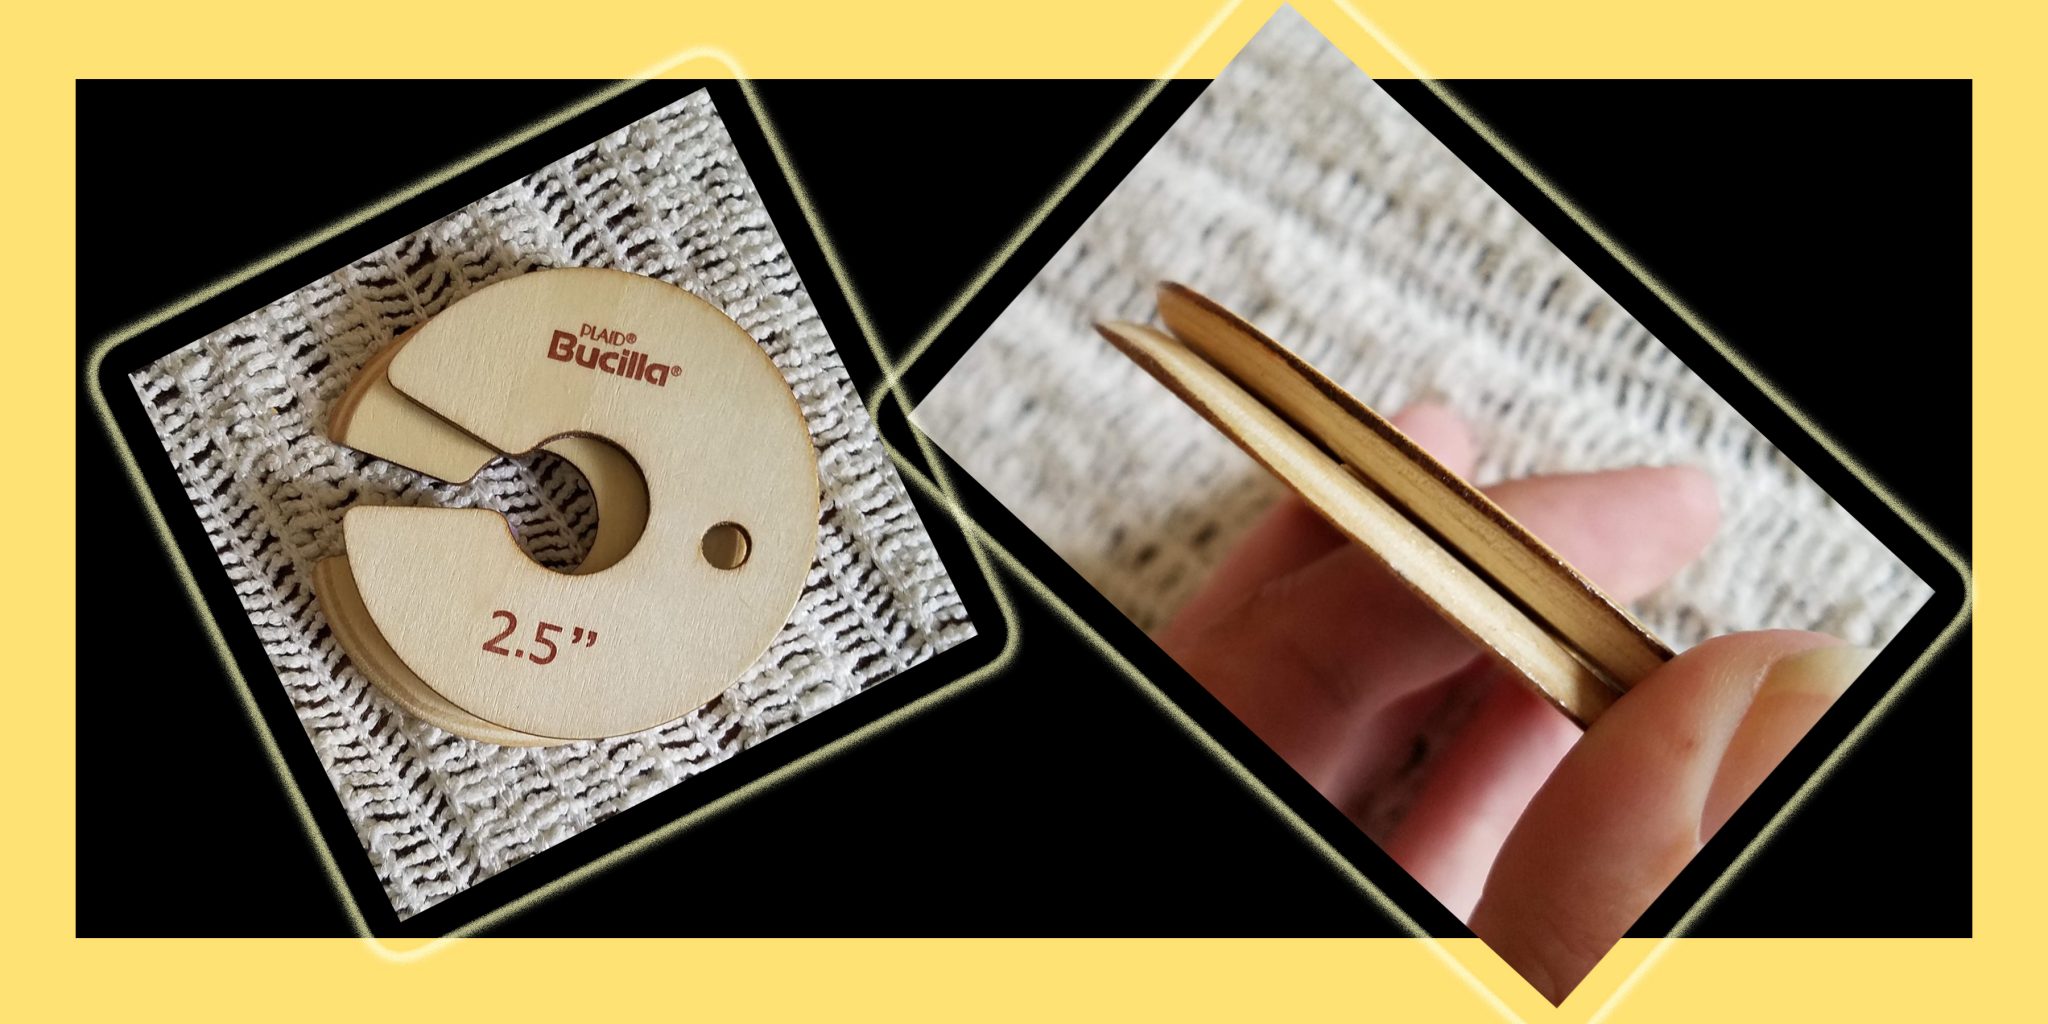
First of all, let’s talk about these pom pom makers. Now, I’ve made pom poms by wrapping yarn around my fingers. I’ve made pom poms by wrapping yarn around pieces of cardboard. Why buy pom pom makers then, you ask? Because these are AWESOME!
Seriously, upgrade your pom pom making skills by using these little almost-circles. First of all, they are sturdy and uniform. Second, they have angled edges that allow a pair of scissors to slip underneath the wrapped yarn. This makes it SO MUCH easier to cut your yarn strands! Also, they come in a two-piece set that holds your yarn pieces together, after they’ve been cut, while you tie them together. Does that make sense? Don’t worry, I have pictures to show you what I mean.
Step 2:
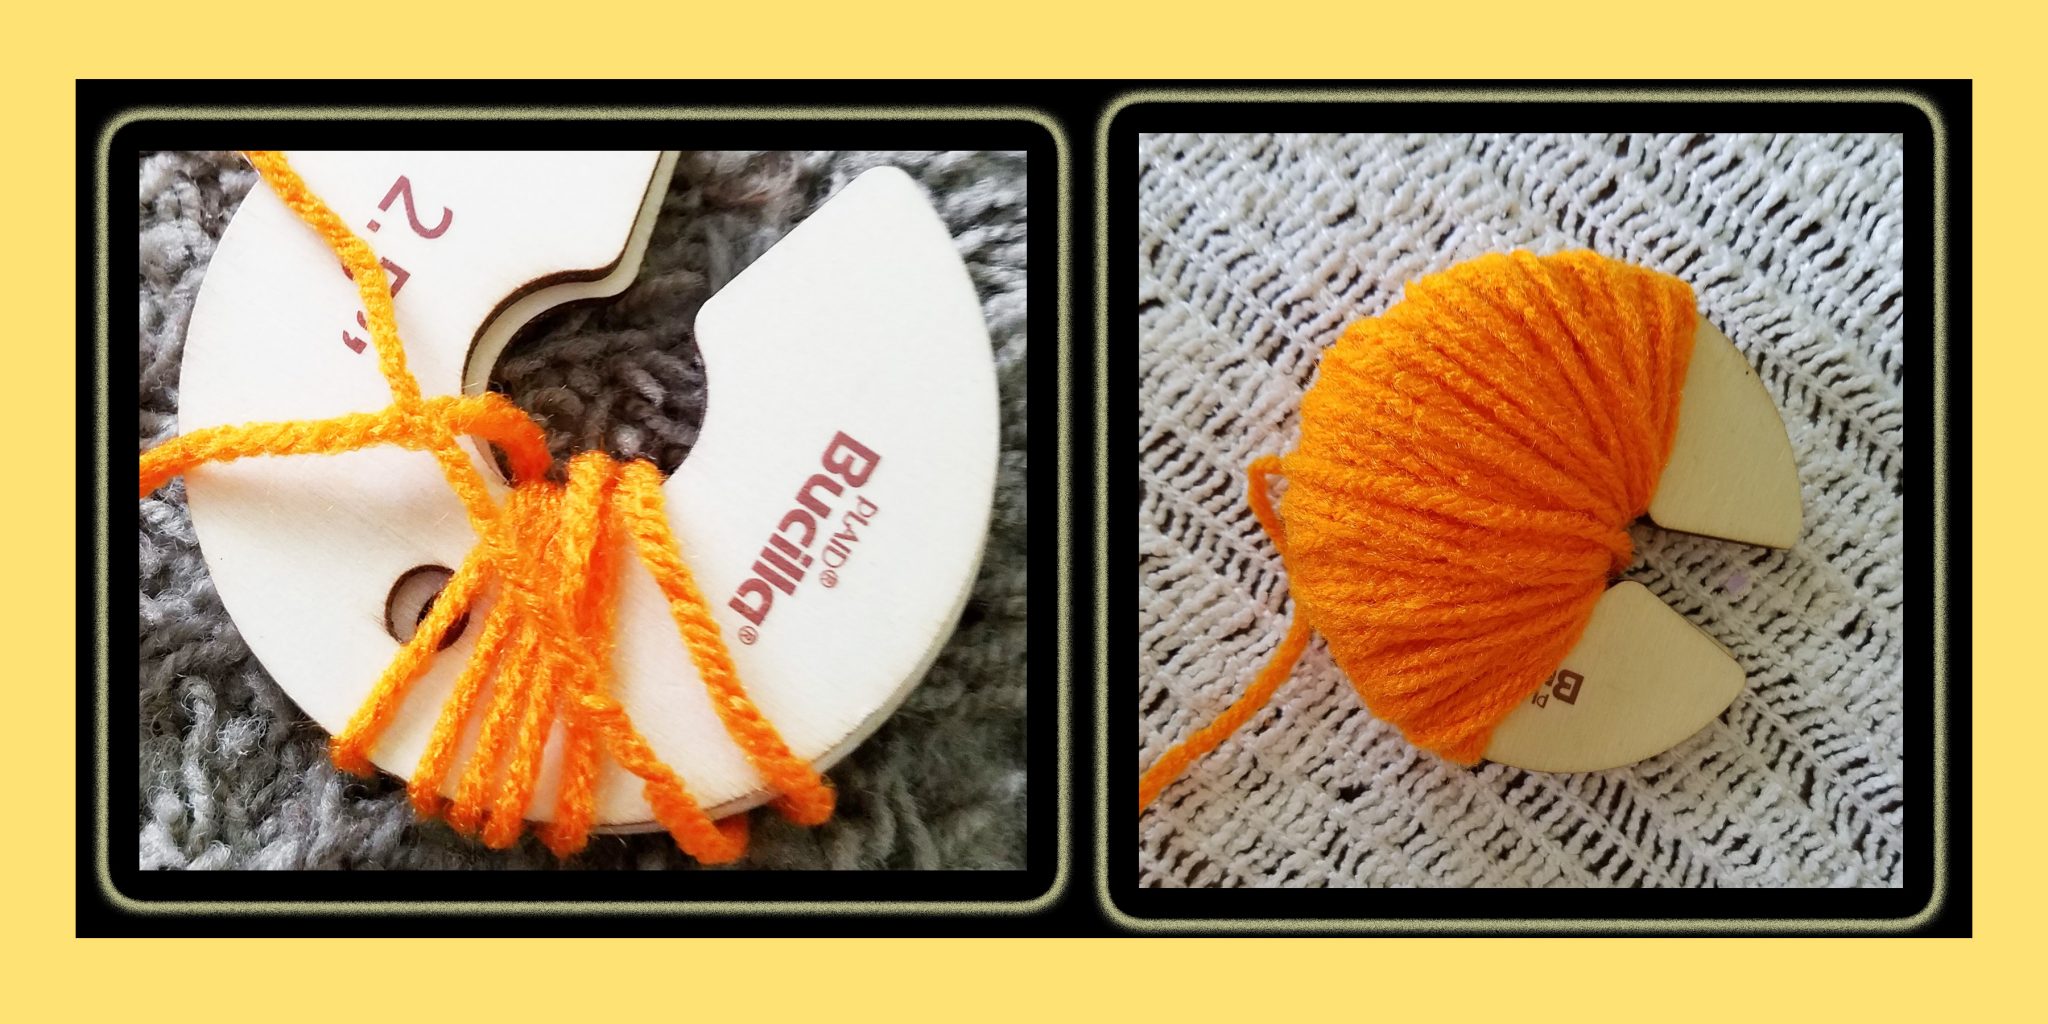
Wrap your yarn. Use the space left open around the outside to access the inner circle. How much yarn should you use? That depends on how full you want your pom poms to be. I like mine to be super full, so I filled up most of the inner circle with yarn.
Step 3:
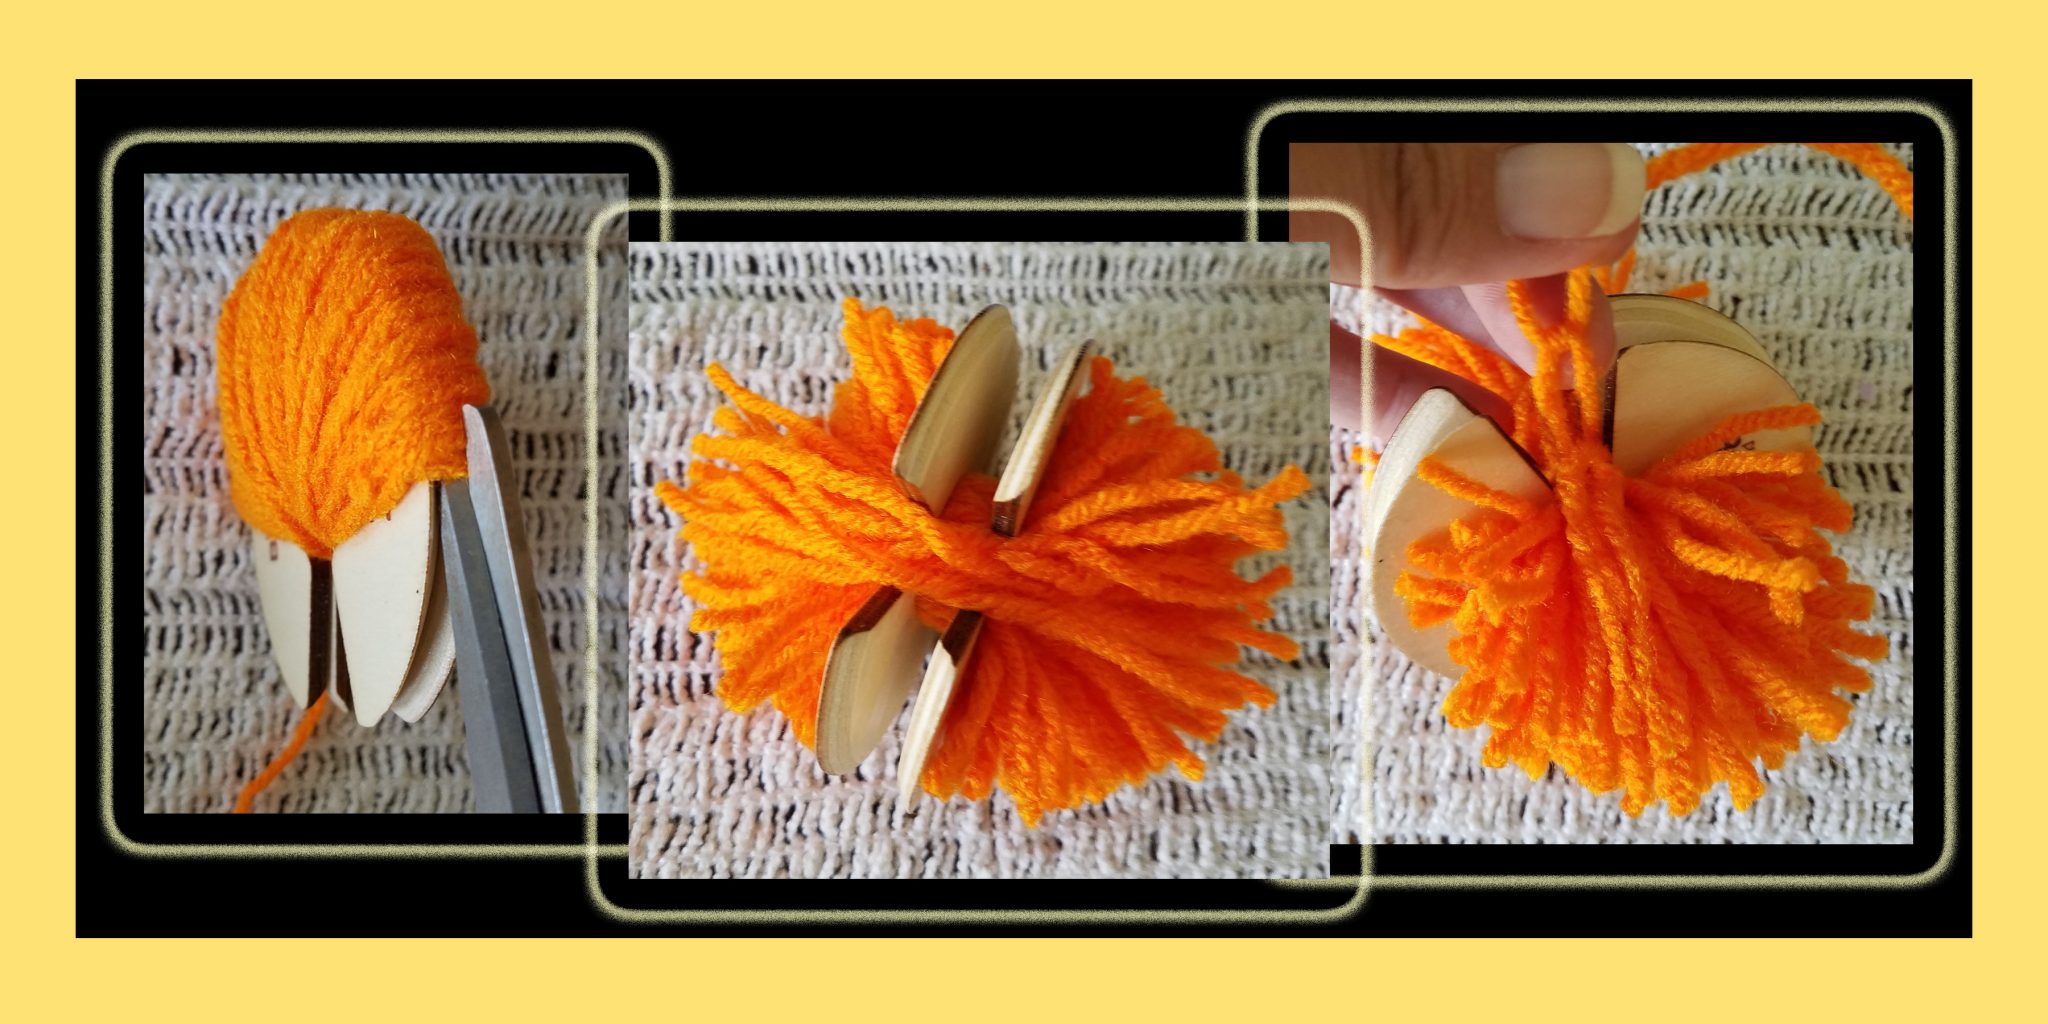
Now, it’s time to pick up those super sharp scissors, slide them into the groove made by your pom pom makers, and cut. When all your strands have been cut, slide the two circle pieces apart a little bit, cut another piece of yarn and wrap it around the yarn inside your circles. Tie this new piece of yarn tight!

Step 4:
Congratulations! You’ve made a pom pom! Slide those wooden circles off and trim around the edges to make them smooth.
Turning a Pom Pom Into a Pumpkin
Step 5:
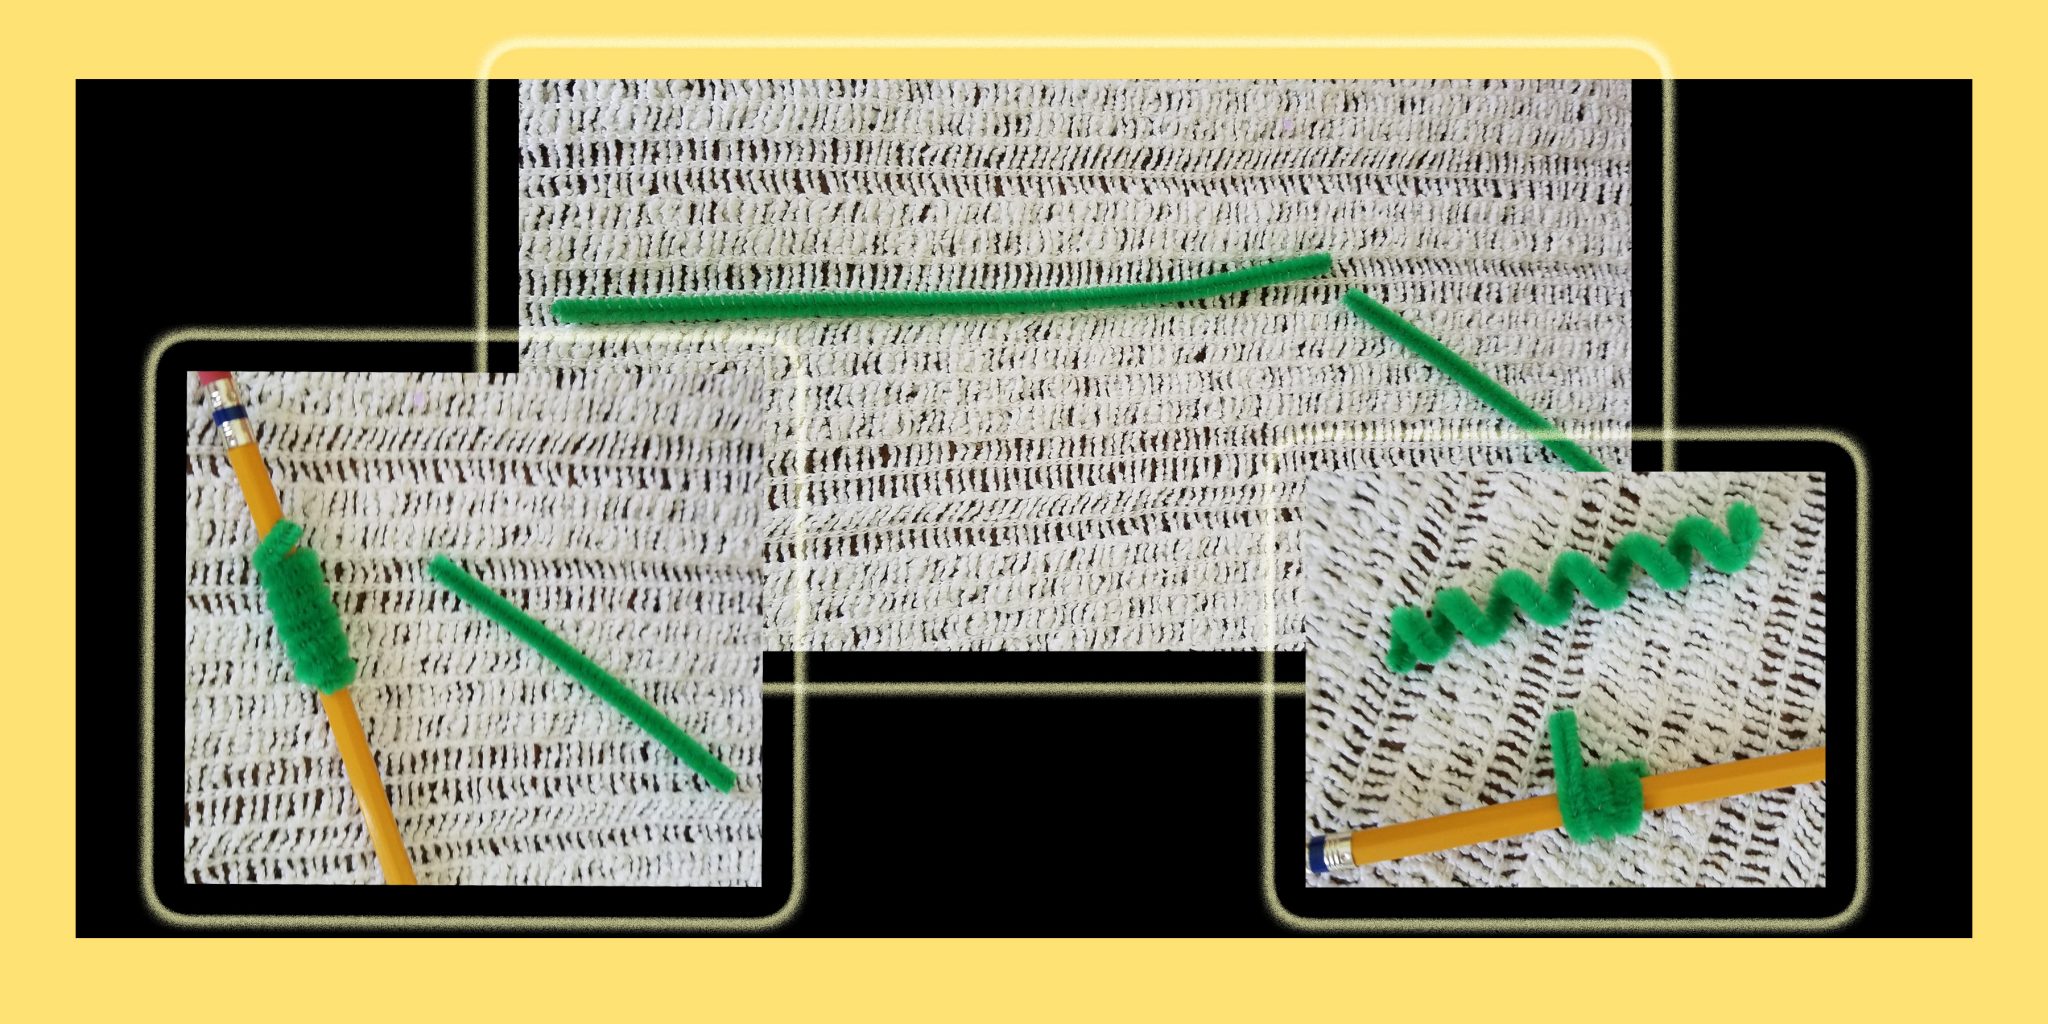
What pumpkin would be complete without a stem and vines? This is where your green pipe cleaner comes in. Cut about a third of the pipe cleaner off so you have two pieces. Wrap all of the long piece around a pencil. Wrap the short piece around a pencil also, but leave a little bit straight – this will be your pumpkin’s stem.
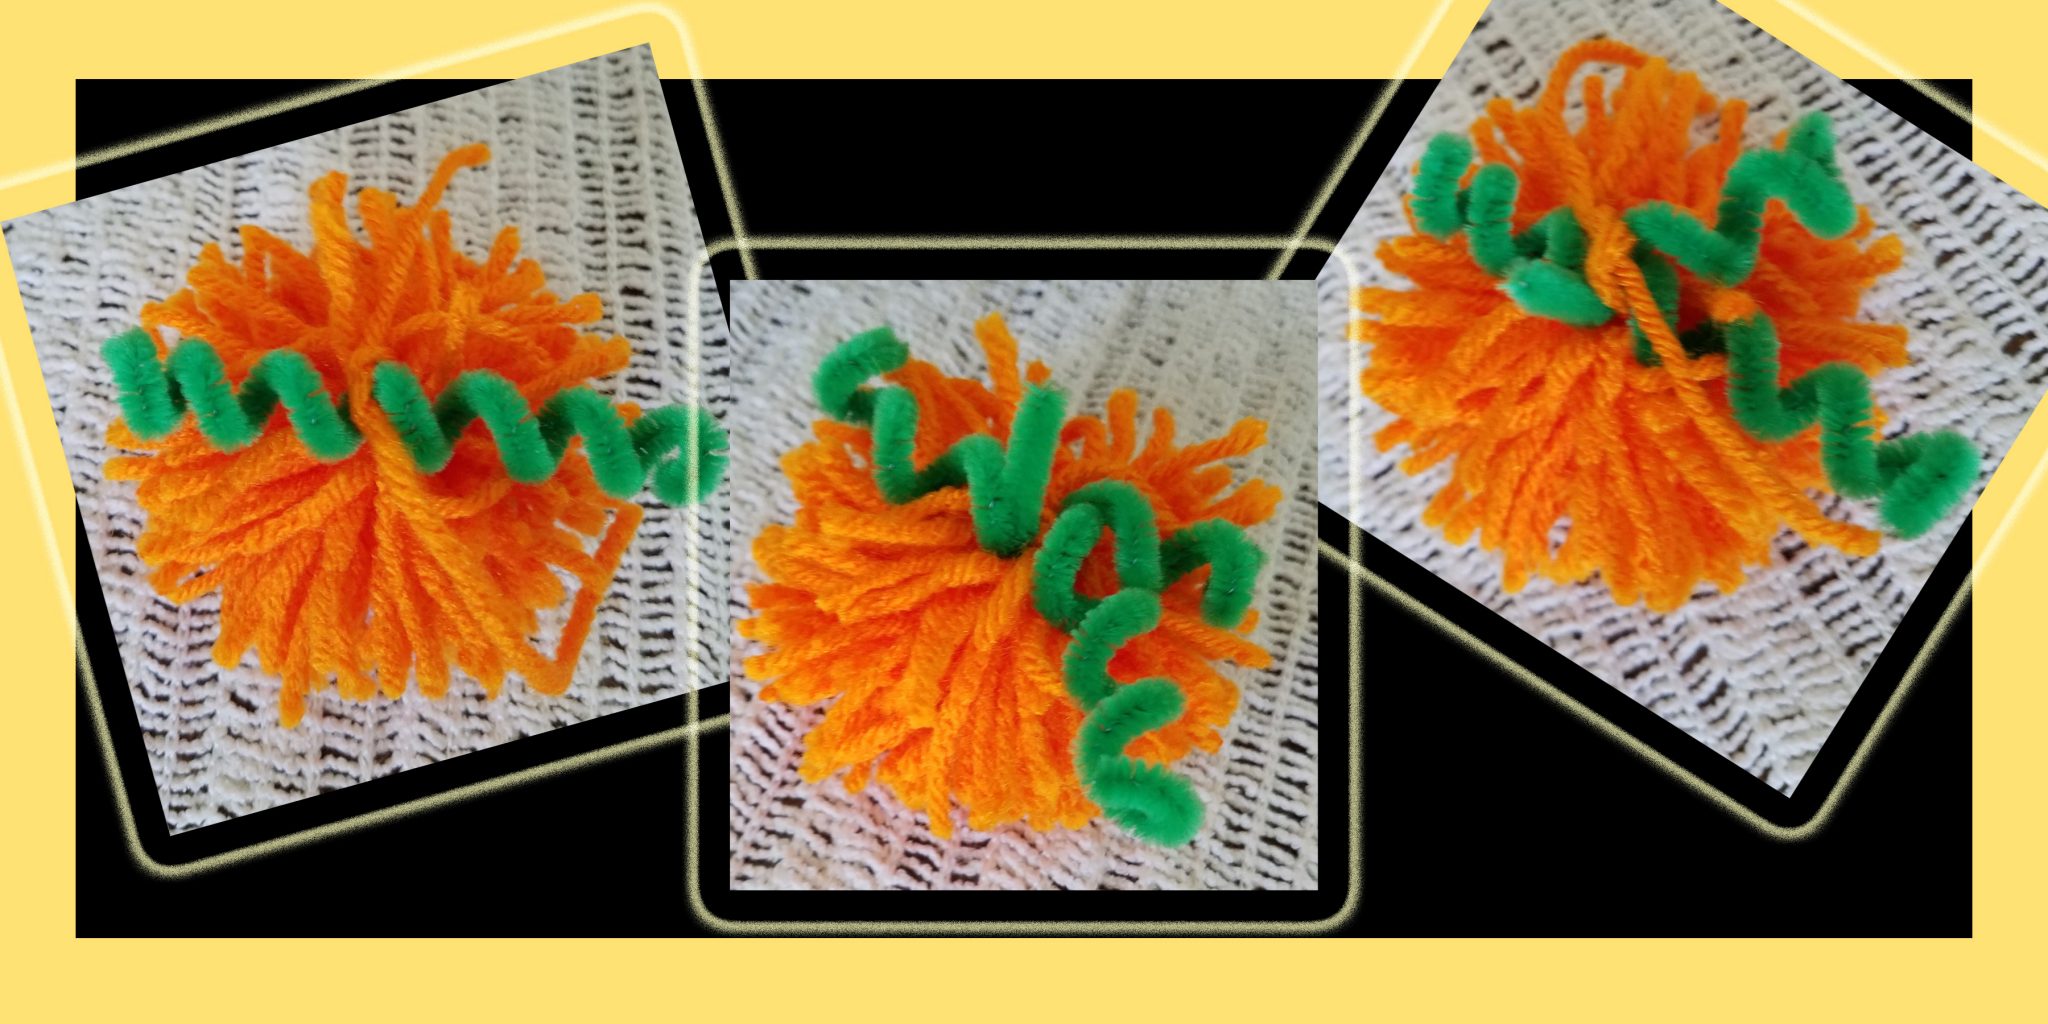
Step 6:
Use a couple strands of yarn to tie your pipe-cleaner vines and stem into place. Arrange them however you want – there’s no right or wrong way for a vine to grow!
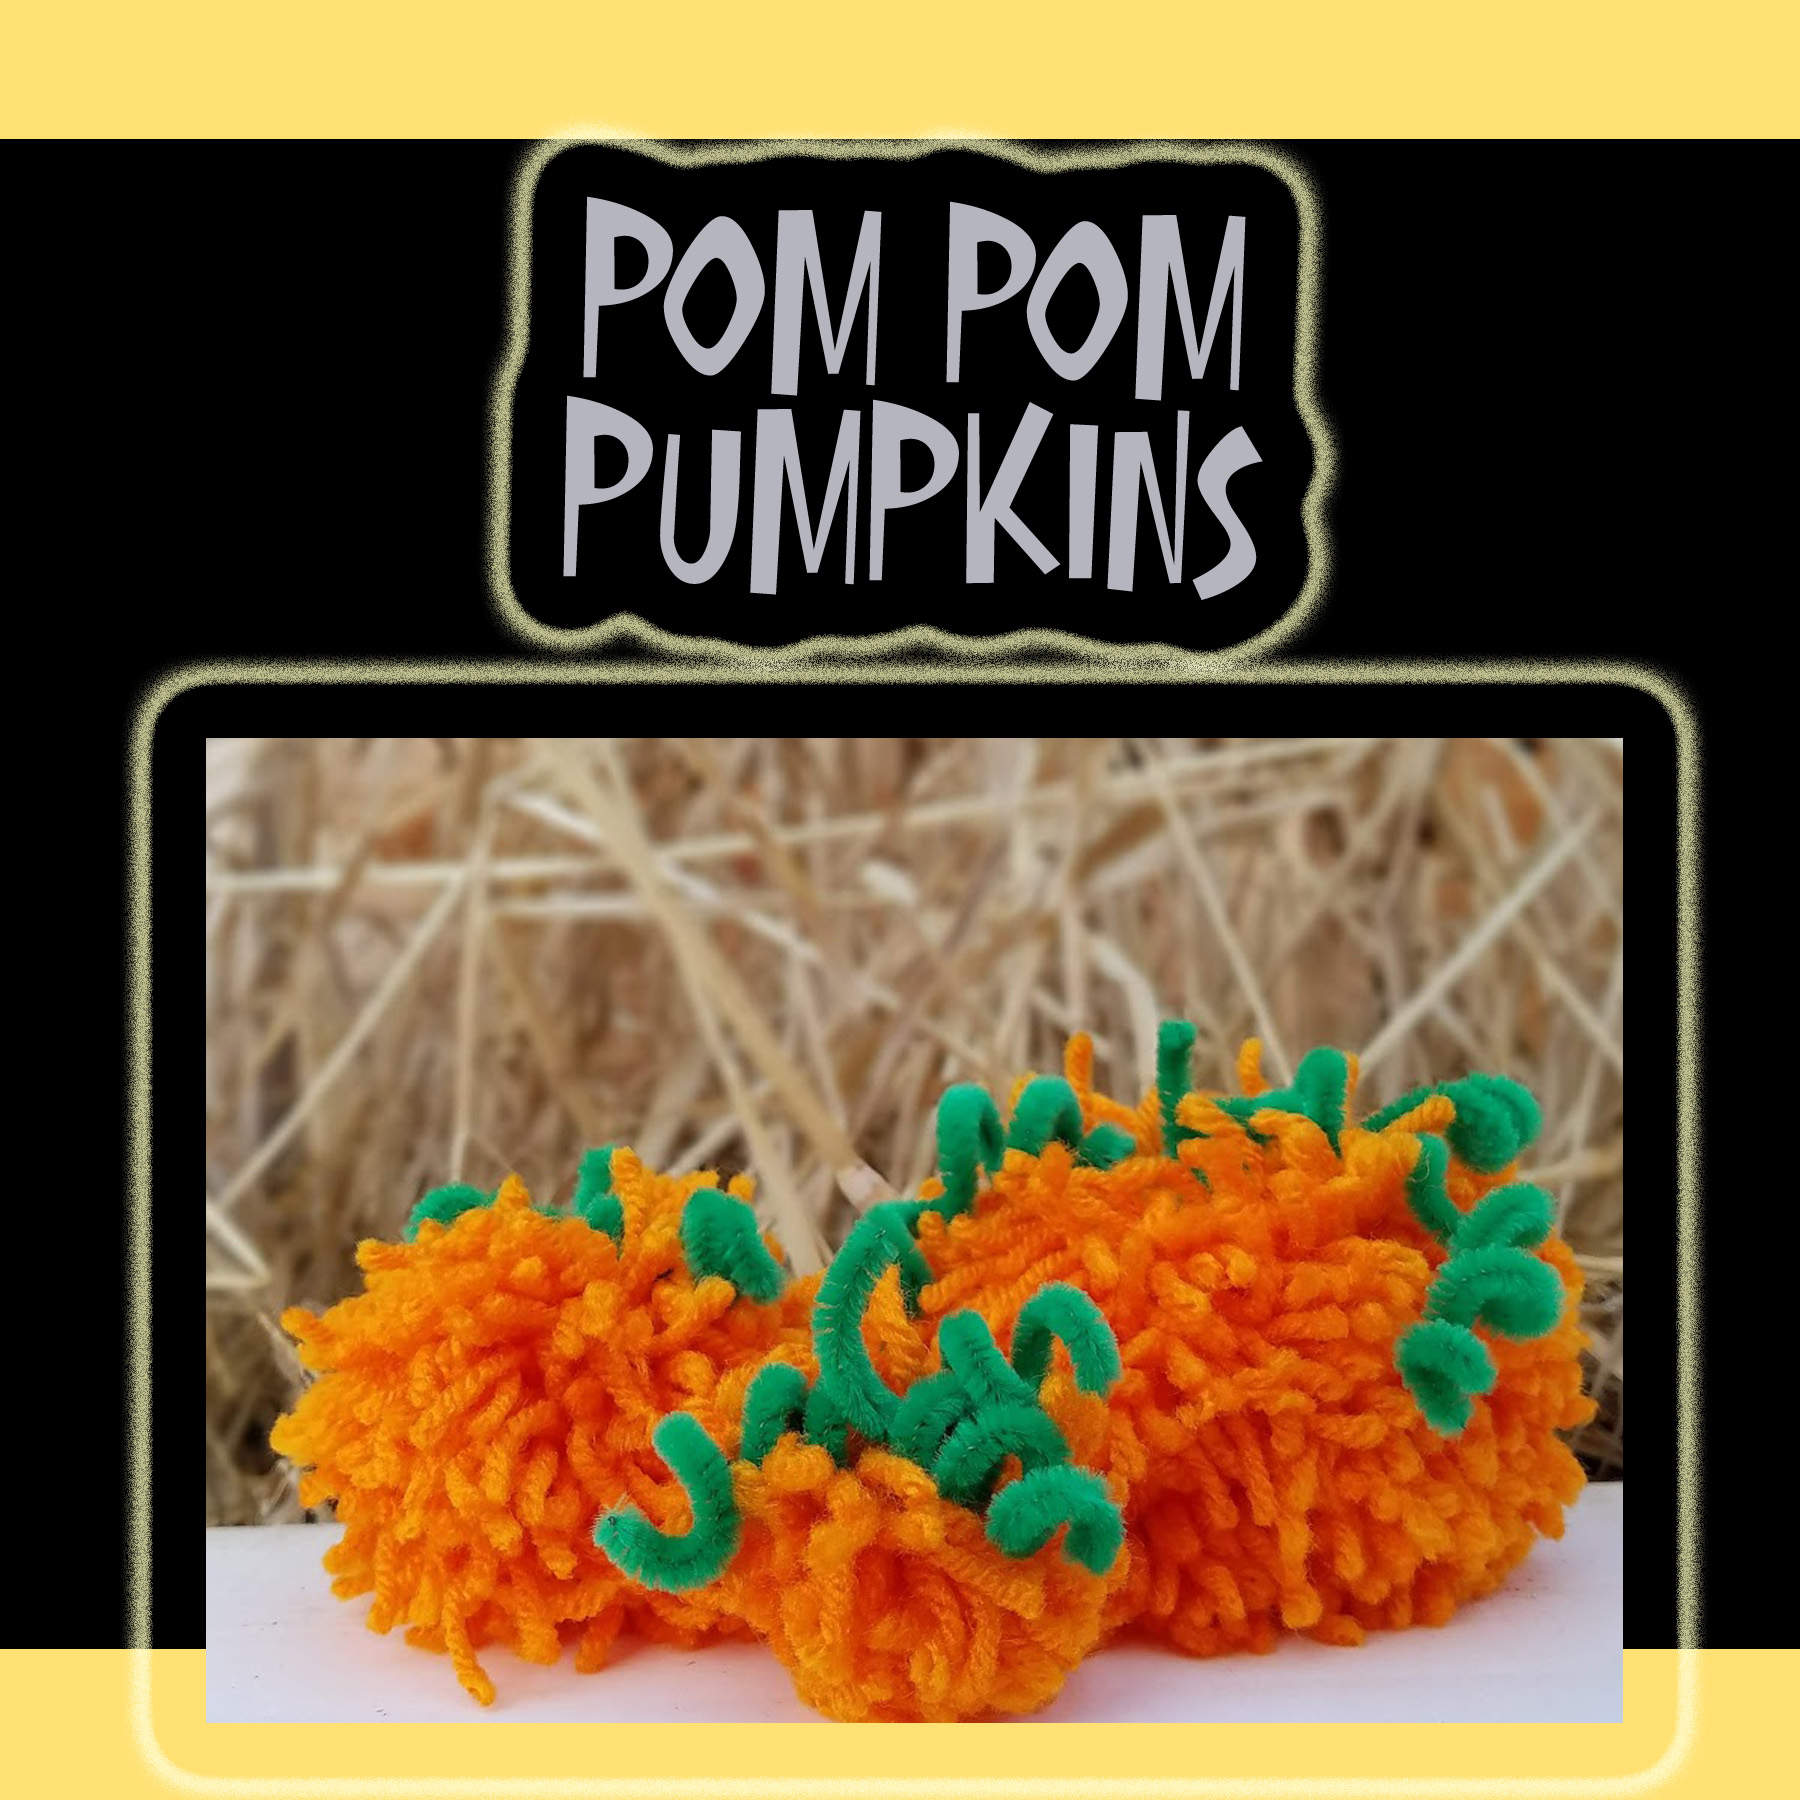
And there you have it . . . your very own Pom Pom Pumpkin! If you buy this set of Bucilla Pom Pom Makers, you can make pumpkins in three different sizes – so much fun! Are you ready?
Let’s Create!
