Things Small and Simple is a participant in the Amazon Services LLC Associates Program, an affiliate advertising program designed to provide a means for sites to earn advertising fees by advertising and linking to Amazon.com.
This post contains some affiliate links. This simply means that if you purchase anything, or take other actions after clicking one of my links, I will receive a small commission. This comes at no extra cost to you. Thanks so much for your support!
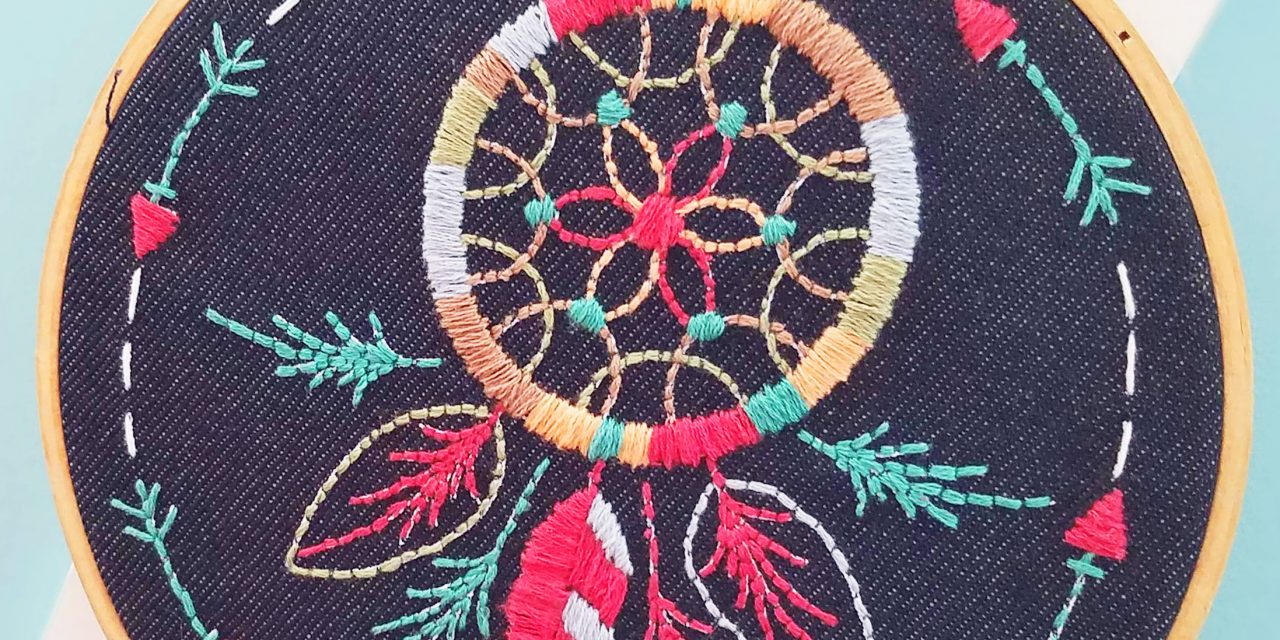
Every now and again, I like to put away my “have to’s” and take some time to just make something. With school starting back up, and the craziness that comes with that, this past weekend was one of those times. I just needed a break from reality, and for me, creating something is always a good way to re-center myself. Read on to learn a little bit about my most recent project . . .

Dream Catcher Embroidery Suggested Supplies:
Embroidery is one of those things that kind of intimidates me. I’m a bit of a perfectionist, and I worry that the fact that my stitches never seem to be the same size as each other will ruin my project. Even so, there’s just something about hand stitching that makes my heart happy.
For this project, I used a kit that included everything you need aside from an embroidery hoop and some scissors. The kit came with two needles, both of which had very small eyes. (My opinion). Threading these needles with four strands was super tricky! Here’s how I did it:
Embroidery Needle Threading Help

Step 1:
The biggest frustration in needle threading, I think, is the fact that thread isn’t usually very stiff. To remedy that situation, I wrap my threads in a little scotch tape to help them stay together and go where I want them to go.

Step 2:
Yes, the tape adds stiffness to the threads, but there’s no way the whole piece I used was going to fit through the eye of the needle. So, I trimmed it off a little. When trimming, be careful to make sure the tape is sealed all the way around the threads. Otherwise, it will all just open up and you’ll be right back where you started.

Step 3:
Cut the top portion of your taped thread at a diagonal, to make it “pointy” (Is that even a word)? Make the tip small enough to easily fit through the eye of your embroidery needle. Once you get the tip through, Just pull the rest of it through and take of the tape. Bam! You’re ready to start stitching!

Now that your needle is threaded, find yourself a quiet place, follow the instructions included in the Embroidery Kit and . . .

Nice post , wonderful website, If you have time maybe you can check mine, keep up the good work.