Things Small and Simple is a participant in the Amazon Services LLC Associates Program, an affiliate advertising program designed to provide a means for sites to earn advertising fees by advertising and linking to Amazon.com.
This post contains some affiliate links. This simply means that if you purchase anything, or take other actions after clicking one of my links, I will receive a small commission. This comes at no extra cost to you. Thanks so much for your support!
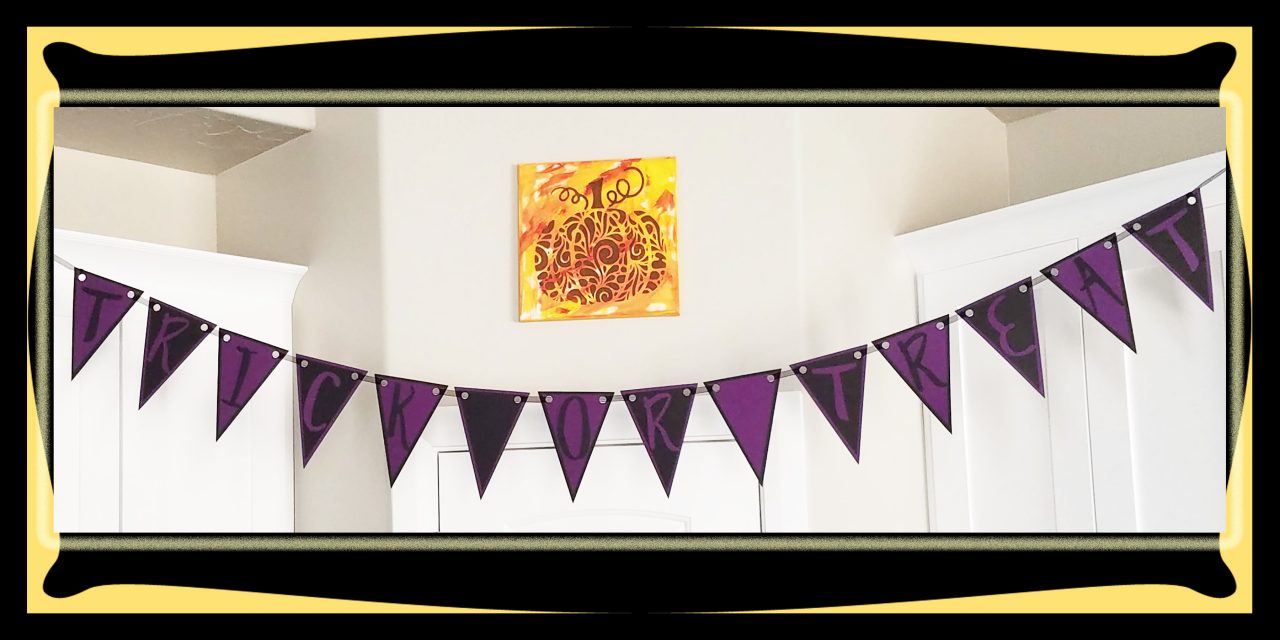
Although it’s still almost 100 degrees outside at my house, Fall is in the air. With Fall comes Halloween! In honor of the season, I created a Halloween Party Banner in Cricut’s Design Space. Keep reading to see the finished product, and to get a free link to my design!

Halloween Party Banner Suggested Supplies:
Parties are fun, but sometimes I have a better time planning and getting ready for them than I do during them. This really isn’t anything new. As a kid, I loved to play with Barbie dolls, but my favorite part was getting set up to play, not the actual playing. I guess you could say I’m an introvert.
At any rate, I had fun designing and creating this “Trick or Treat” banner. It would be great for a Halloween party, but also just as fun to simply use in your holiday decorating. This is a pretty quick project, I hope you enjoy it!
Creating Your Halloween Banner

Step 1:
Click here to access my Design Space file for this project. Once you have it open on your computer, make sure the pieces are the size you want them to be. The file, with no editing, will cut each penant at about 8 inches tall. If you want to adjust that, do it before you cut!

Step 2:
This project takes quite a few pieces of cardstock, so make sure you have plenty handy when you’re ready to cut. I recommend using the blue mat. In the middle picture above, I had the paper on a green mat . . . It was a bit stickier than I needed it to be!

Step 3:
Before gluing anything, lay out each of the pieces you have cut to make sure things look the way you want them to. When weeding your pieces, remember to save the middle pieces of your “R’s”, “O”, and “A”! Once everything has a home, get out your glue and finish things up.

Use the black ribbon to string each letter together. In order to keep things evenly spaced, I taped the ribbon to the back of each triangle. Are you ready for some Halloween fun?
How in the world did we used to craft without die cut machines? They are the BEST! Super cute banner!