Things Small and Simple is a participant in the Amazon Services LLC Associates Program, an affiliate advertising program designed to provide a means for sites to earn advertising fees by advertising and linking to Amazon.com.
This post contains some affiliate links. This simply means that if you purchase anything, or take other actions after clicking one of my links, I will receive a small commission. This comes at no extra cost to you. Thanks so much for your support!
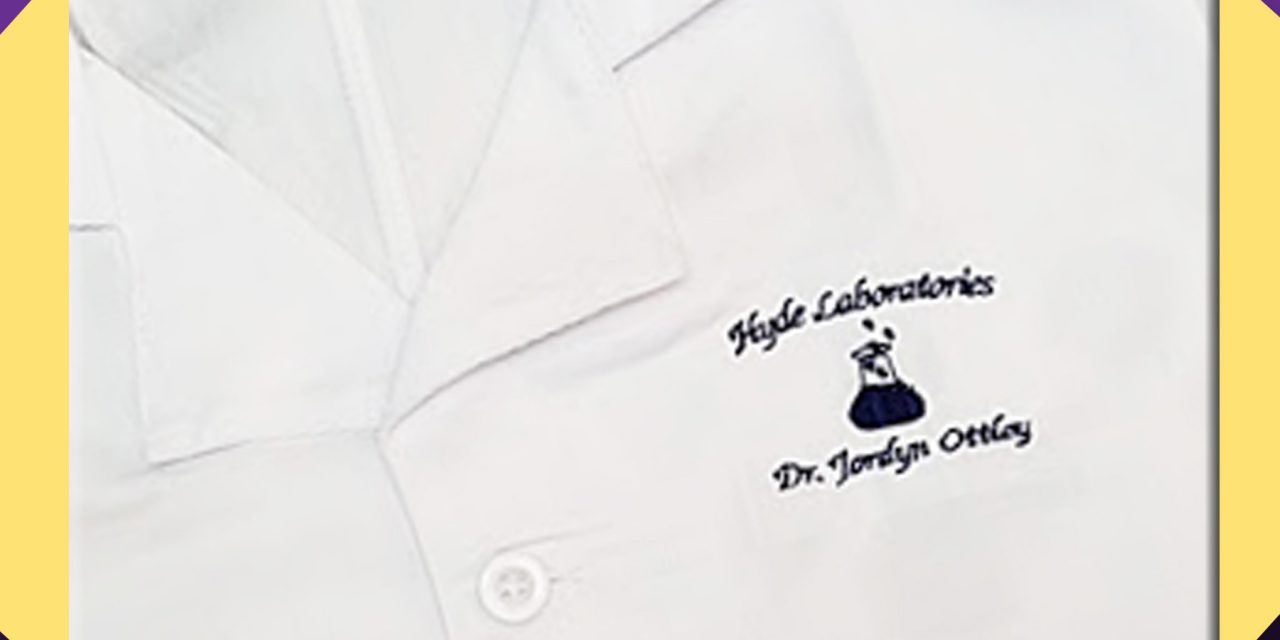
Each summer for the past several years, my parents have gathered my kids and their cousins and taken them away on an adventure lovingly known as “Cousins’ Camp”. This past July, Cousins’ Camp was also a science lab, where the kids got to do all kinds of crazy experiments, from making their own sidewalk chalk to creating Moose Toothpaste. Who even knew that was a thing? Read on to learn about the scientist lab coats I embroidered for camp this year.
DIY Scientist Lab Coat for Kids
Suggested Supplies:
- Embroidery Machine – I LOVE my Brother embroidery / sewing machine!
- Four inch machine embroidery hoop – Most machines come with one, but just in case yours didn’t, you can get one here.
- Embroidery thread – I used blue, but check out this listing on Amazon if you want a different color. They have TONS of options.
- Machine Embroidery Stabilizer Paper
- Fabric Marking Pen
- Plain white lab coat – These ones are really good quality, and a great price. They carry kids sizes from 3 to 14.
Embroidering a Scientist Lab Coat
Tip 1:
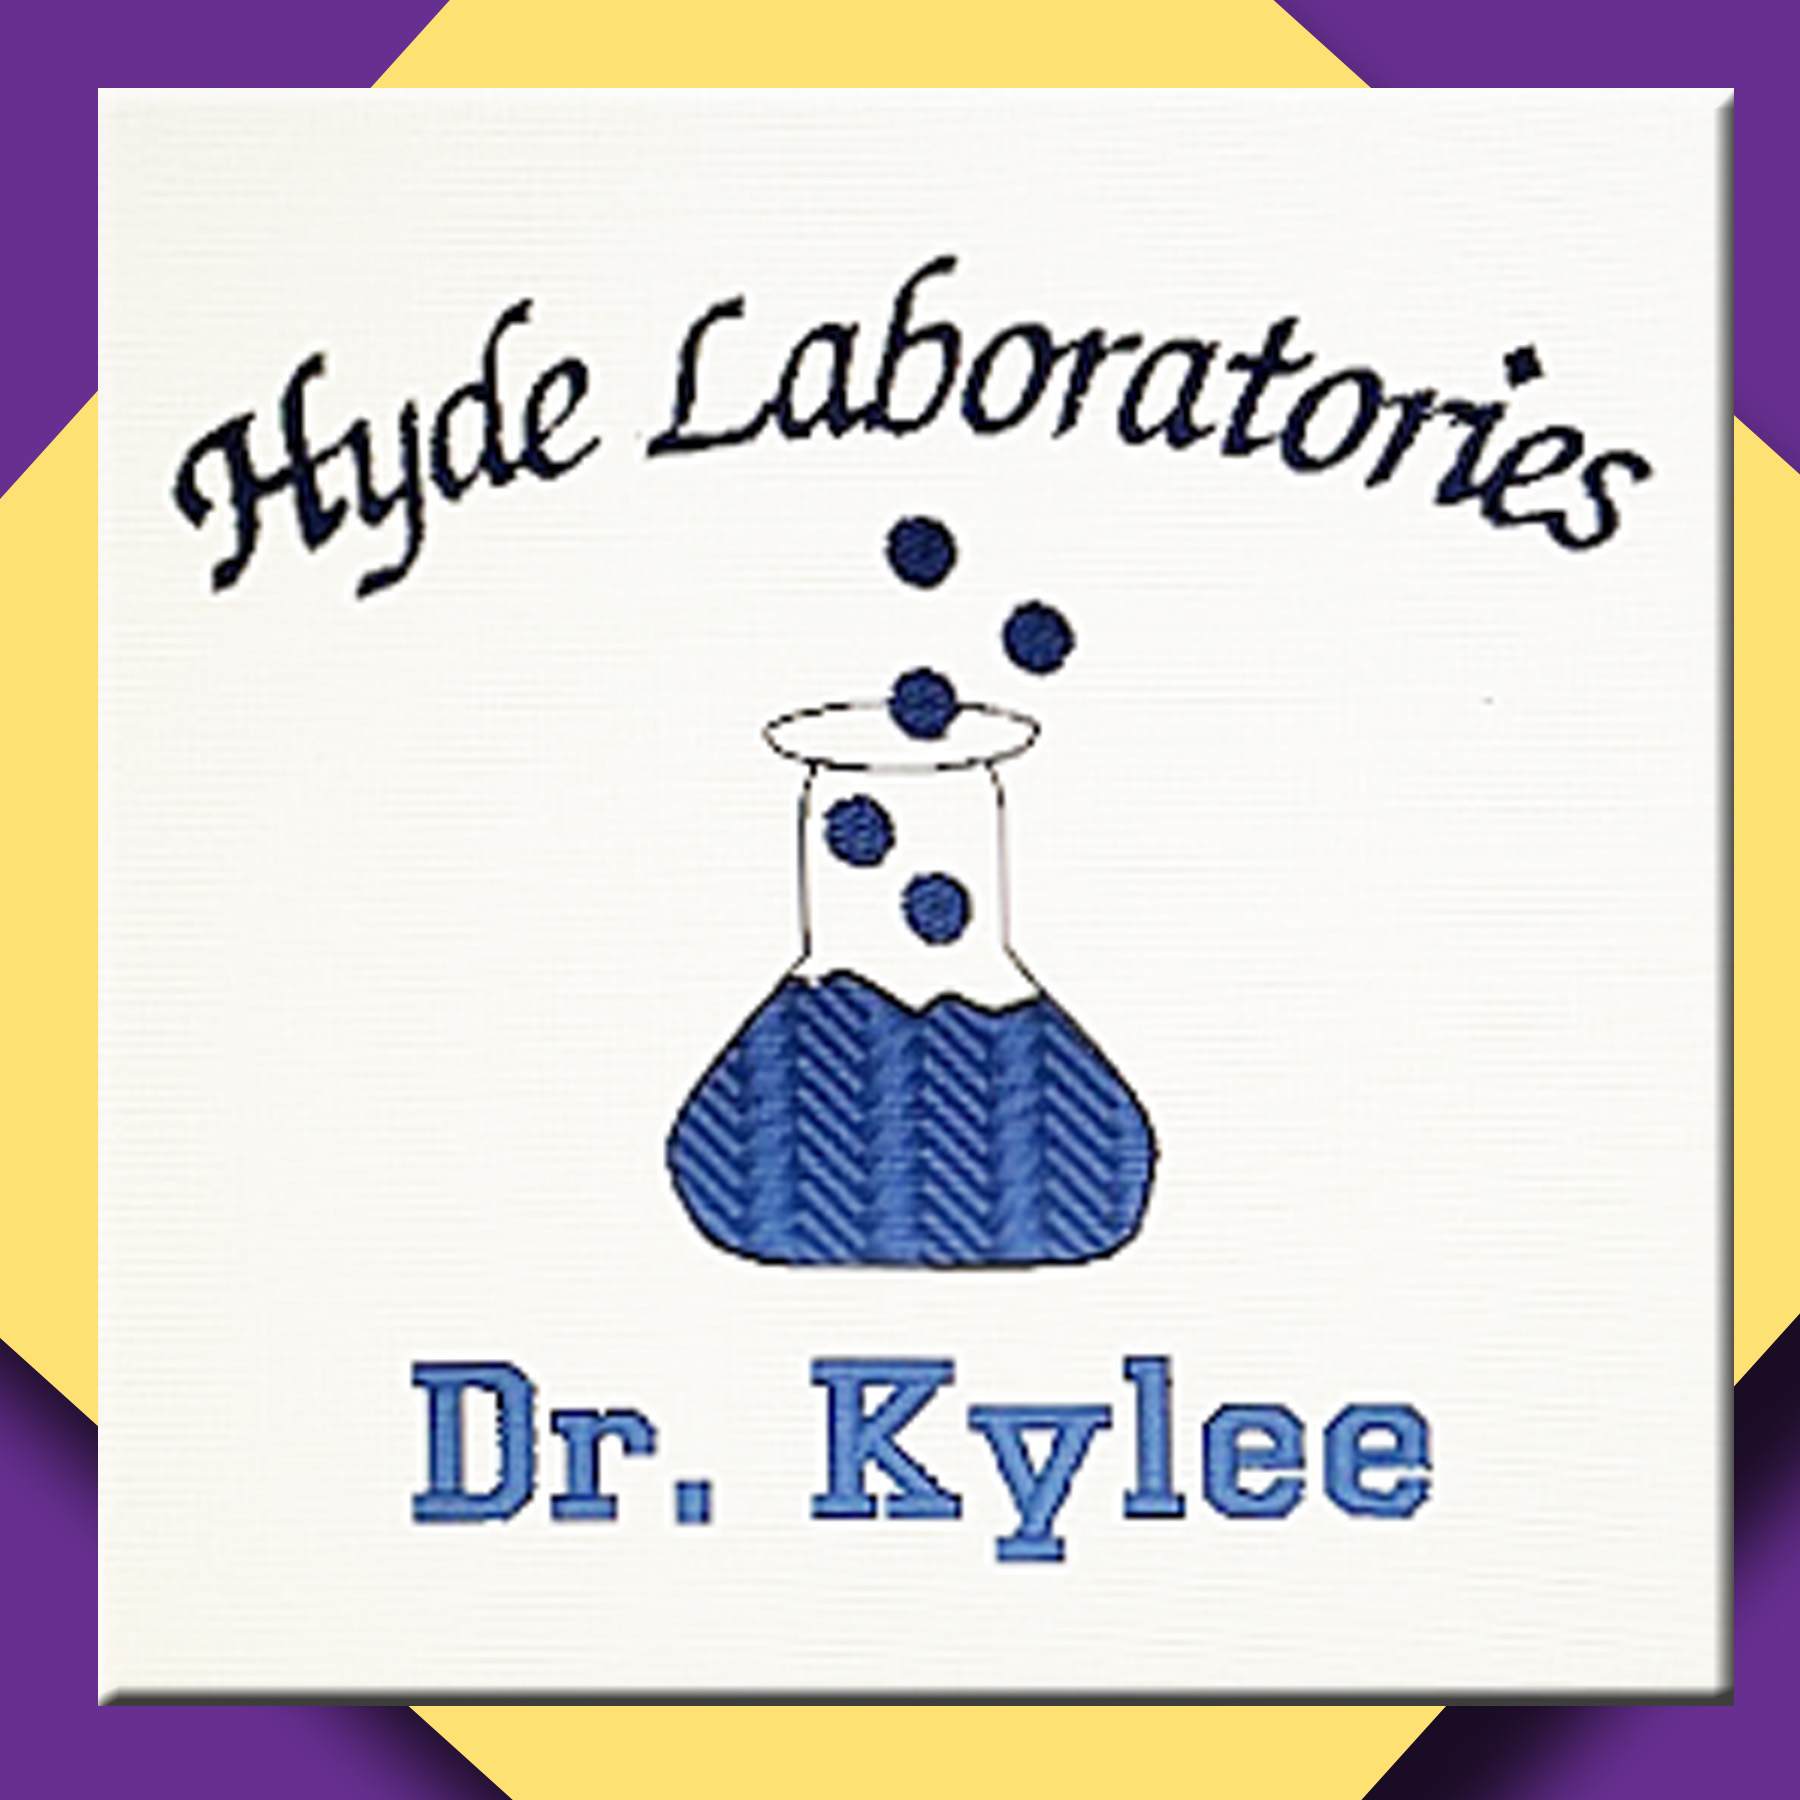
Honestly, the trickiest part of this whole project was creating the embroidery design. I didn’t have an embroidery file for a test tube, and heaven forbid I actually go out and buy one . . . Nope, I’m stubborn. I have some embroidery design software that I used to create this image.
I know what you’re thinking . . . “Well that’s all well and great for you, but I don’t have embroidery design software!” Don’t worry, I’ve got you covered. If you want my test tube file, just fill out the form below and I’ll send you a link to the .pes test tube file in my google drive. You will need to add your own text, but embroidery fonts are much more accessible. In fact, many machines have a bunch of them pre-loaded.
Getting that Embroidery on the Lab Coat
Tip 2:
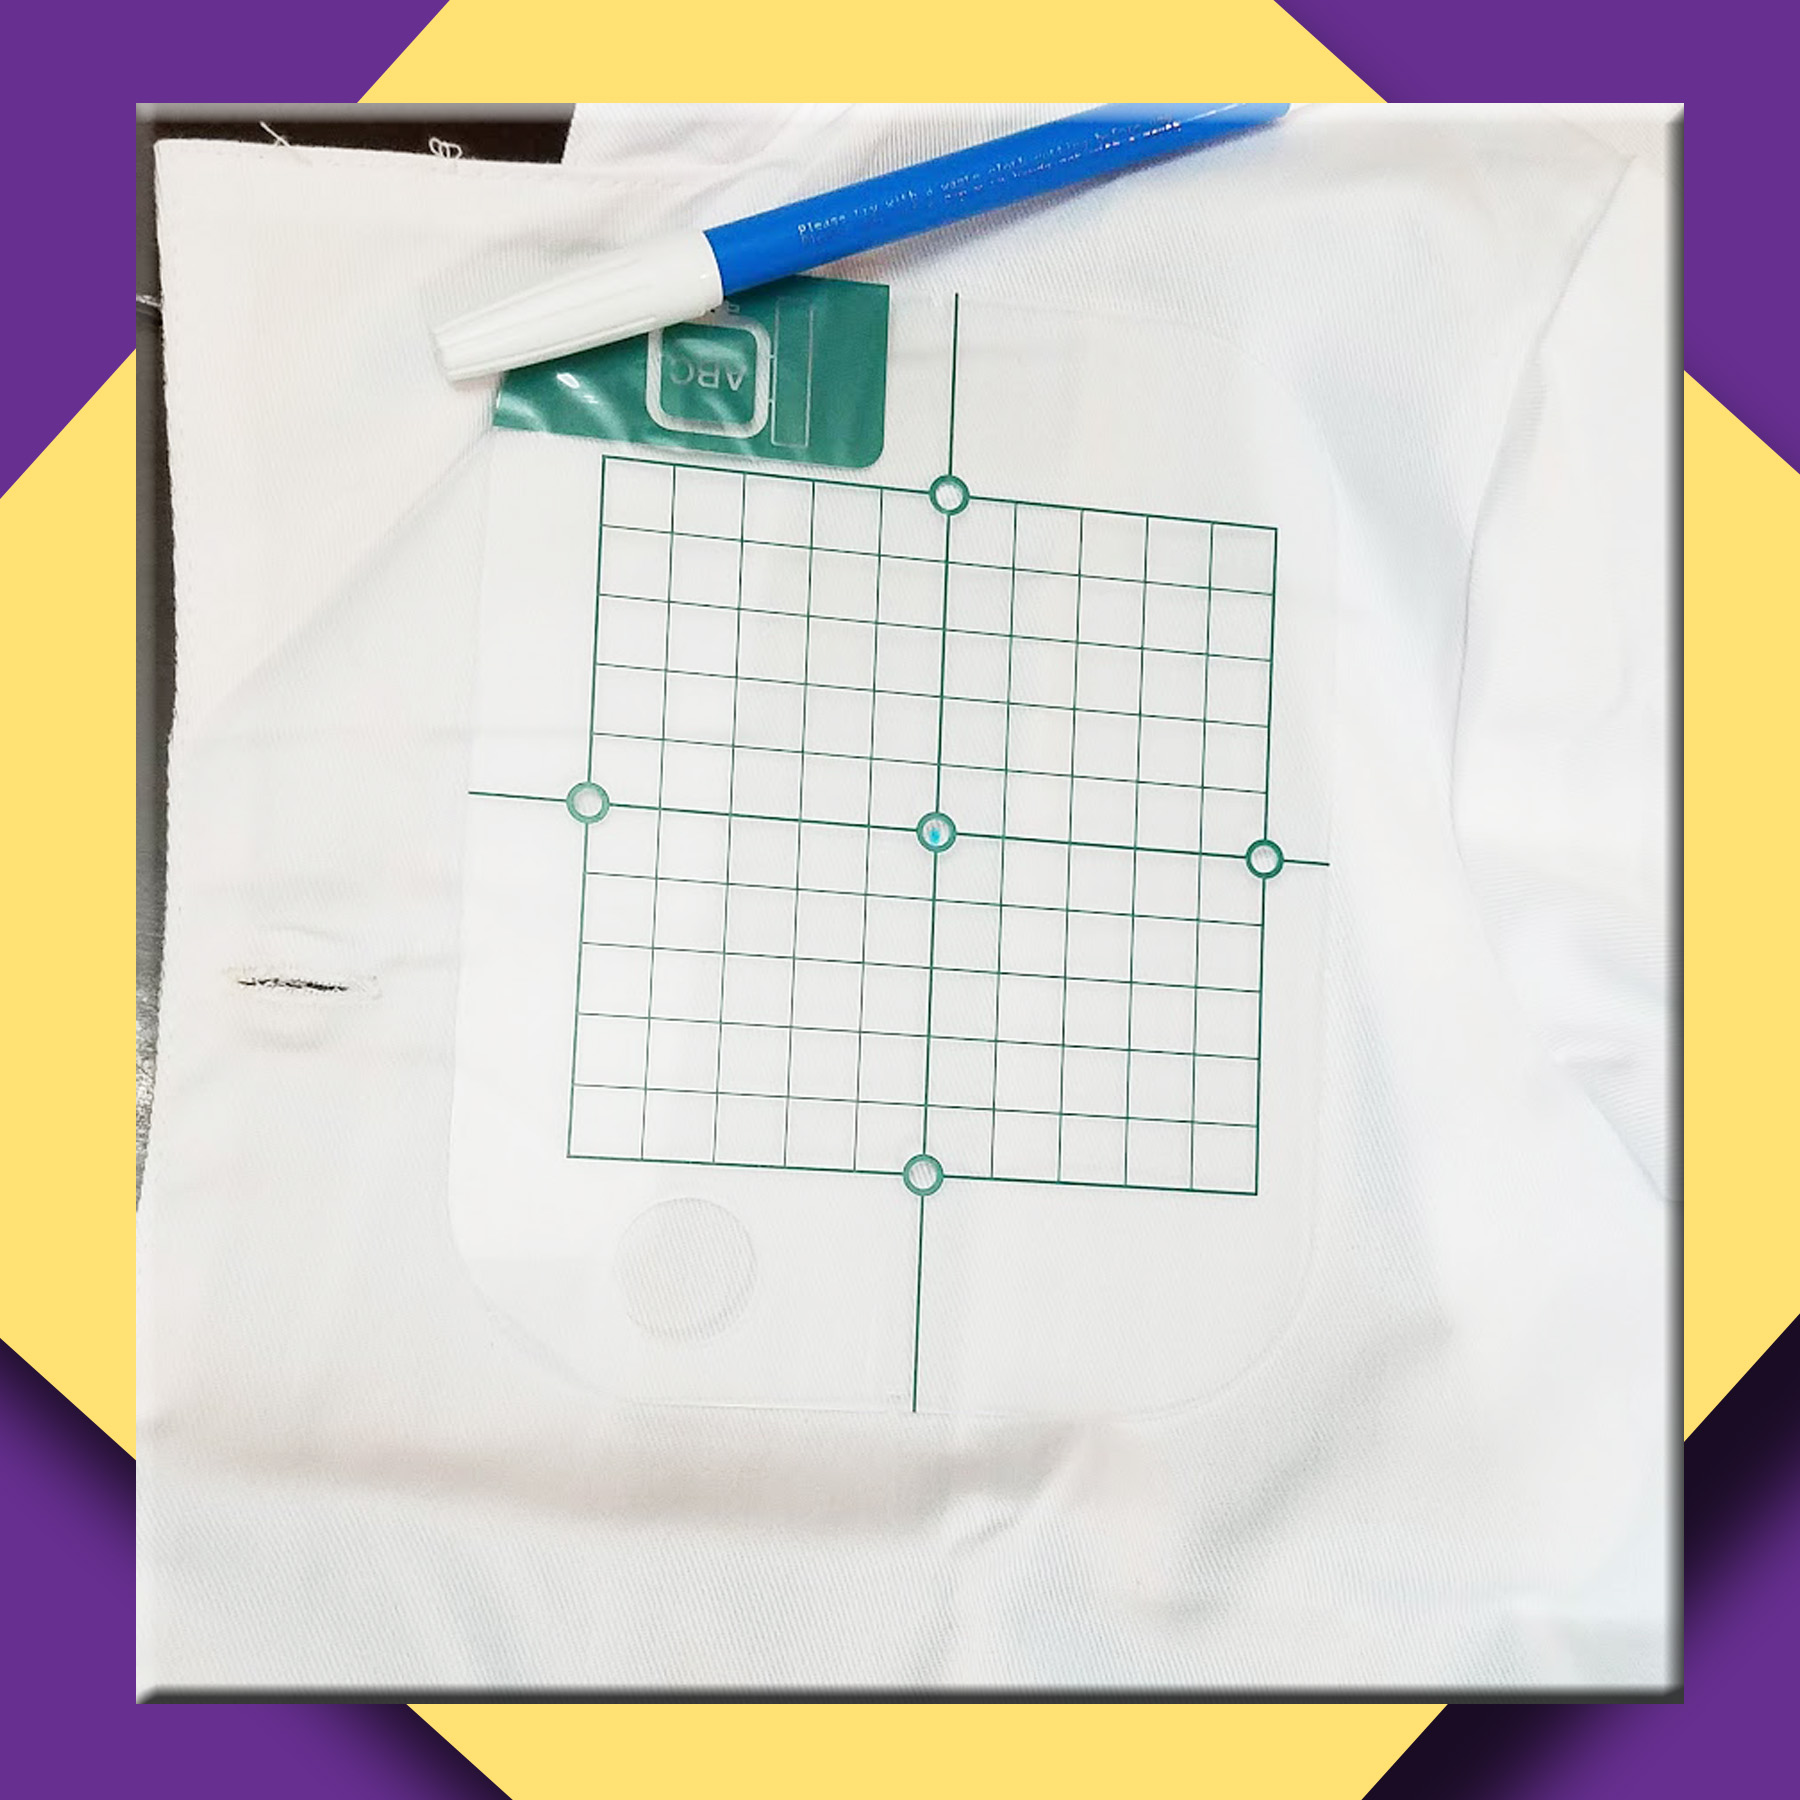
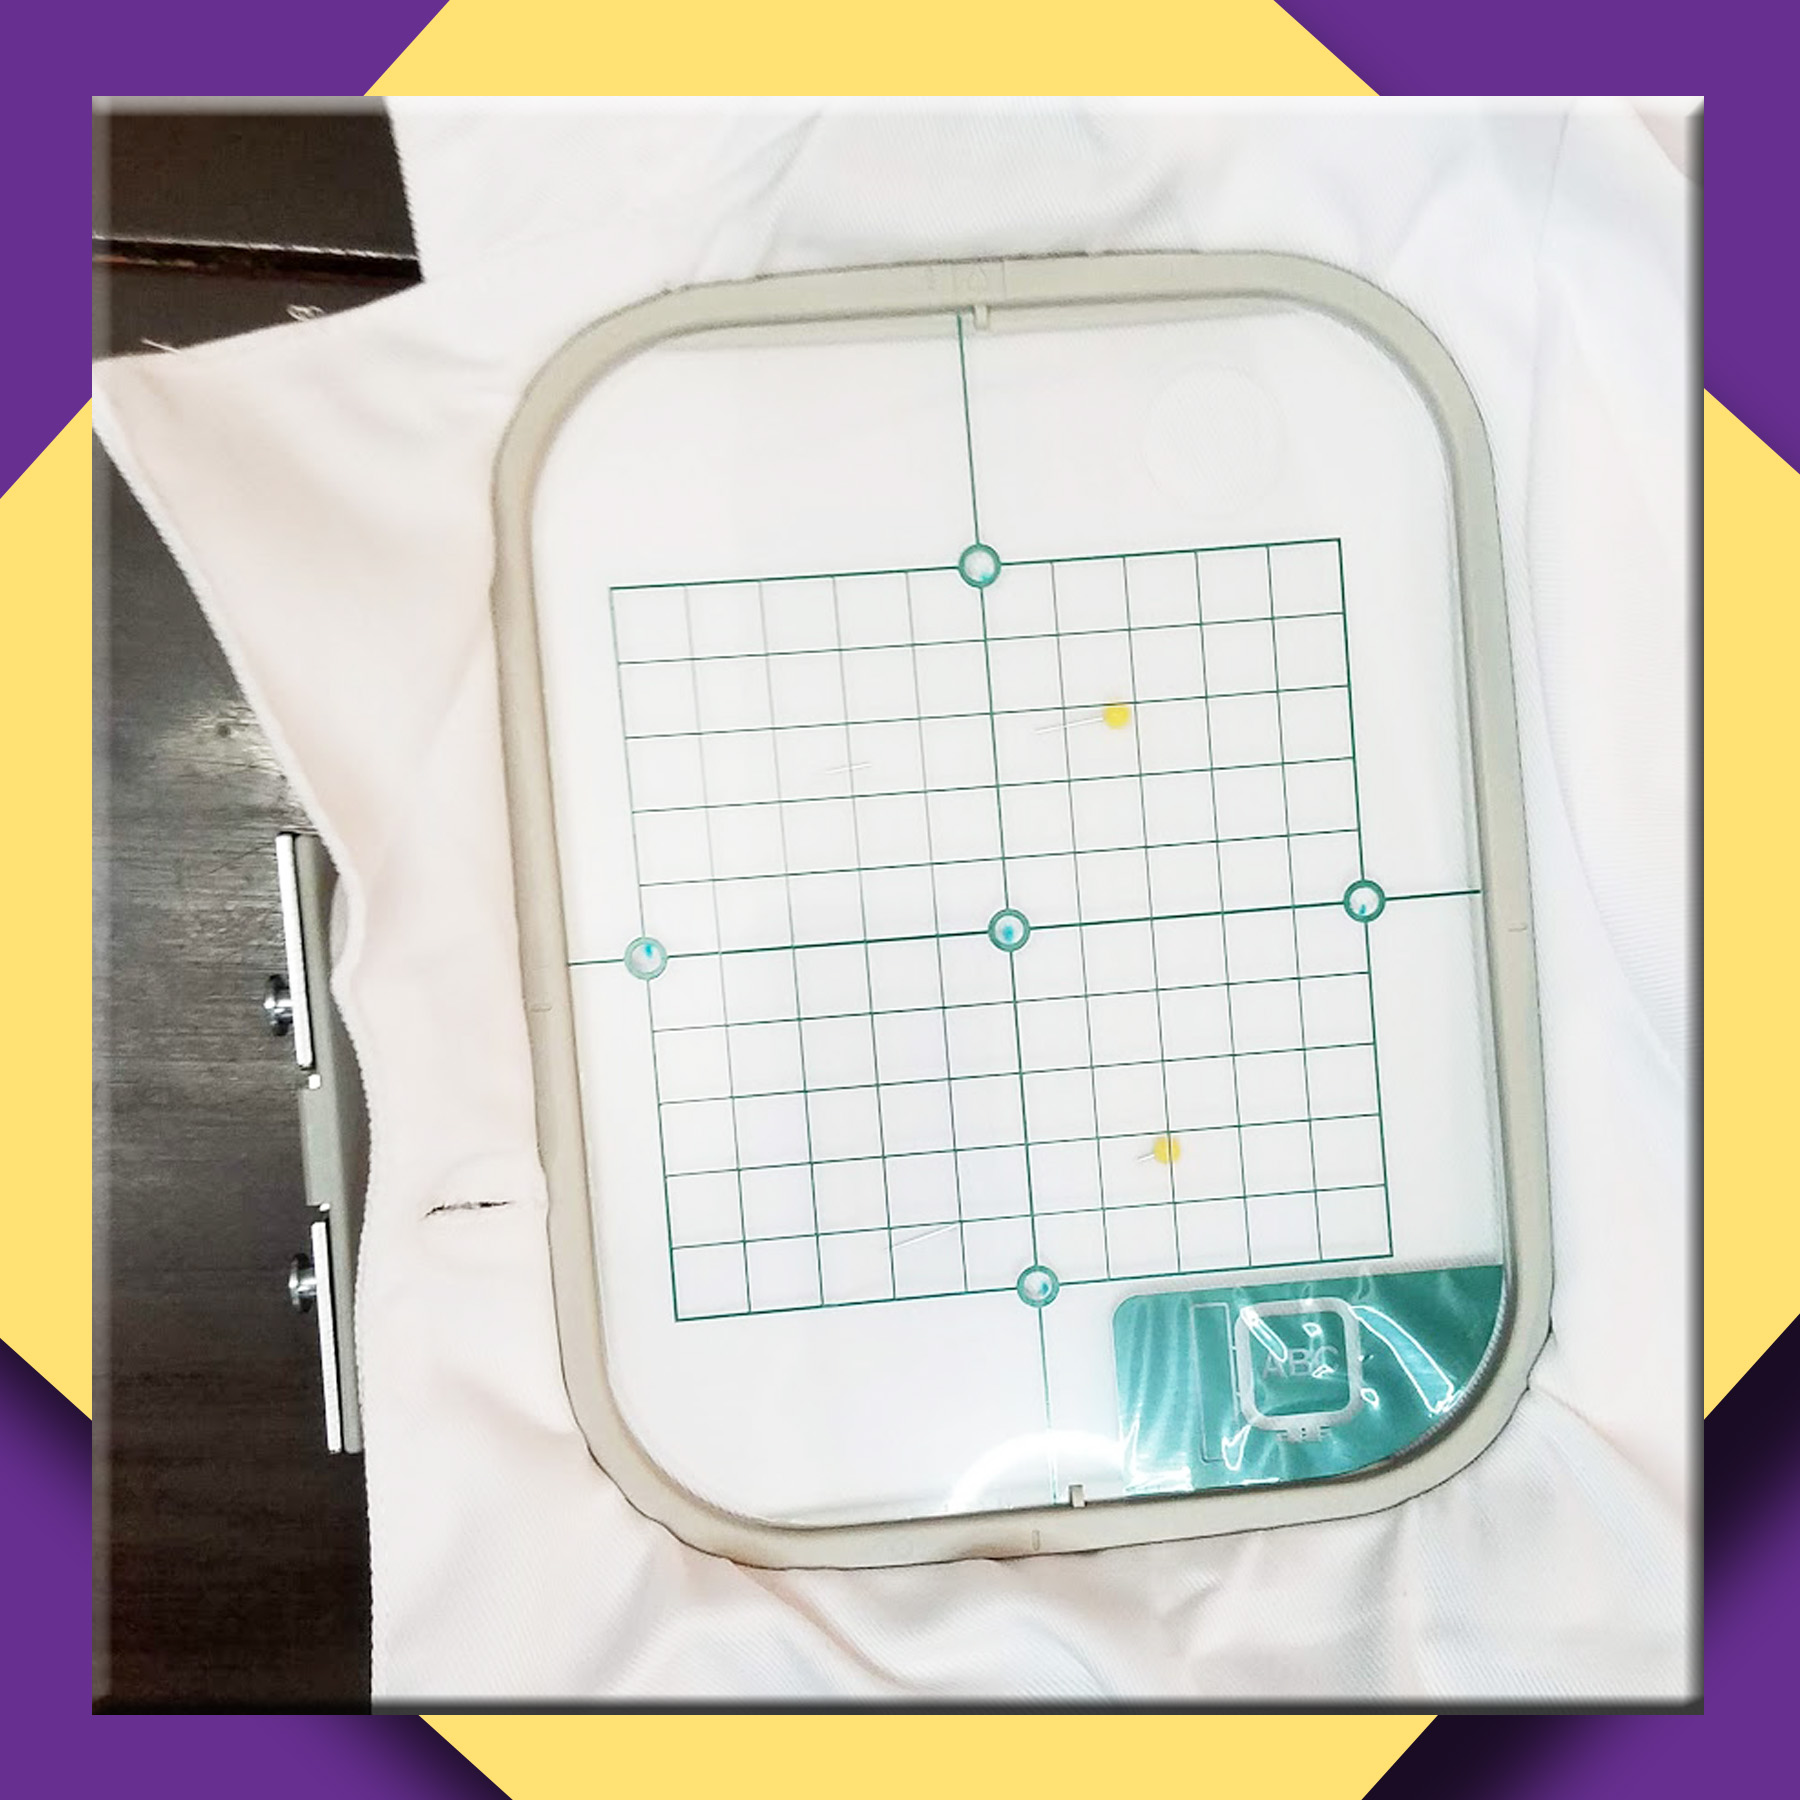
Aside from getting your embroidery design ready, the most crucial part of this project is getting your embroidered images sewn in the right place on the lab coat. Your hoop should have a corresponding, clear grid that you can use to map out where your machine will be sewing.
Lay out your lab coat and decide exactly where you want your image to end up, then set the grid in that space. Use the grid lines and side seams of the coat to make sure your machine will sew things on straight. Once you’re confident that your grid is in the right spot, and that it is straight, pull out your fabric marking pen and mark where the grid should be.
Tip 3:
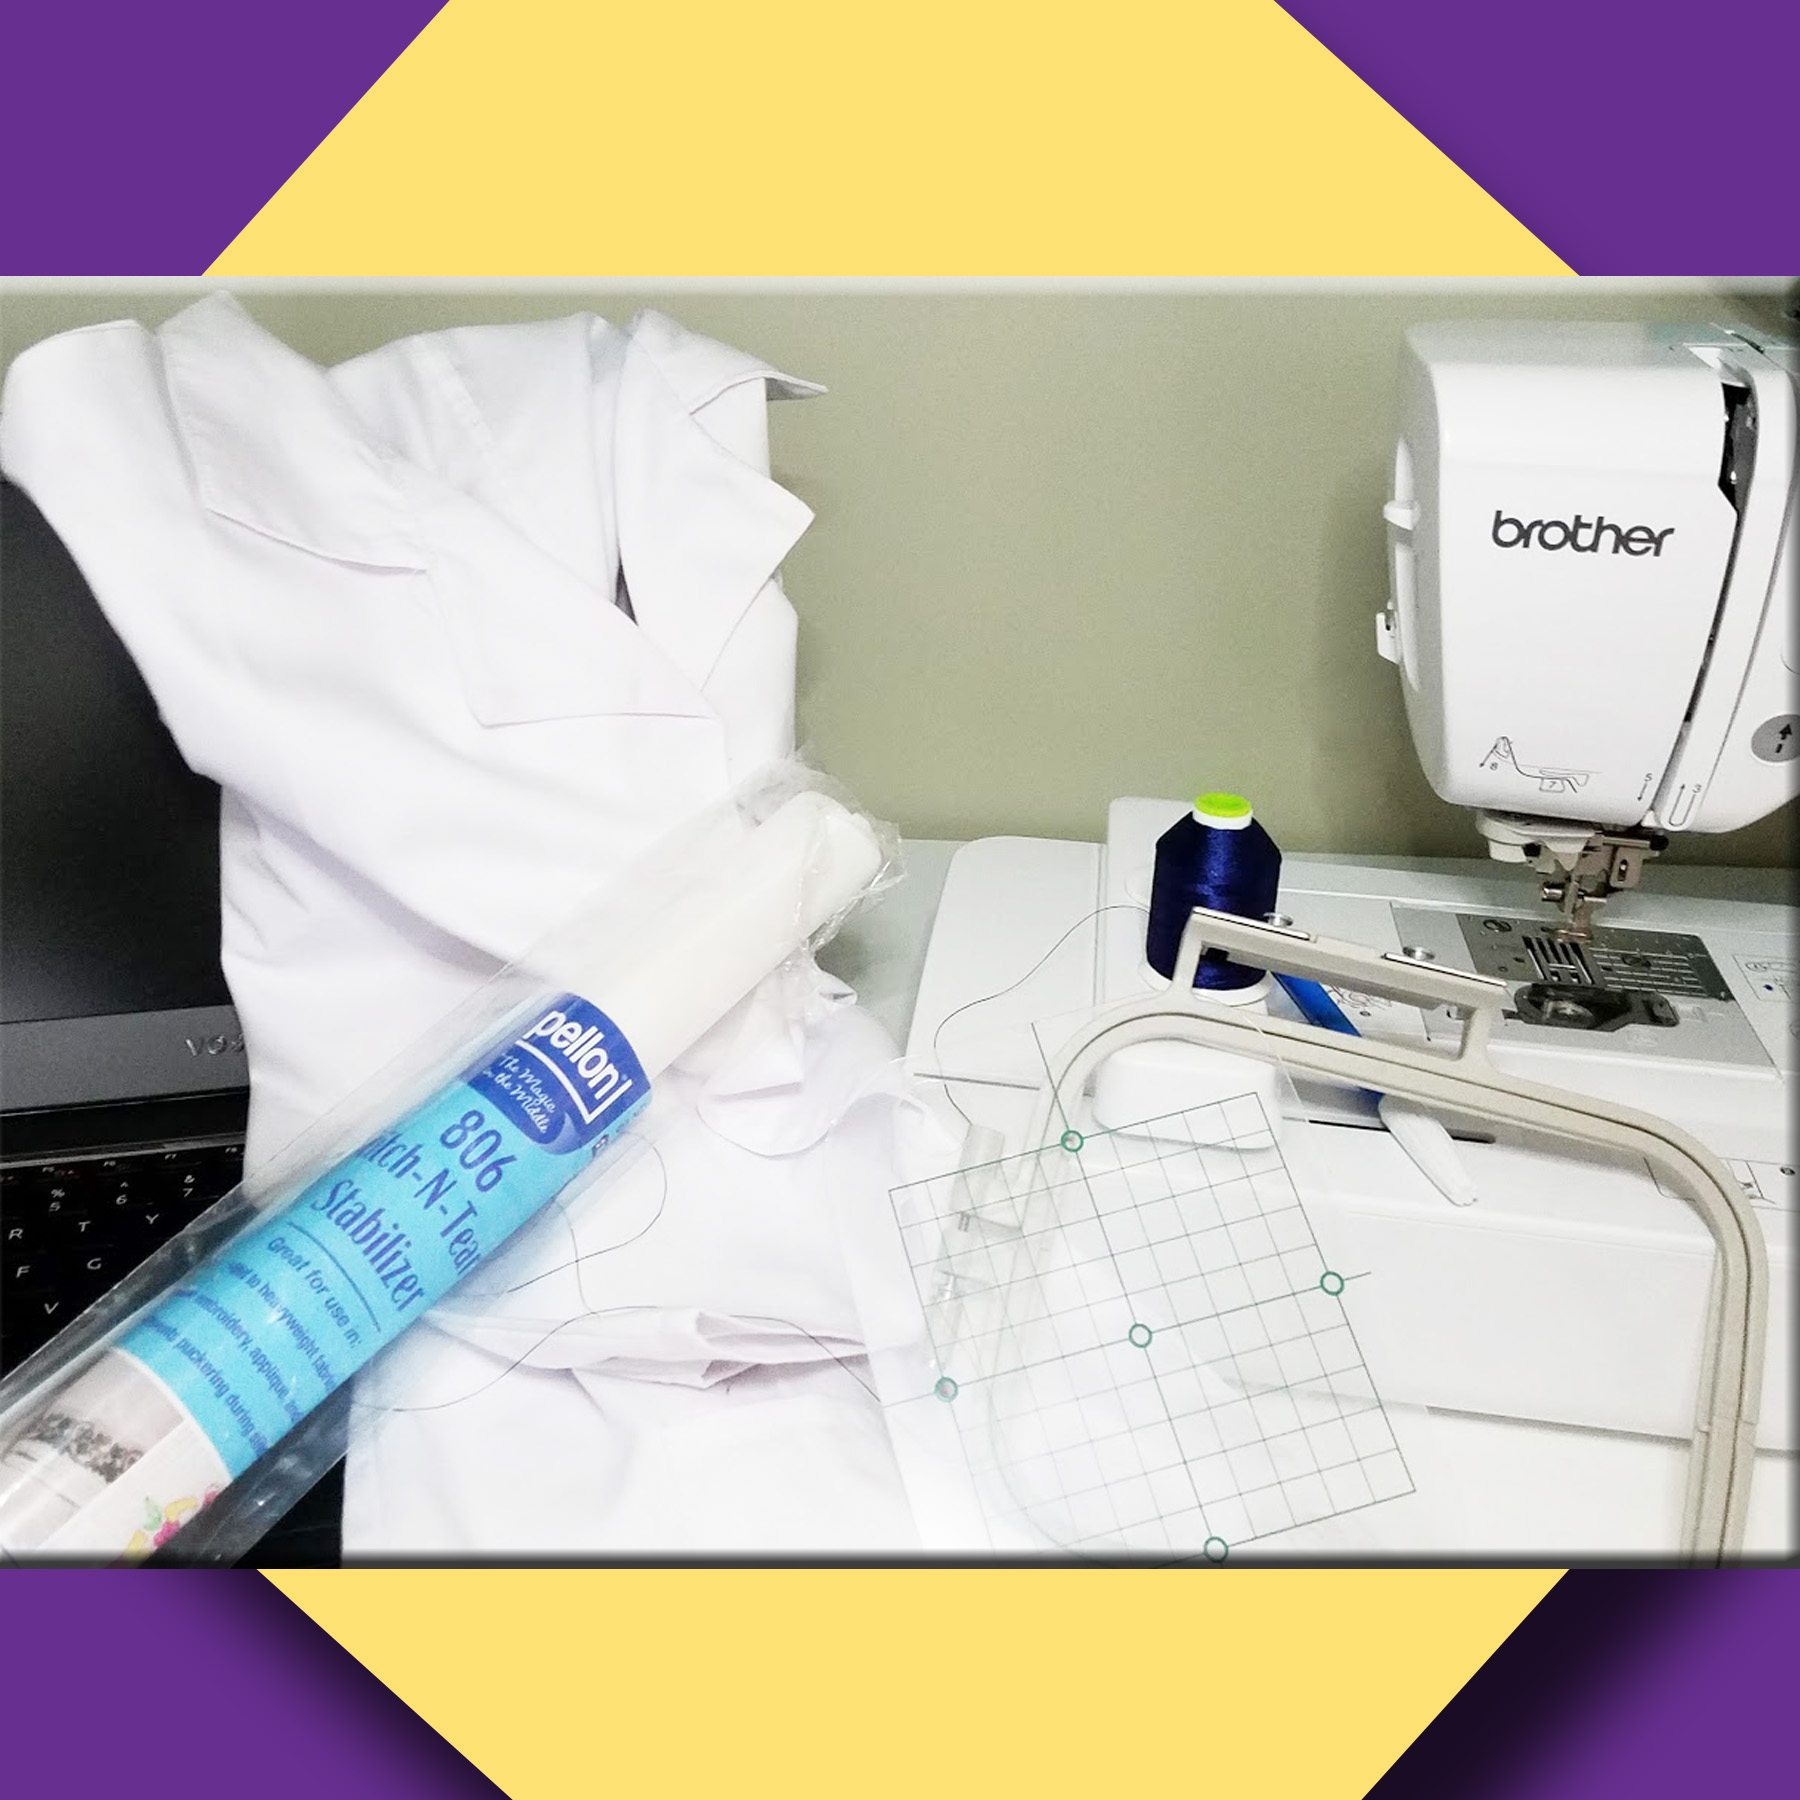
Now, it’s time to get everything loaded into the embroidery hoop. Before adding the hoop, I pinned some stabilizer paper to the back of the lab coat where my machine would be sewing. This is just to make sure the paper doesn’t slide around while you’re getting the hoop set. Remember to remove the pins before you sew!
Start by putting the bottom of the embroidery hoop behind the layer of lab coat you will be embellishing. Next, using the grid and marks you have made, you can make sure you’re fabric stays where you want it to be as you close up the embroidery hoop and pull things tight.

Once you get everything situated in the embroidery hoop, it’s time to let your embroidery machine work its magic. In no time at all, you’ll have your own personalized lab coat that has the potential to turn you, or a child you love, into a true scientist! Are you ready?
