Things Small and Simple is a participant in the Amazon Services LLC Associates Program, an affiliate advertising program designed to provide a means for sites to earn advertising fees by advertising and linking to Amazon.com.
This post contains some affiliate links. This simply means that if you purchase anything, or take other actions after clicking one of my links, I will receive a small commission. This comes at no extra cost to you. Thanks so much for your support!
When I was growing up, I had a little brother who was obsessed with fire. In the evenings, before bed, my siblings and I would all pick a “quiet time” activity. This brother of mine often chose to sit at the kitchen table with my parents and burn matches. As I recall, he was allowed five matches a day.
At some point, my brother acquired a wood burning kit, and the smell of wood burning became a regular in my home. A year or so ago, I received this wood burning kit, and I’ve been excited ever since to make something with it. Since our “Inspire my Creativity” theme for October is ‘Wood’, I decided the time had come for me to quit stalling. Read on to see what I made!
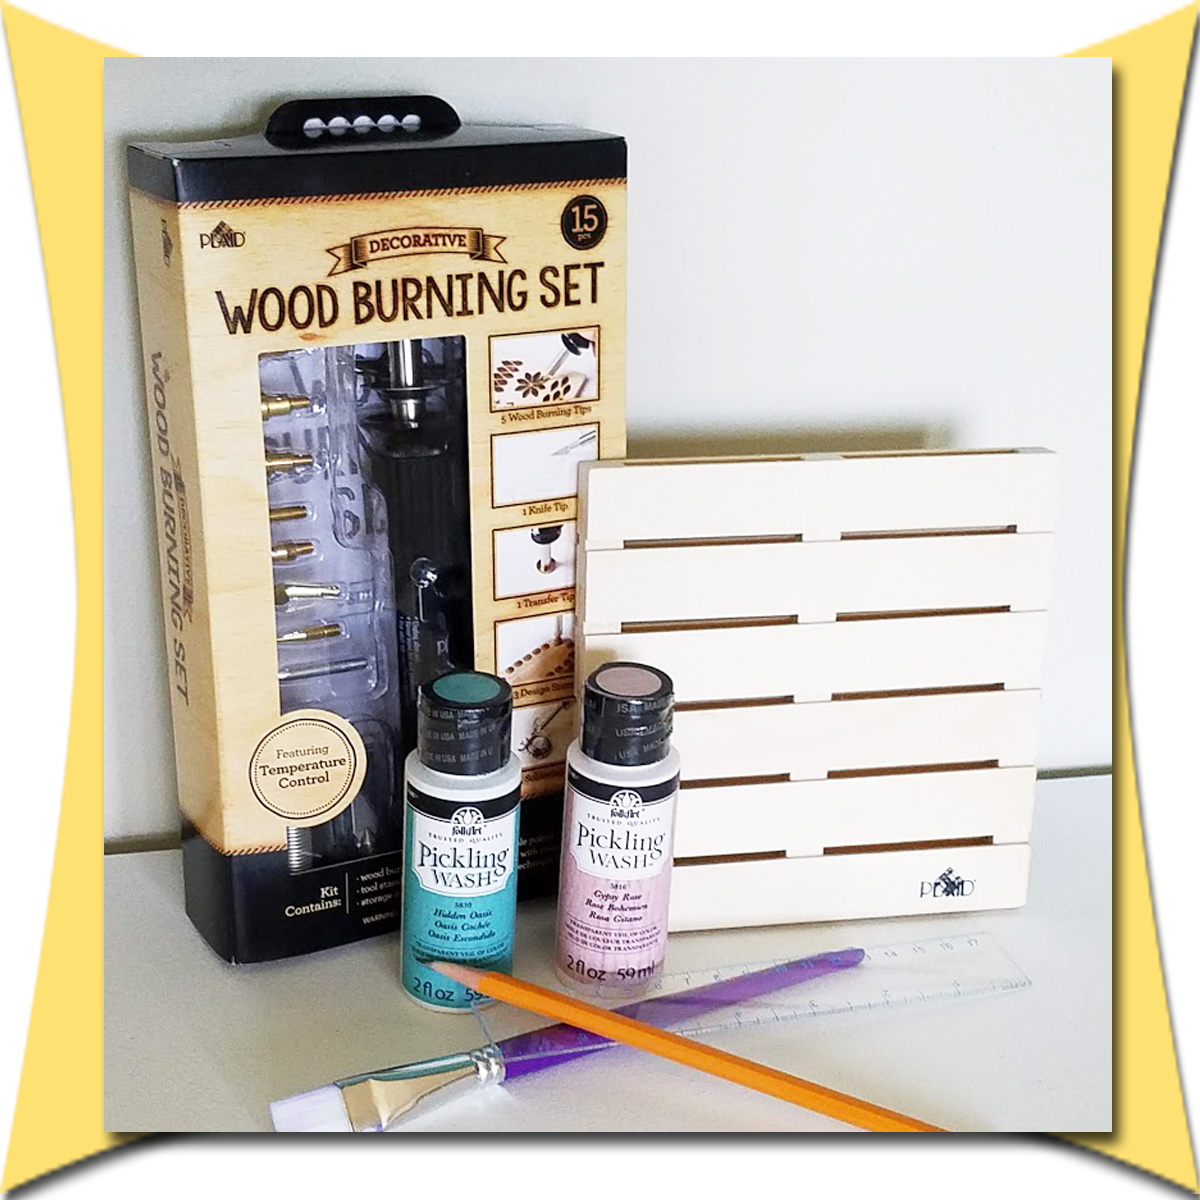
Thankful, Grateful, Blessed Wood Burning Supplies:
- Plaid Decorative Wood Burning Set
- Small Wood Pallet (I used this Unpainted Wood Craft Surface from Plaid).
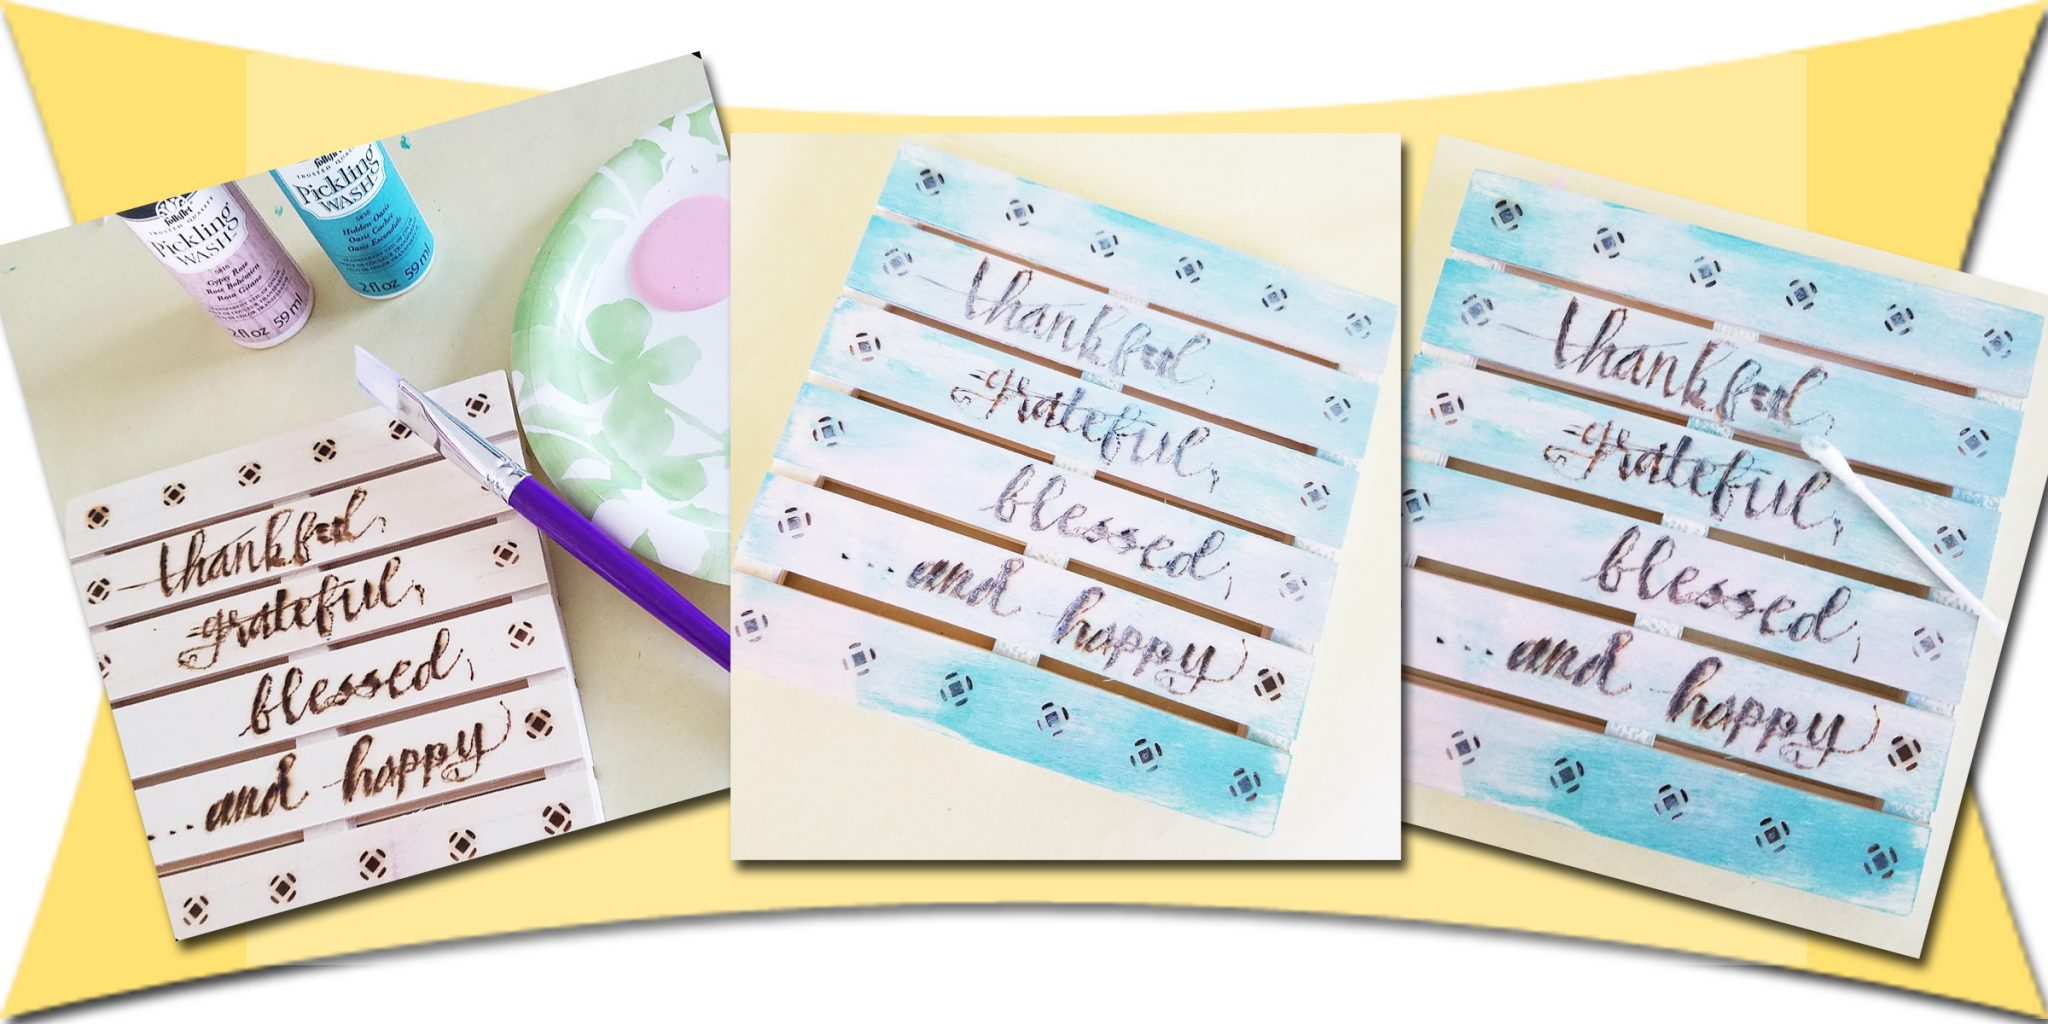
- Folk Art Pickling Wash – Get a couple different colors that “mix well” together
- Flat Paint Brush (I love Folk Art Brushes).
I have a confession . . . this project was kind of an experiment from start to finish. I had a vague idea in my mind of what I wanted to do, but kind of just made up each step as I came to it. I don’t usually craft like this, because I’m a little bit obsessed with order, but it’s fun to just wing it every once in a while. Here’s what I came up with:
My Wood Burning Experiment – Step by Step
Step 1:
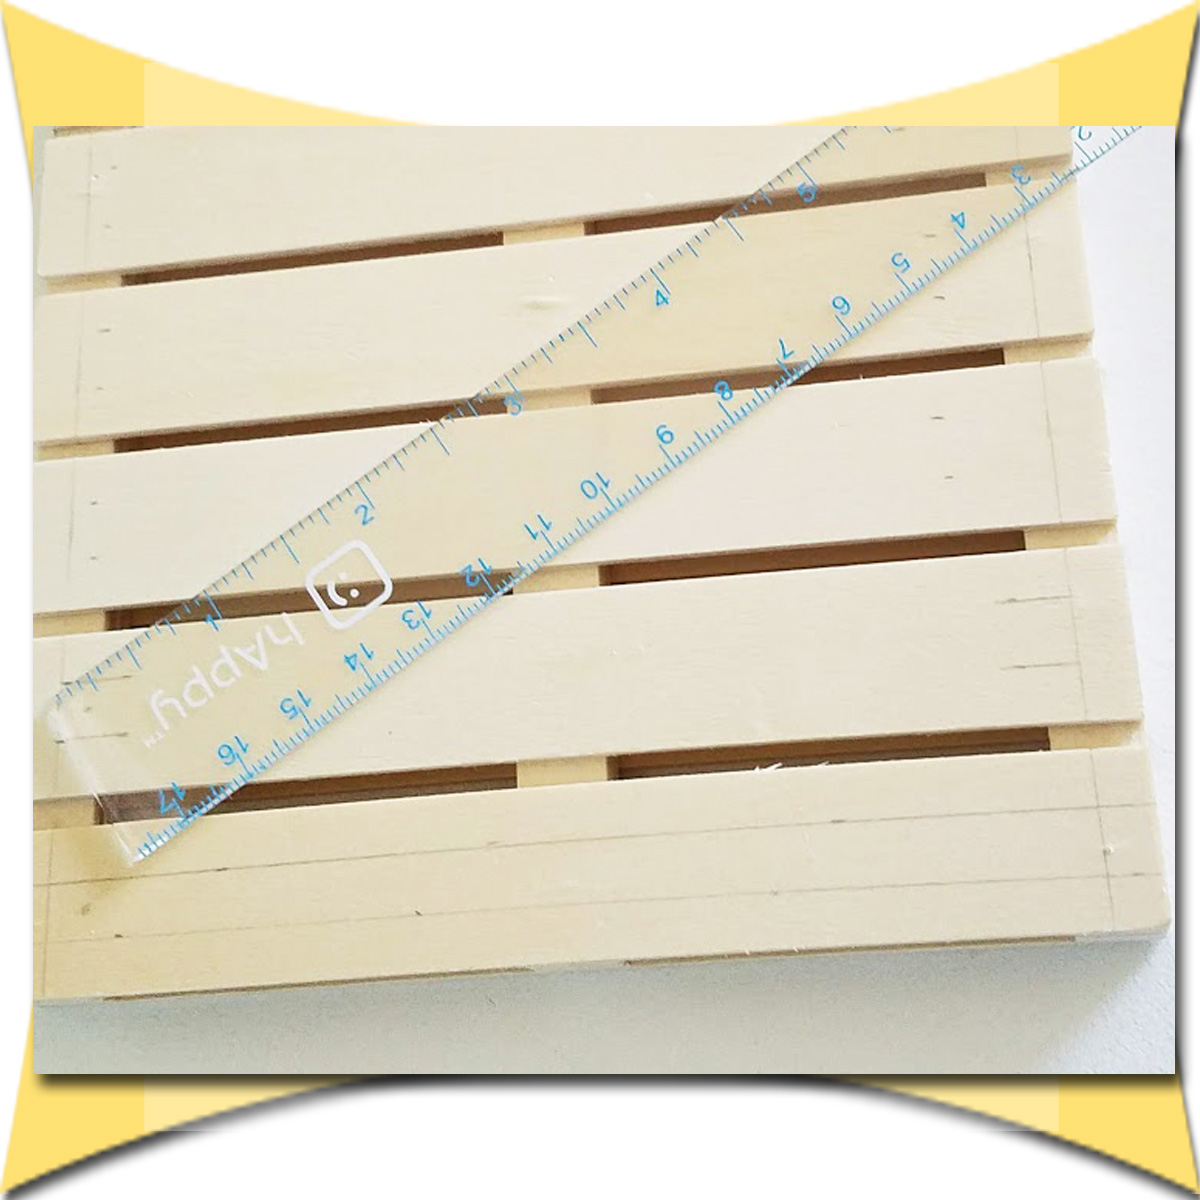
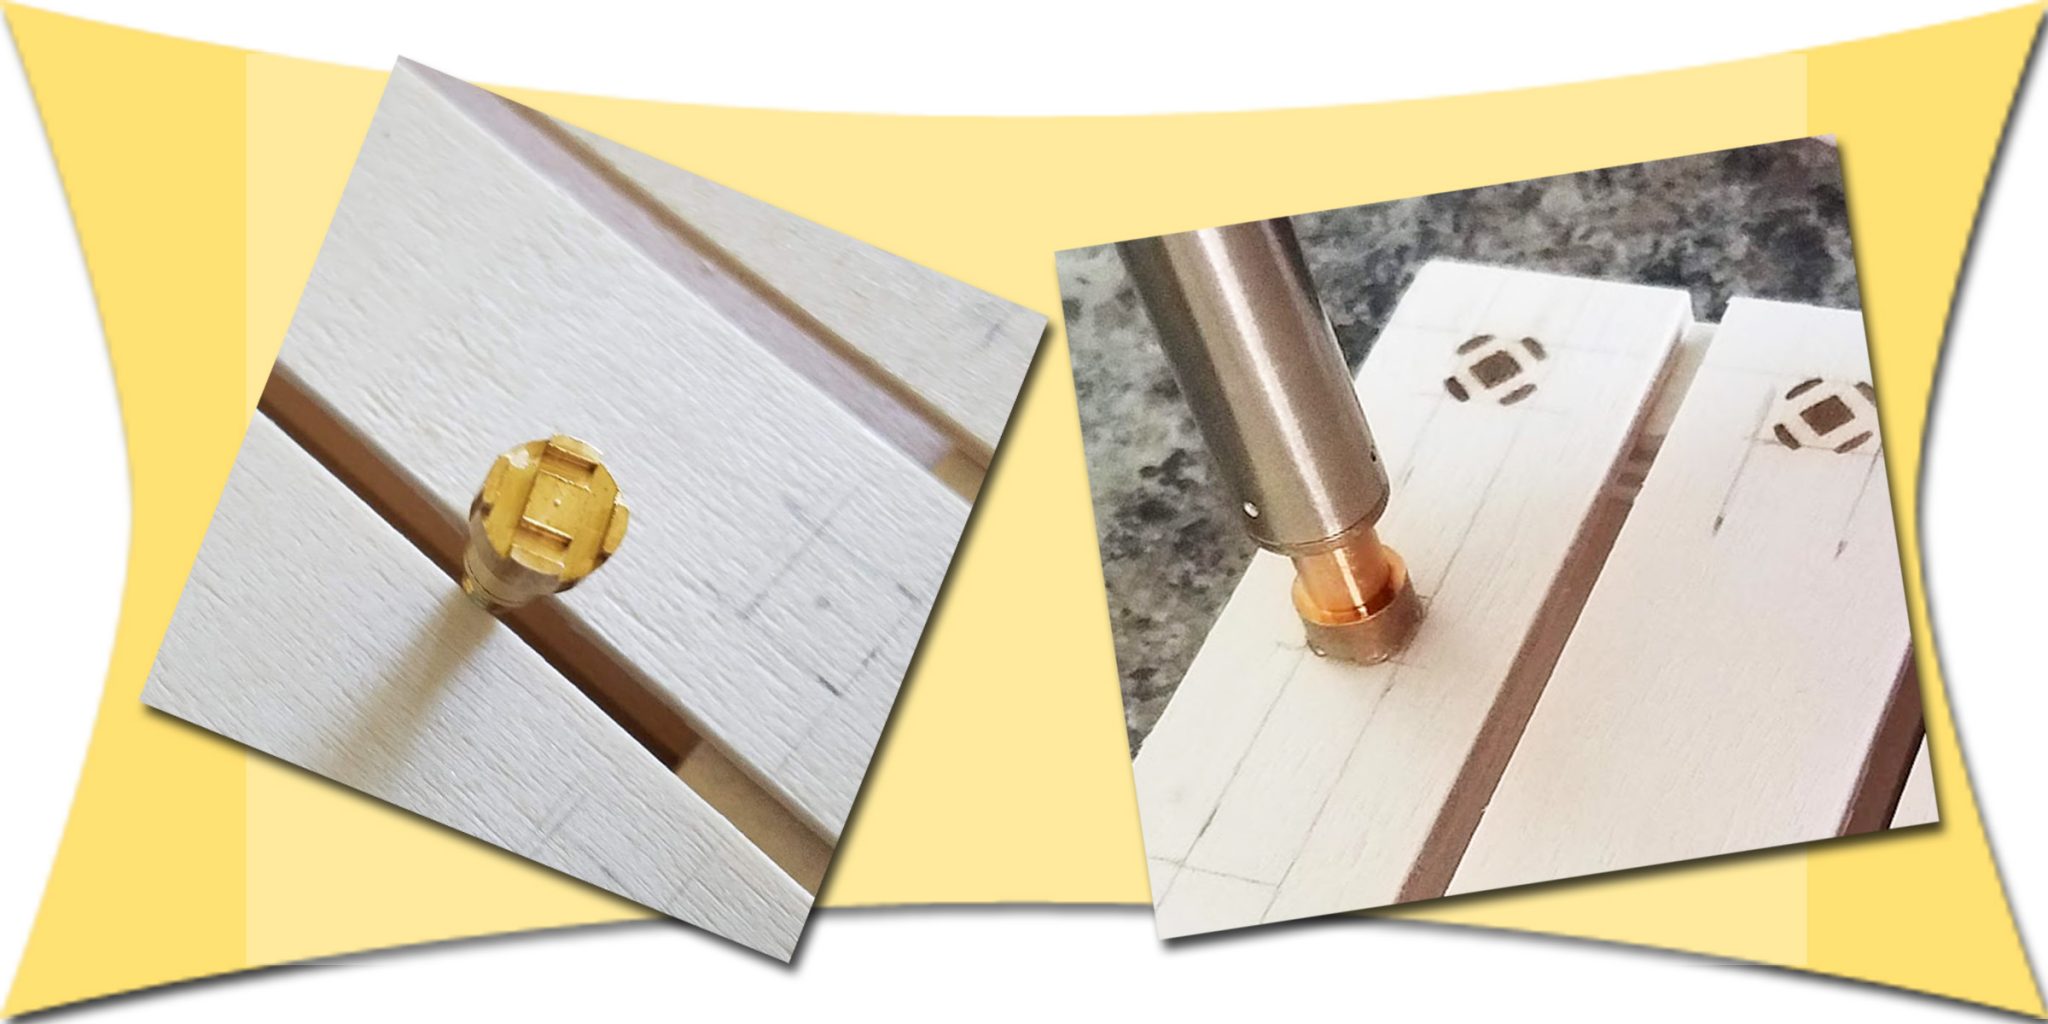
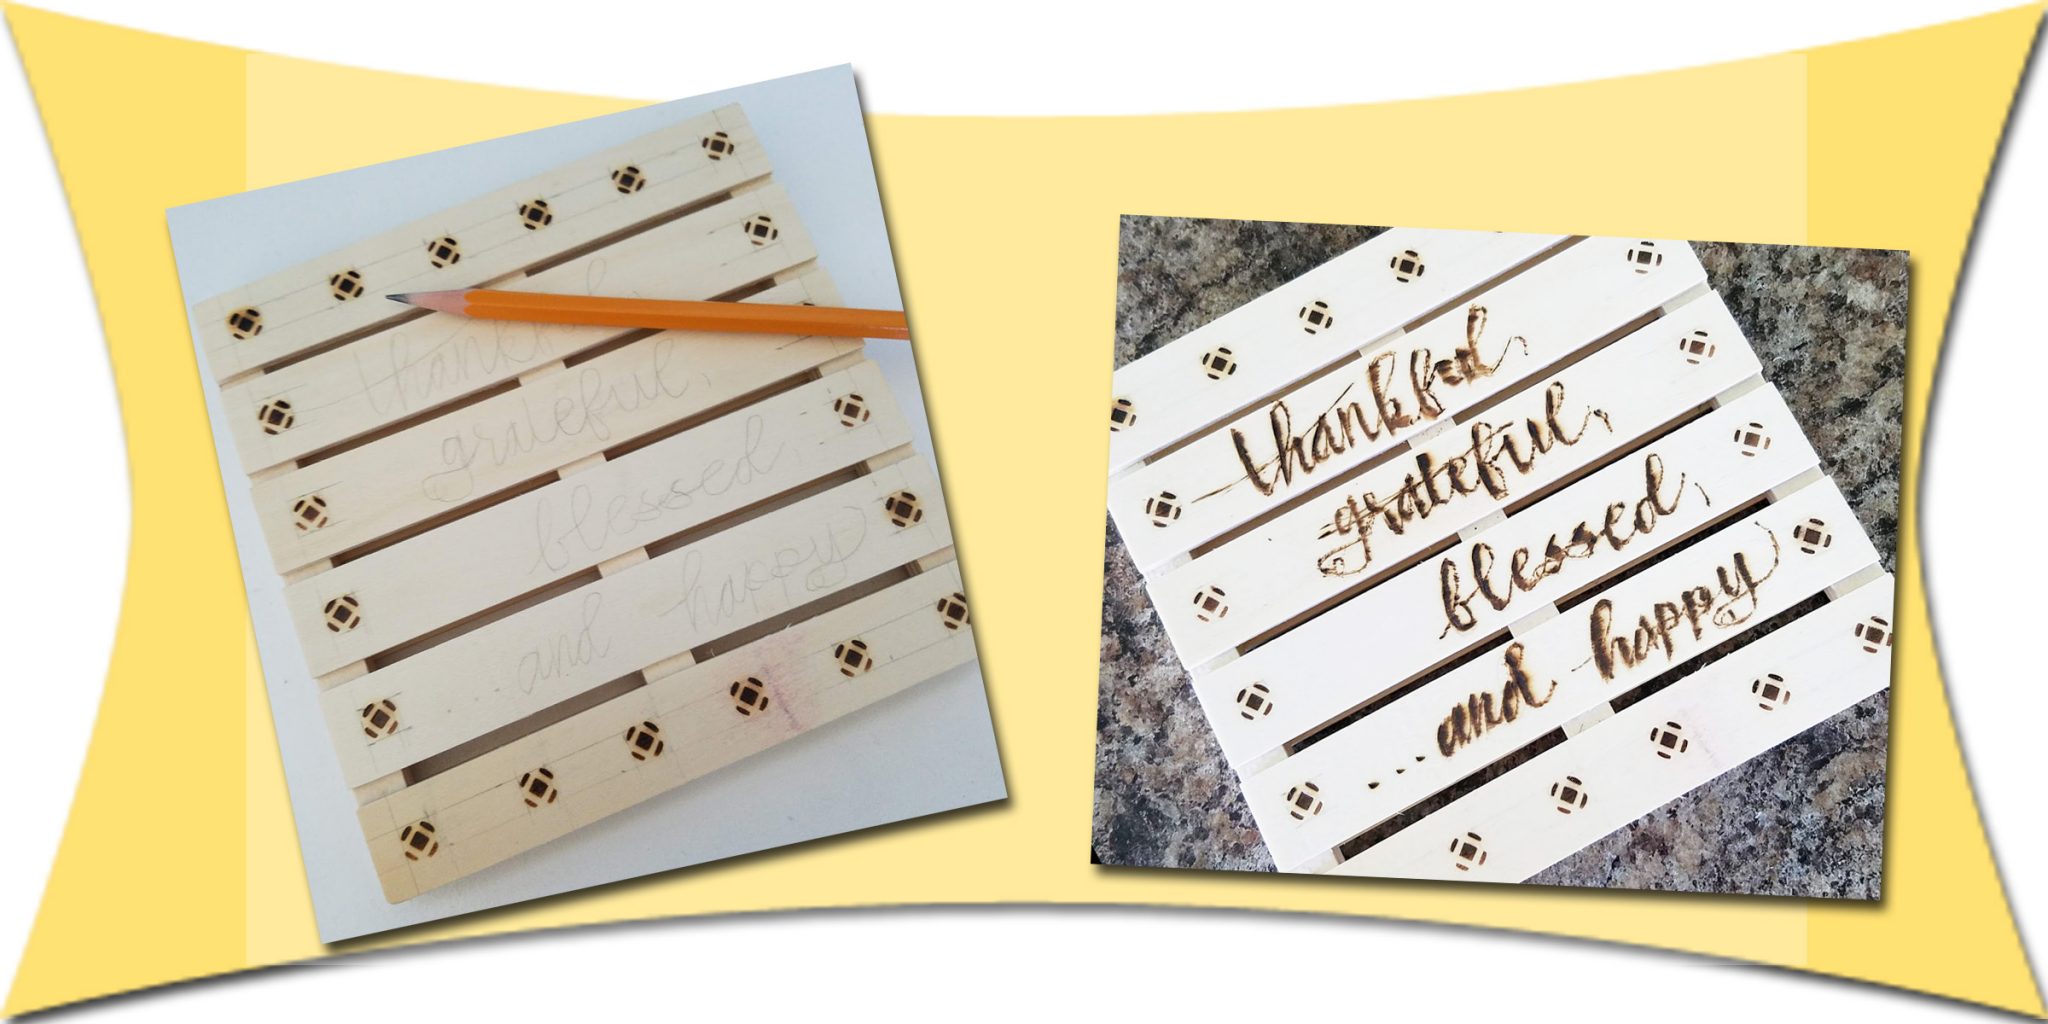
My wood burning set came with some fun decorative tips, so the first thing I did with this project is prep it for a border. Originally, I was just going to put the border on the top and bottom sections of the pallet, but as I was marking out the spaces I wanted to burn, I decided to add the sides, too.
If you want to add the same type of border that I did, I measured in 1/4 inch around all four sides of the pallet. The pallet slats are approximately 3/4 inch wide, so if you measure 1/4 inch from the top and again from the bottom, your border will be centered on each slat.
For the top and bottom slats, measure one inch from the left edge of one burn space to the left edge of the next burn space. I marked out little squares for each of my border pieces.
Step 2:
One of the things that’s tricky about wood burning, is that you can’t erase mistakes. Once you’ve burned an image into the wood, it’s there for good. This is one of the reasons I measured everything out before getting the wood burner heated up.
Along with measuring things out, you’ll want some scrap wood to practice on before working on your actual project. I just used the back of the pallet, since I’m only going to display one side.
Step 3:
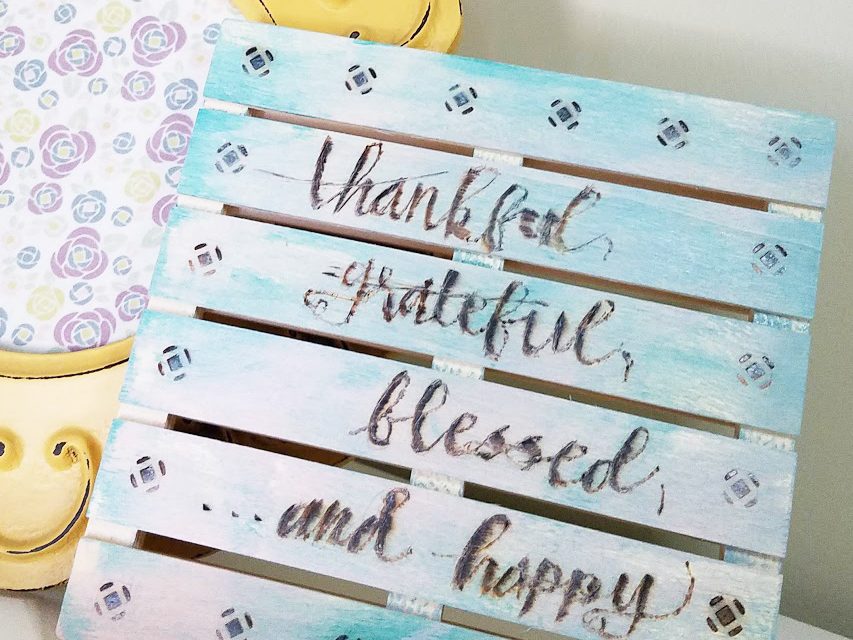
Now that you have a border in place, you’re ready to fill in the center. I chose to fill my center with words. I’ve been playing around with hand lettering lately, and thought it might be fun to see how the things I’ve been practicing would transfer to wood burning.
Because I was working with something I couldn’t erase, I decided to trace out the things I wanted to burn before heating up my fun little tool. I got a little bit impatient, though, and got to work before my tool was as hot as it ideally should have been. Because I tried to rush things, my last line turned out much better than the first three. My project is definitely not perfect, but for a first try, I’m pretty pleased with it.
Step 4:
Now it’s time to add some color! This step is totally optional, but I love the subtle color that pickling wash adds to this project. Pickling wash is designed to just add hints of color. It’s a lot thinner than regular paint, which is great for a wood burning project, because the paint won’t completely cover up your other work.
At first, I intended to paint each slat a different color, but last minute wondered what it would look like if I just mixed everything together. How do you like it? After painting, I took a cotton swab and wiped off some of the paint covering my words, just to help them be easier to see.
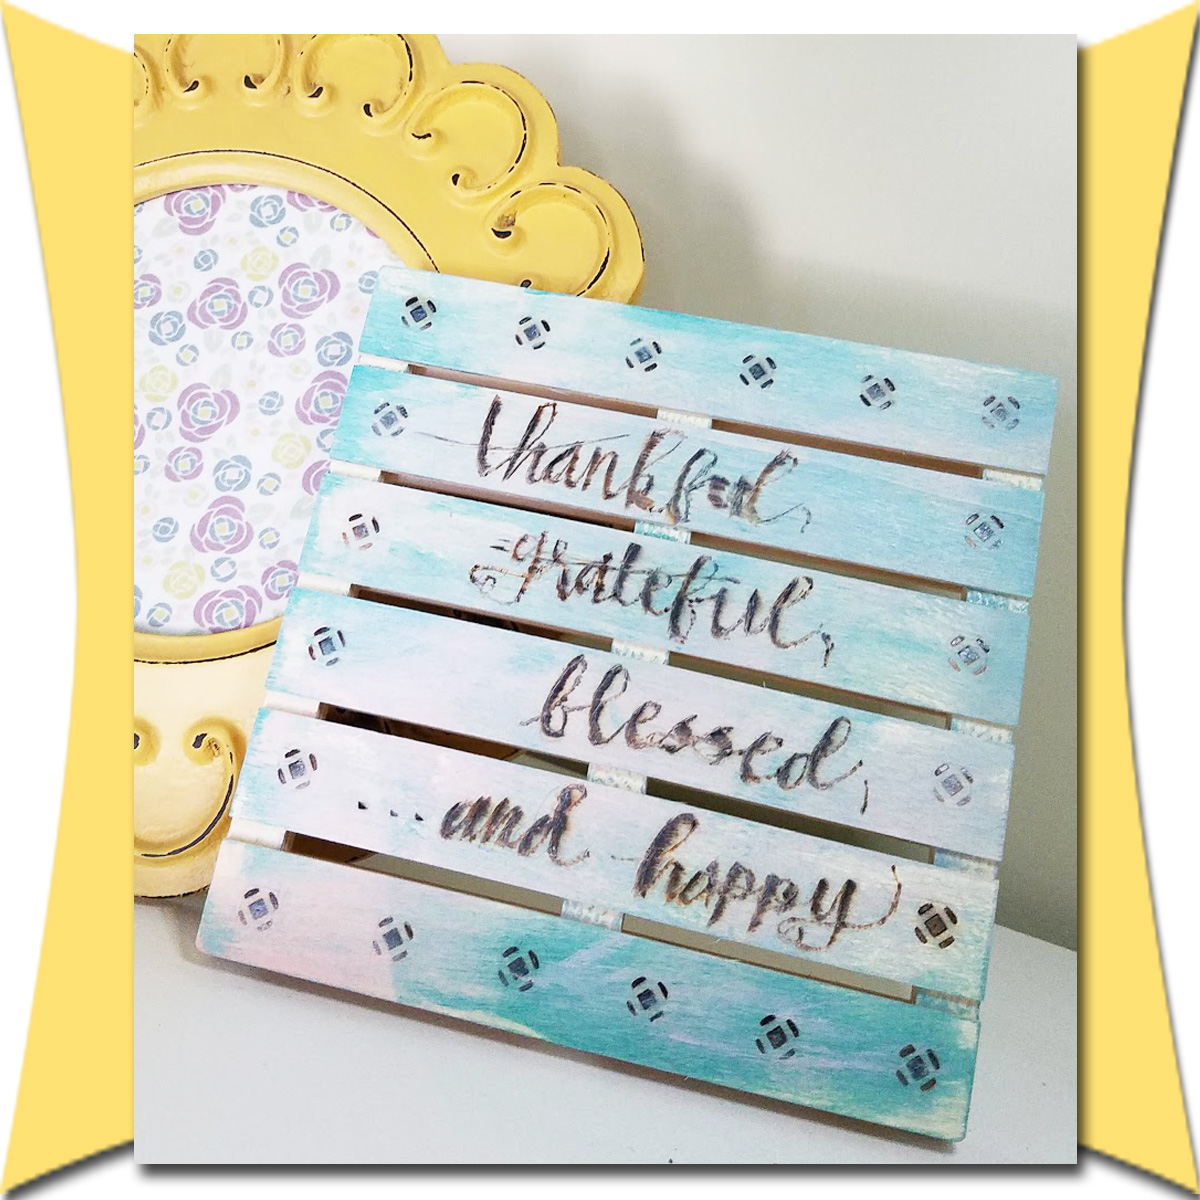
As far as experiments go, I really like the way this one turned out. I have a bit of work to do when it comes to hand lettering with a wood burner . . . something to keep in mind for future projects. Are you ready for your own experiment?
Let’s Create!
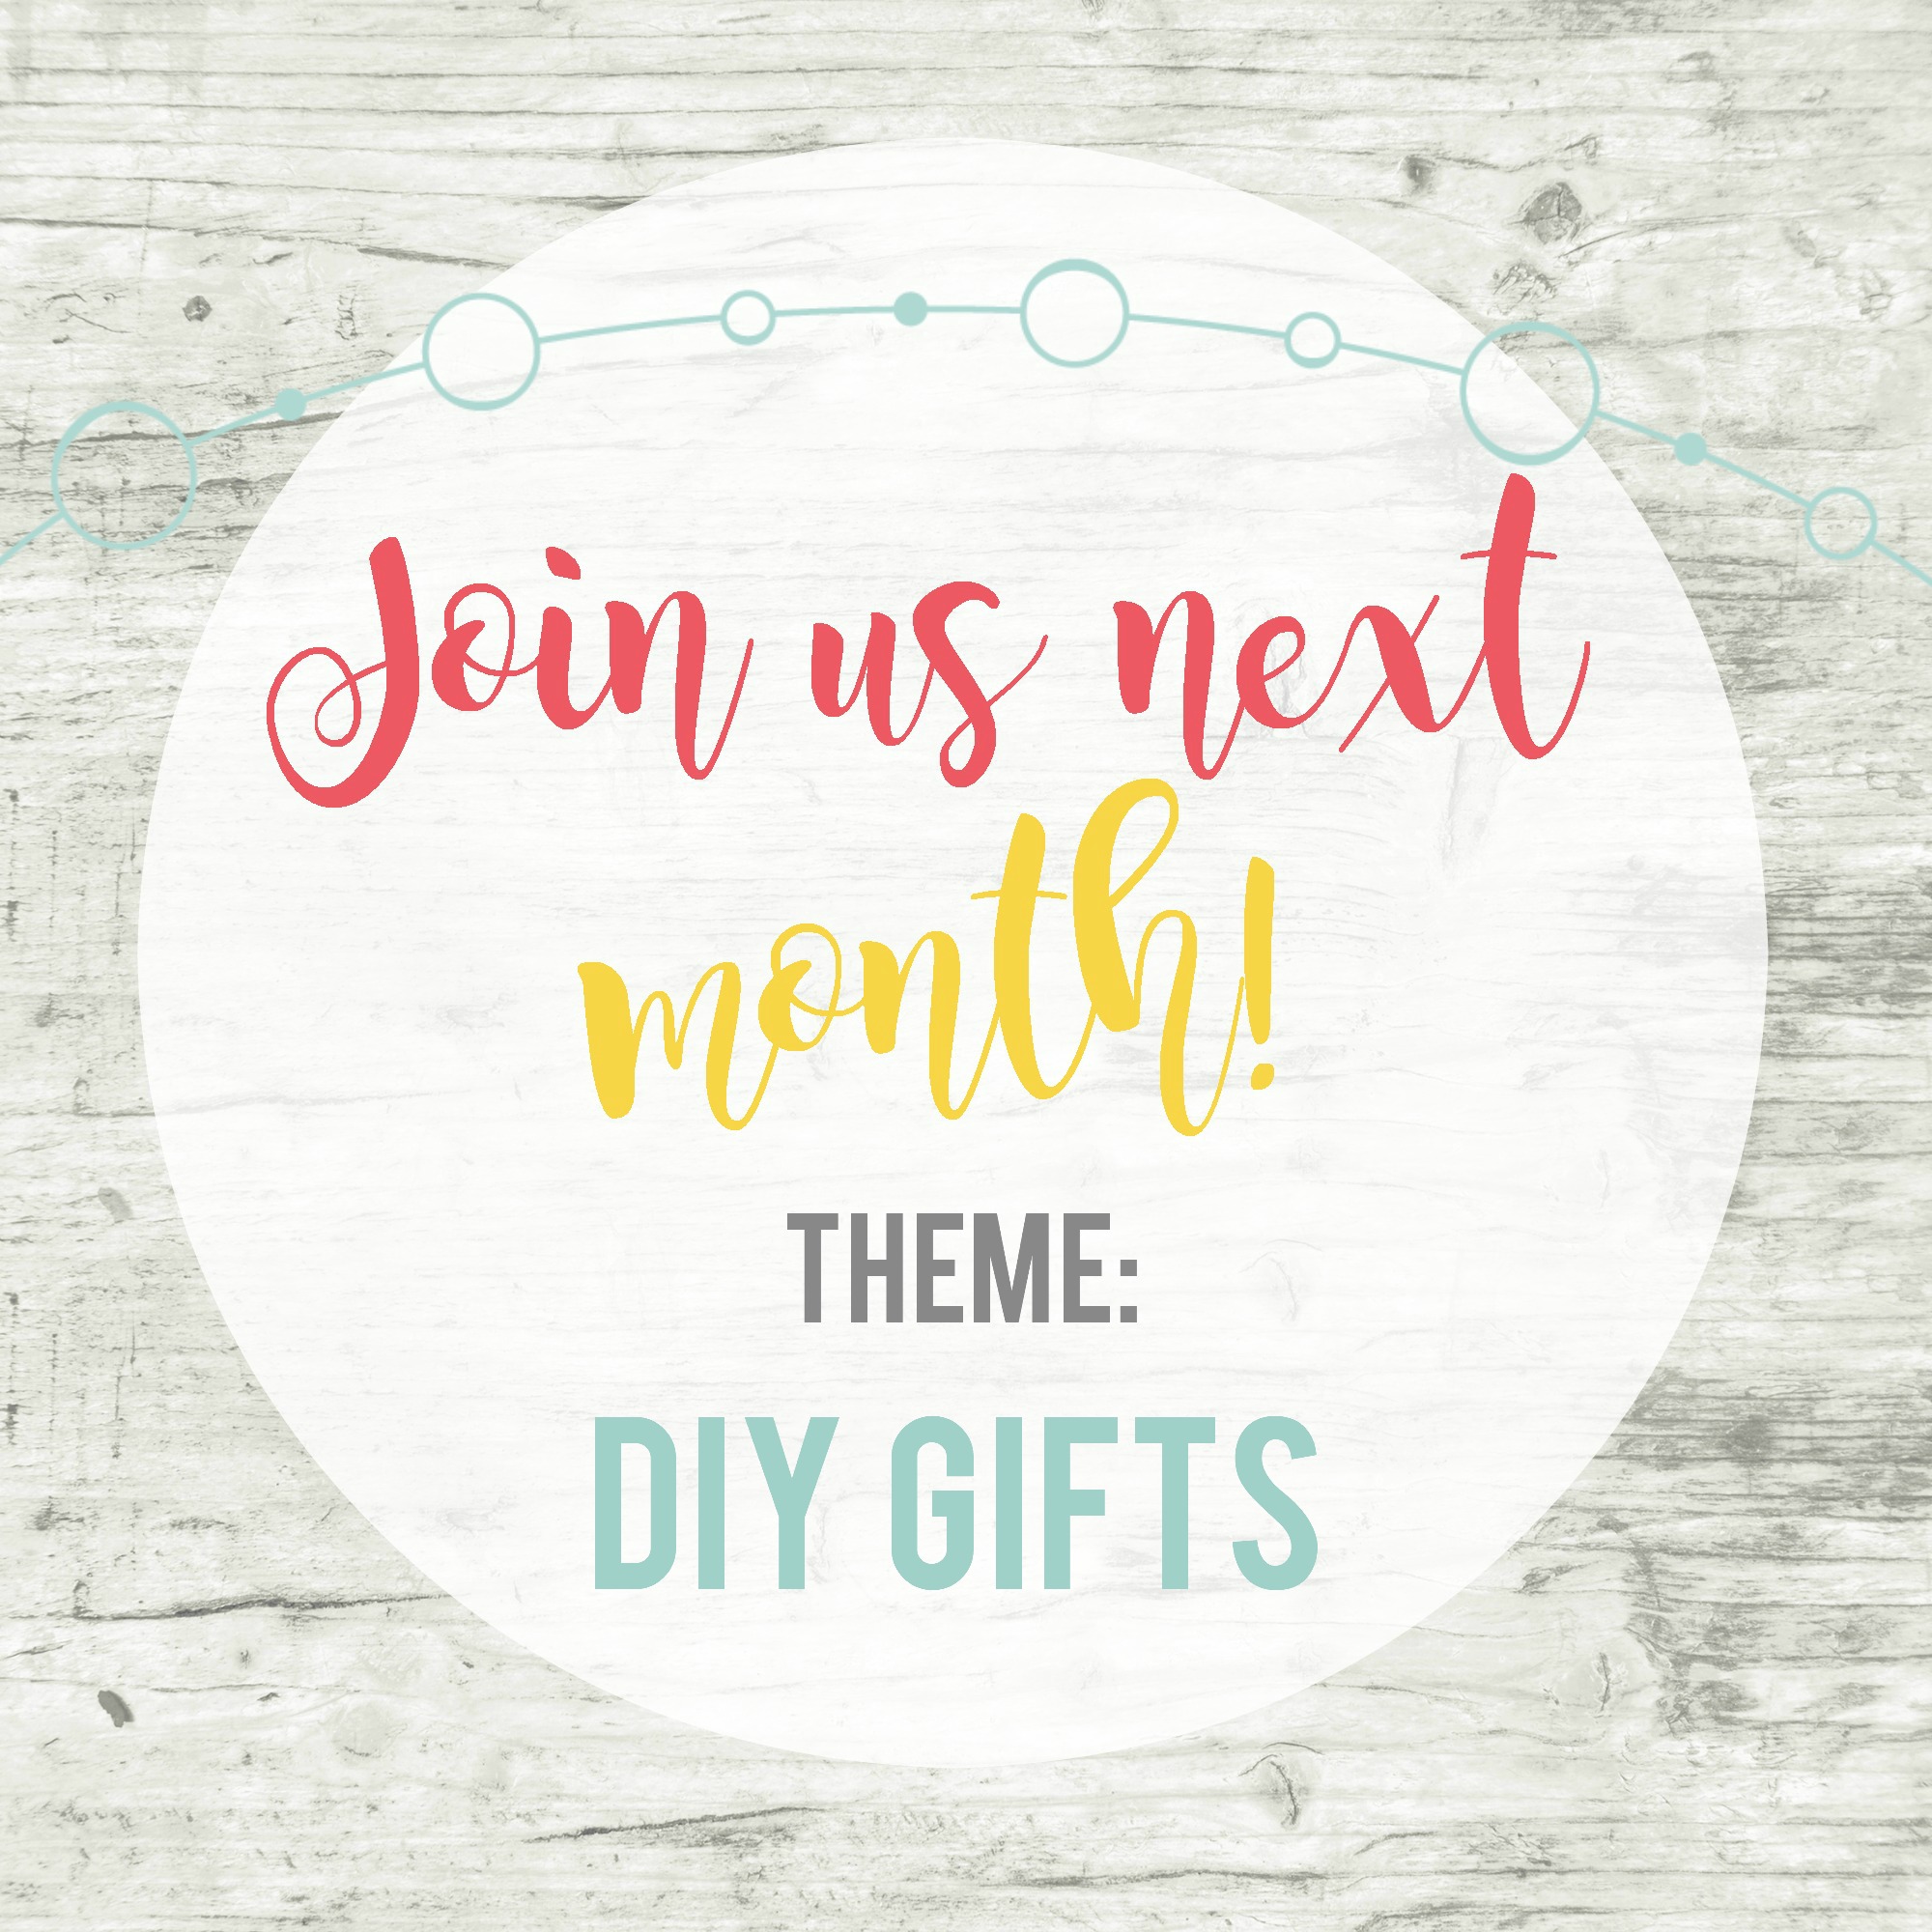
This project was created for October 2019’s “Inspire My Creativity” link party. This month’s theme? Wood! I’m lucky enough to co-host this link party with some pretty amazing ladies – make sure you check out their blogs (links below) for more fun projects!
I love woodburning. I really like the one you used for the border looks great!
Yay! Yes, the border turned out great . . . the rest? It’s pretty rough, but what can a girl do?
What a cute project! I totally want to try a wood burning kit now!
Thanks! I’m glad you like it! Woodburning is kind of intimidating, but it’s super fun.