Things Small and Simple is a participant in the Amazon Services LLC Associates Program, an affiliate advertising program designed to provide a means for sites to earn advertising fees by advertising and linking to Amazon.com.
This post contains some affiliate links. This simply means that if you purchase anything, or take other actions after clicking one of my links, I will receive a small commission. This comes at no extra cost to you. Thanks so much for your support!
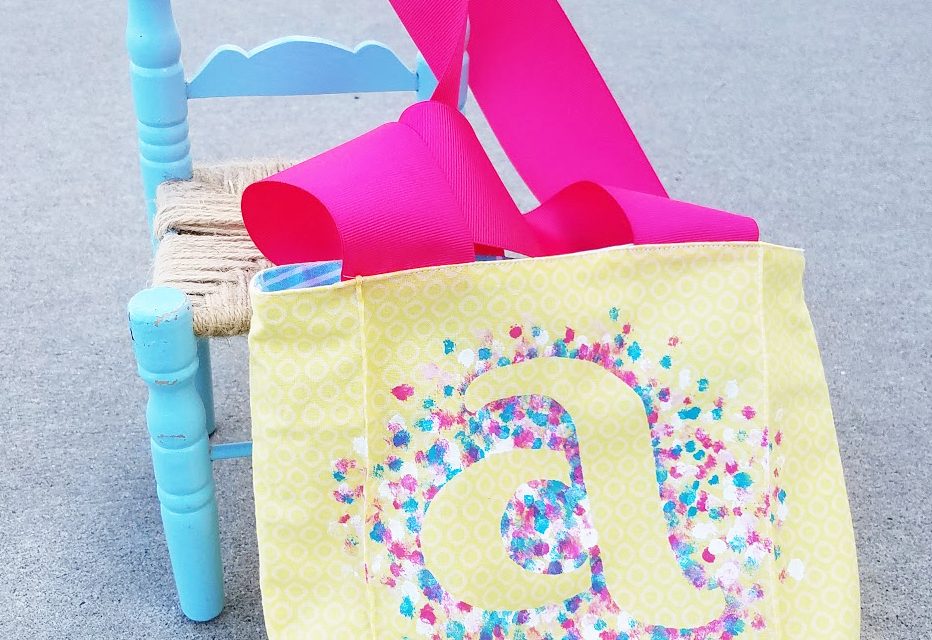
With kids back in school, I’ve spent some time getting my home back in order. In the process, I’ve finally organized all the fabric scraps I’ve collected over the years. It feels SO good to have that done! As an added bonus, I can actually see what fabric I have, and use it to make something – which is the whole point of saving fabric scraps anyway, right? Do you have a stash of fabric at your house? Maybe you’d like to make a little tote bag, too. Read on for a quick tutorial:
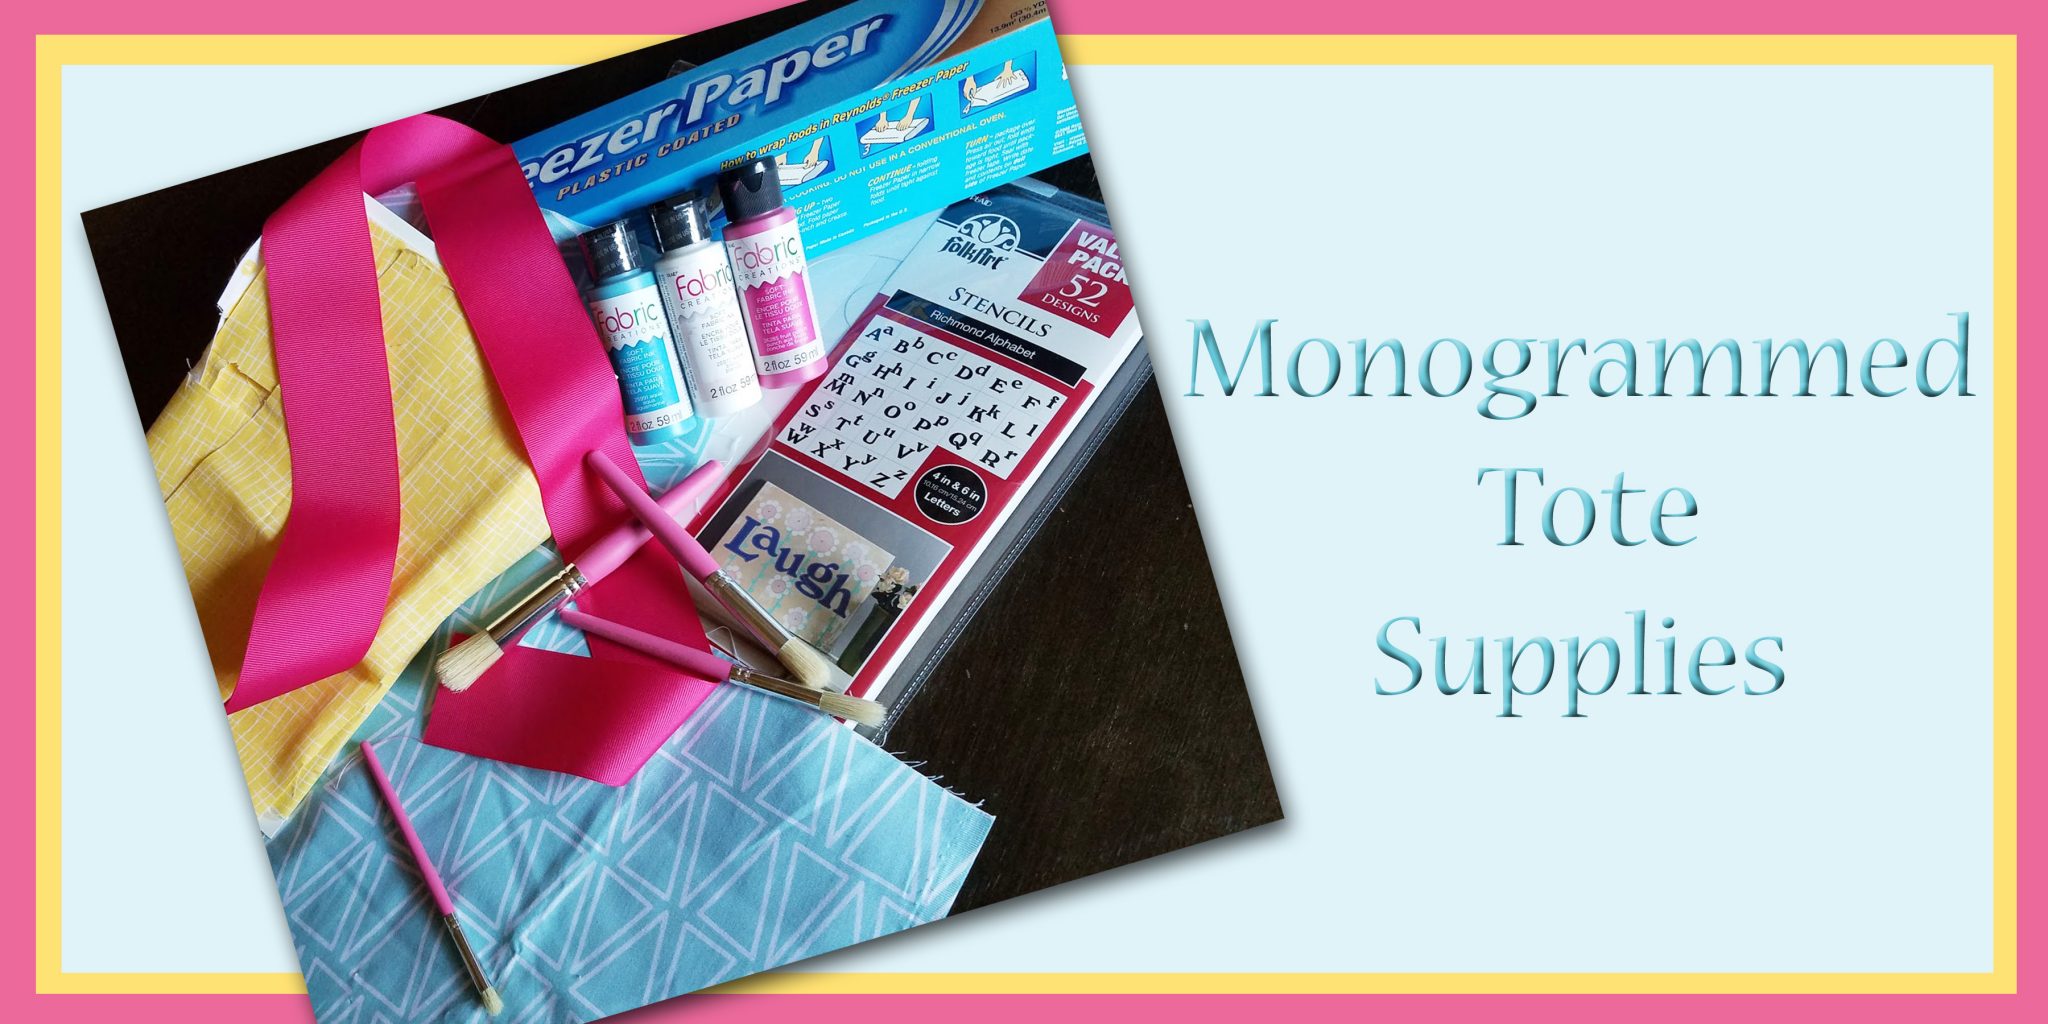
Monogrammed Tote Suggested Supplies:
- Fabric Scraps in coordinating colors (If you don’t have scraps, you can always go buy some).
- 2 inch wide ribbon – at least 18 inches
- Freezer Paper
- Fabric Creations Fabric Ink – Get a variety of colors
- Fabric Creations Stencil Brushes
- FolkArt Stencils Value Pack: Richmond Alphabet
- Rotary Cutter
- Self Healing Mat
- Cutting Ruler
- Sewing Machine – I LOVE my Brother Machine!
Do you have everything? Phew! Now it’s time to get sewing. Don’t get discouraged by the length of this tutorial, I promise this is a pretty simple project. I just want to make sure you understand what you need to do one step at a time.
Creating Your Tote Bag – The Sewing Section
Step 1:
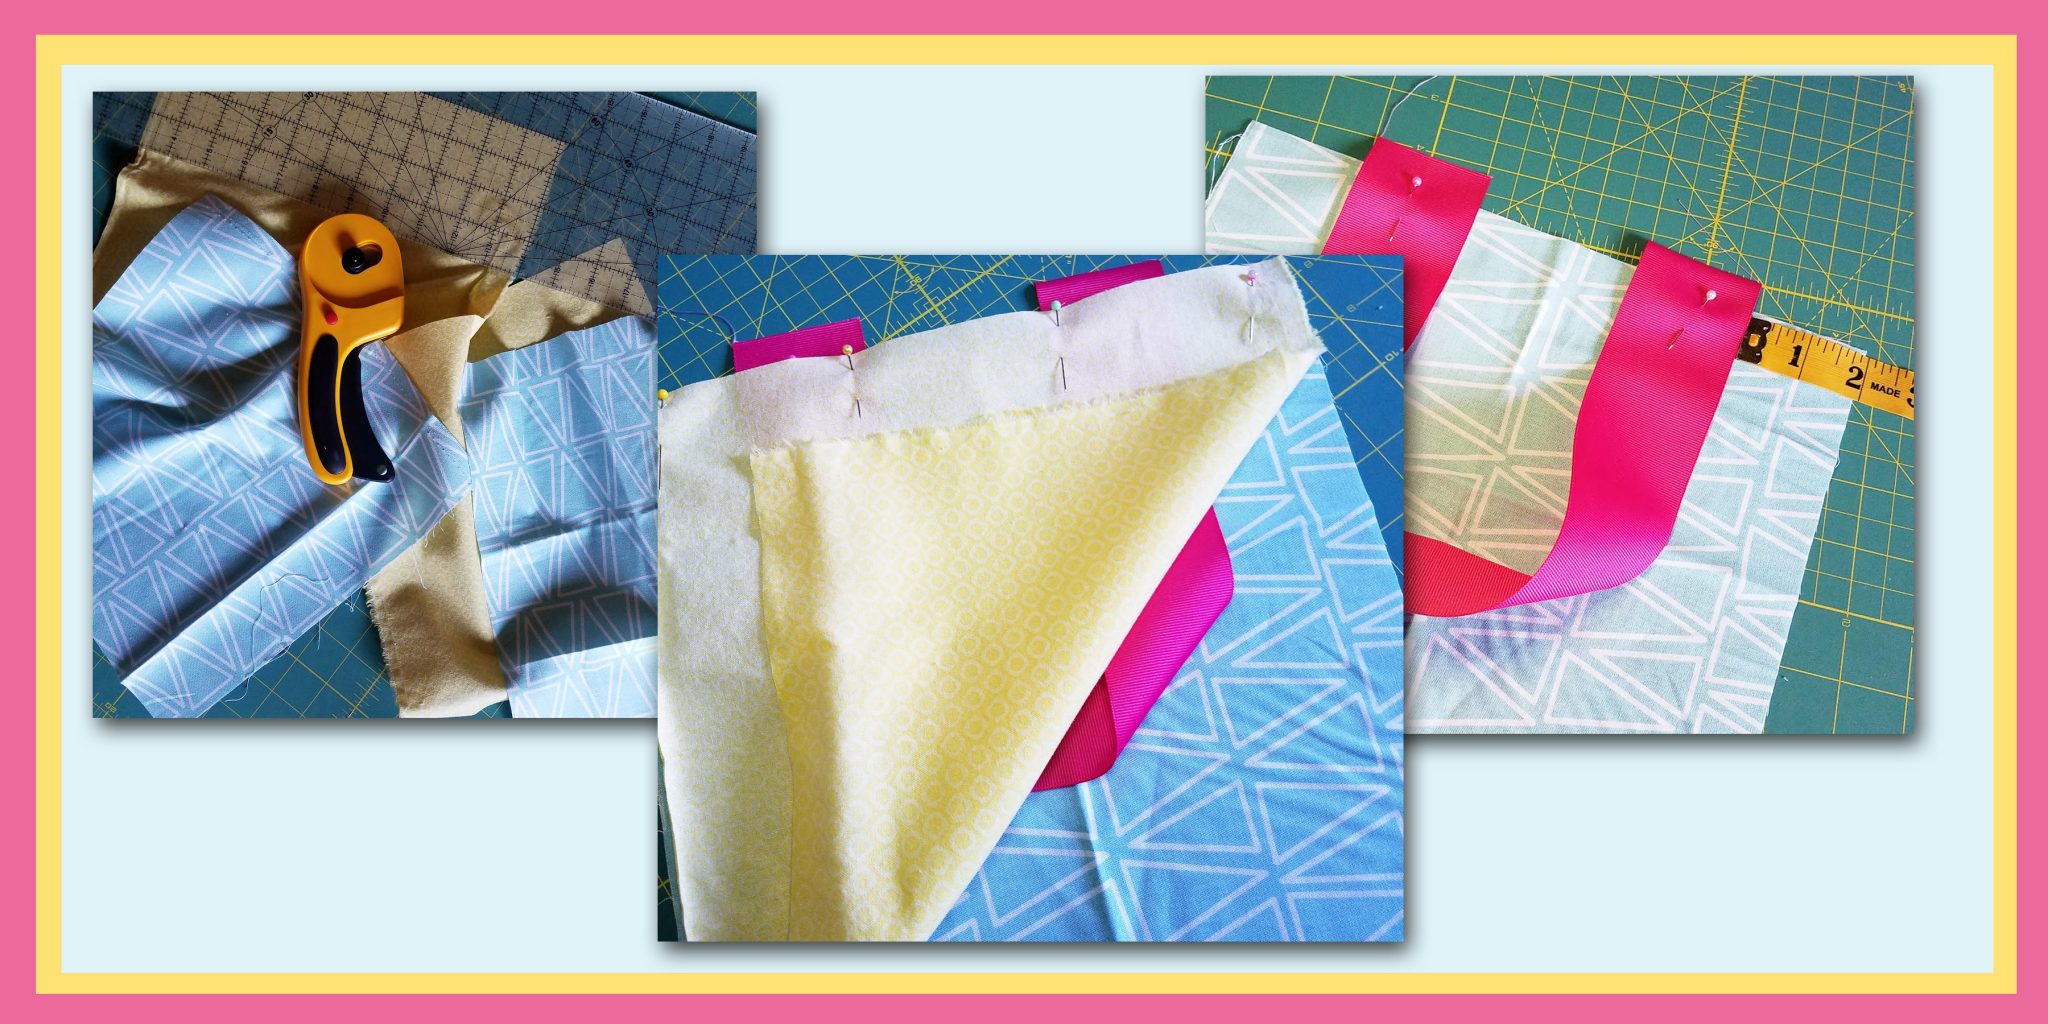
First of all, you need to prep all your pieces. You’ll need:
* 9-inch pieces of ribbon (cut 2)
* 4 squares of fabric – I cut mine to be 11 inches square, but you’re welcome to go bigger or smaller. I wanted my lining to be a different fabric than my main fabric, so I chose two complimentary fabrics and cut two of each one.
Once you have everything cut and ready to go, you need to get your pieces prepped for sewing. You’re going to make two “tote bag sandwiches”. Put your liner fabric on the bottom, pretty side up. In the middle, goes your ribbon handle. Pin it to the liner fabric to make sure it stays centered as you sew. I pinned my ribbon in two inches from the edge of my fabric. The top layer of your little sandwich is your main fabric, put that on pretty side down, so all the pretty parts of your tote bag will be on the inside of your sandwich.
Got it? Make sure everything is pinned in place, then sew accross the top of each sandwich. IMPORTANT: Only sew the top edge of the sandwich. When you’re done, you want to be able to pull the two fabric squares apart and have the ribbon hanging out from the middle of them.
Step 2:
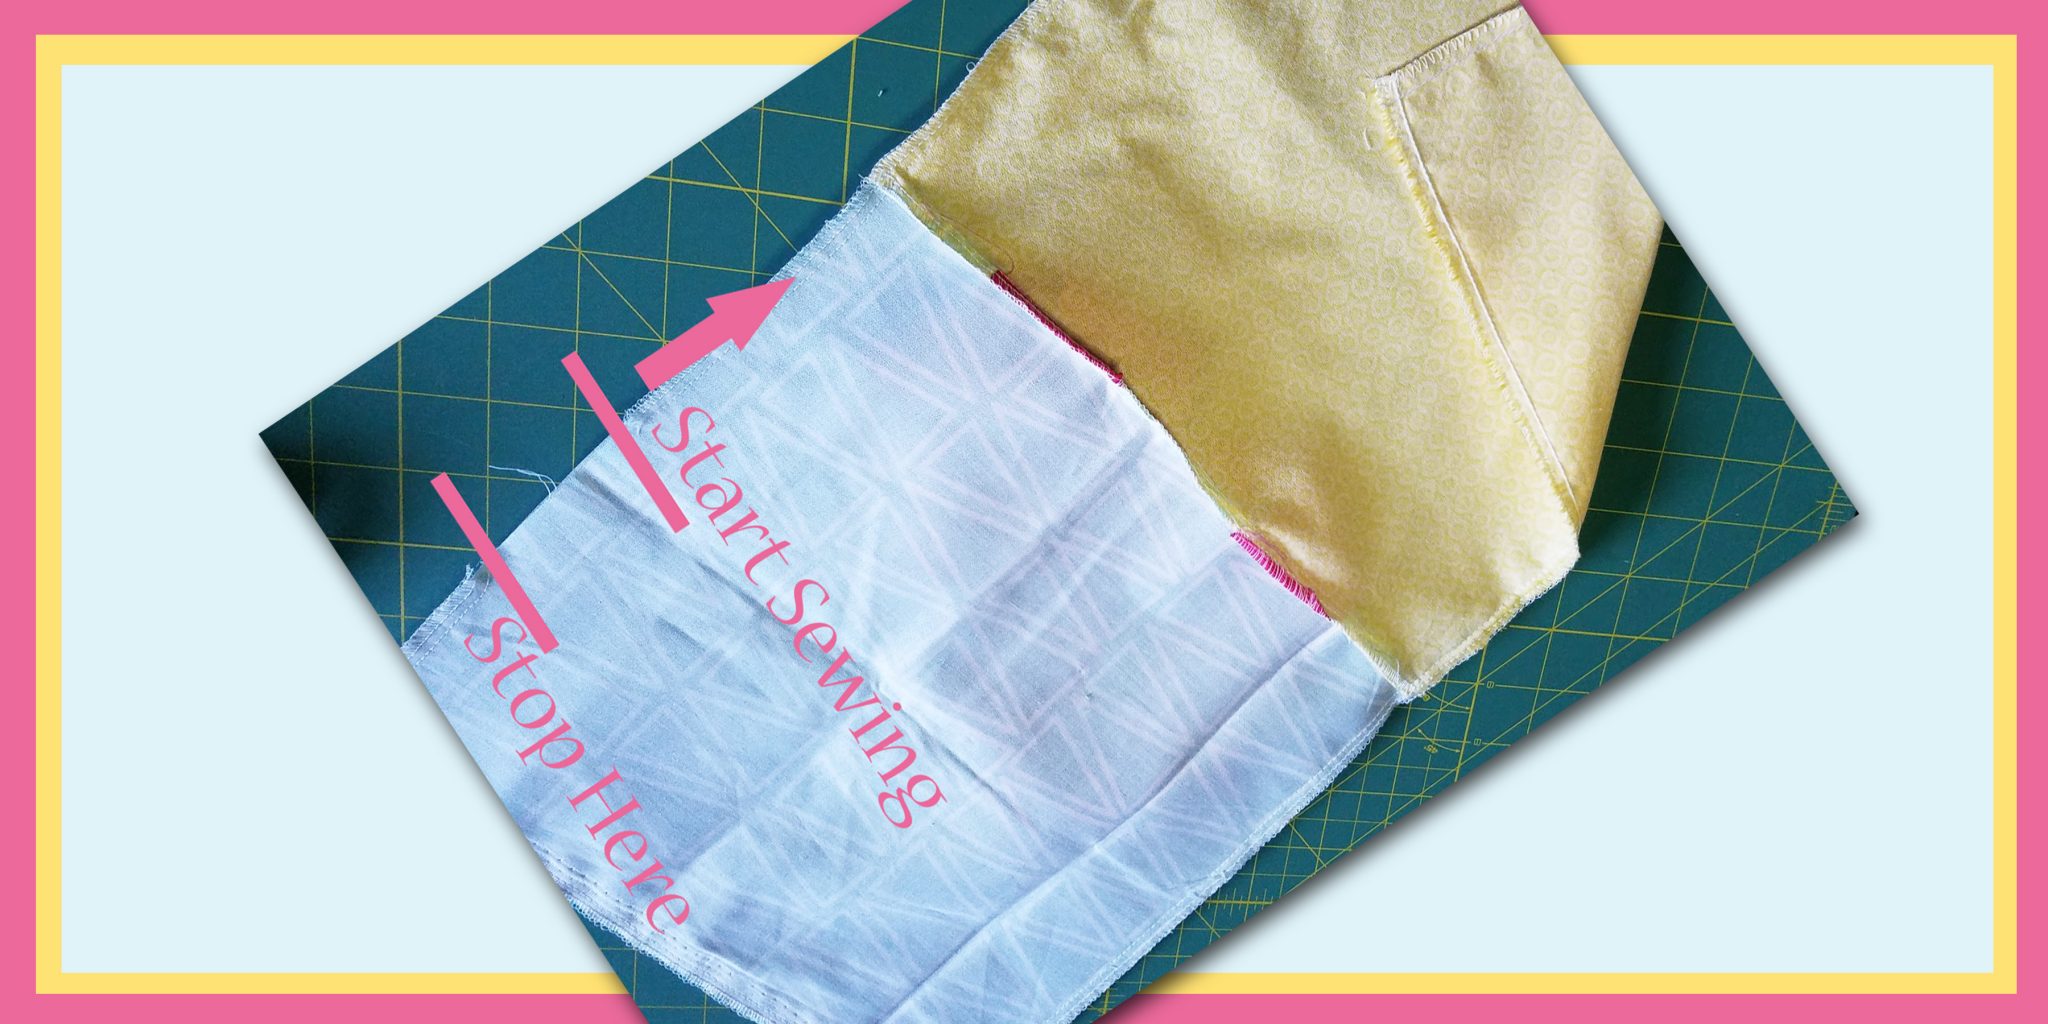
Open up your “tote bag sandwiches”, and lay one on top of the other. If you are using two different fabrics, make sure each square is stacked upon the square it matches. Pretty sides (including the ribbon) are inside.
From here, you’re going to sew around all four sides of the rectangle you’ve made. Leave a hole on one of the sides of your liner so you’ll be able to turn the tote bag right side out.
Step 3:
This next step is totally optional! If you don’t want to have boxed corners on your bag, you can just skip ahead to the next step.
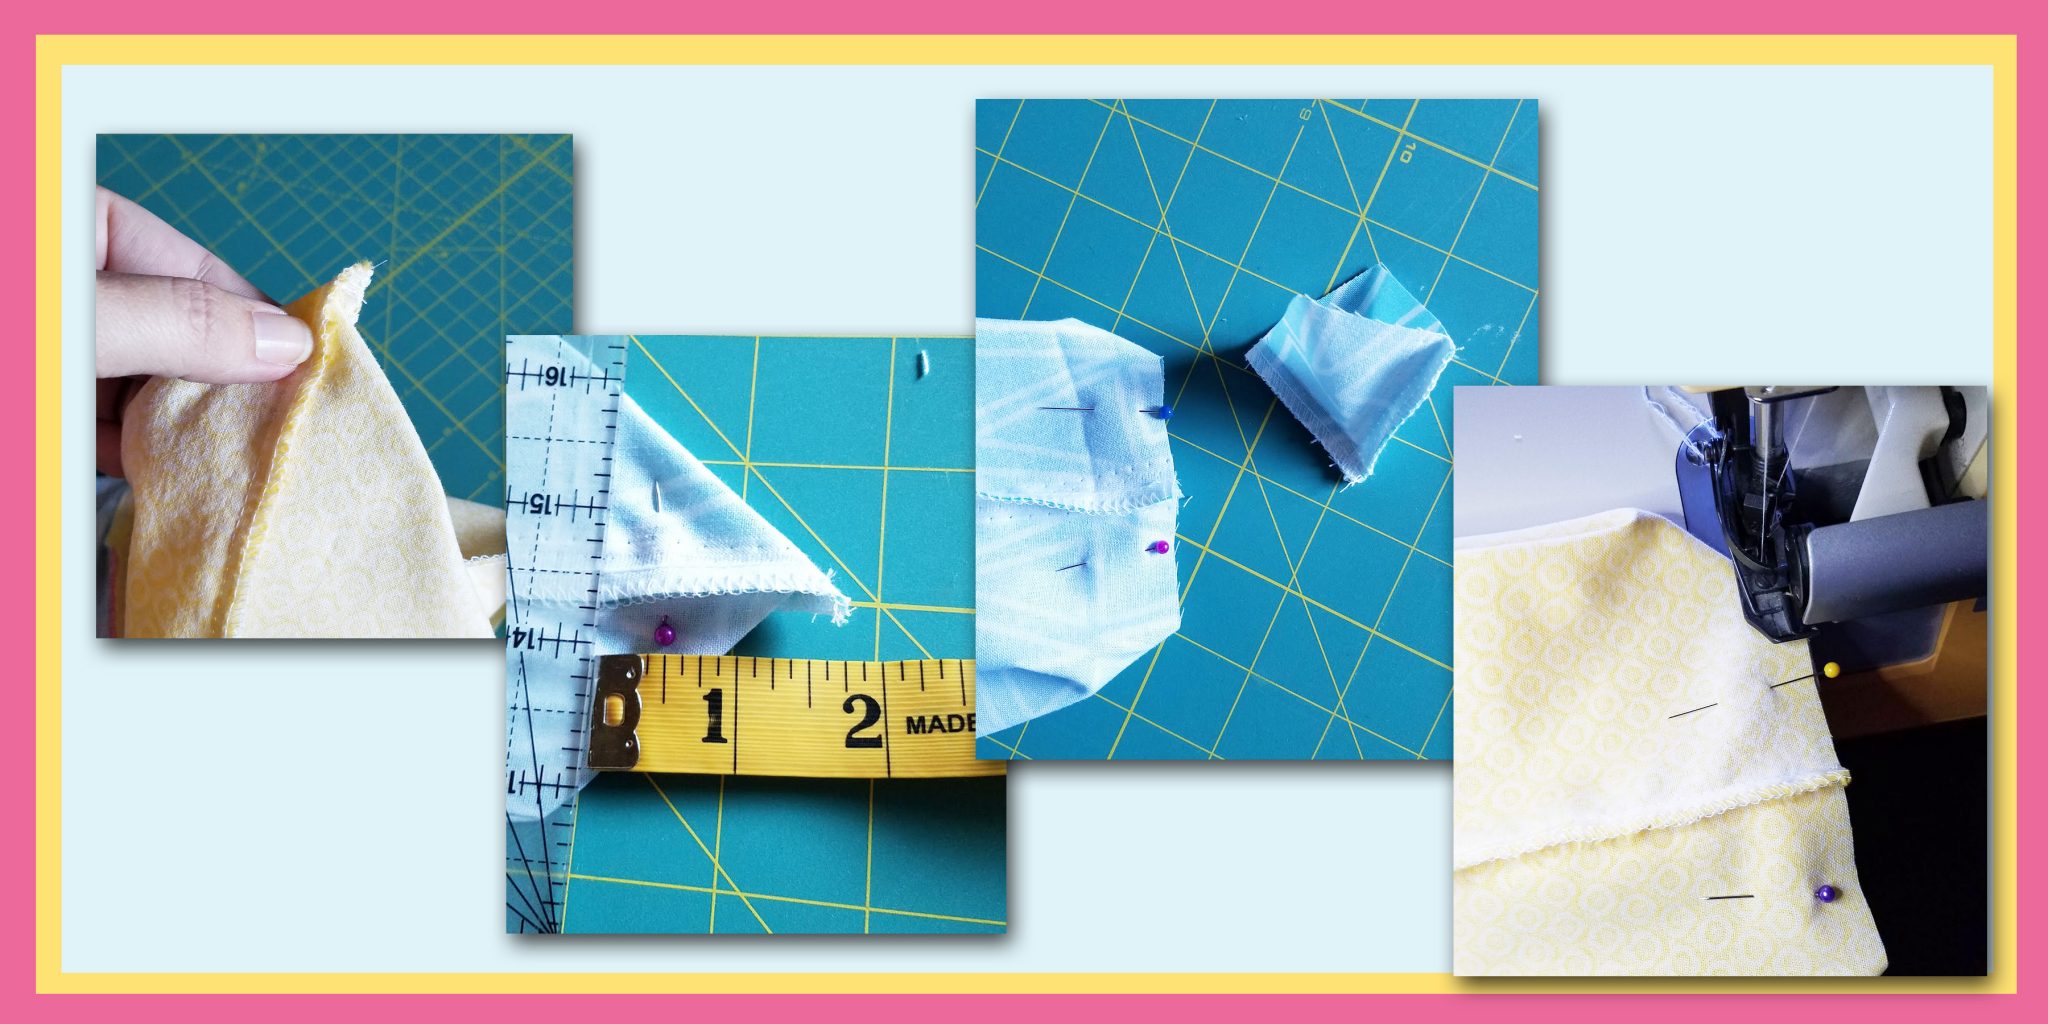
At this point, you should have a long rectangle, and as such, you have four corners. To box a corner, you first need to line up the seams you have sewn on each edge of the corner. This turns your corner into a little triangle.
Cut off the tip of the triangle, and sew along the edge you just cut. Simple, right? Make sure you cut the same size triangle from each corner. I cut mine off at two inches from the tip. Yes, you need to do this for each of the four corners of your rectangle.
Step 4:
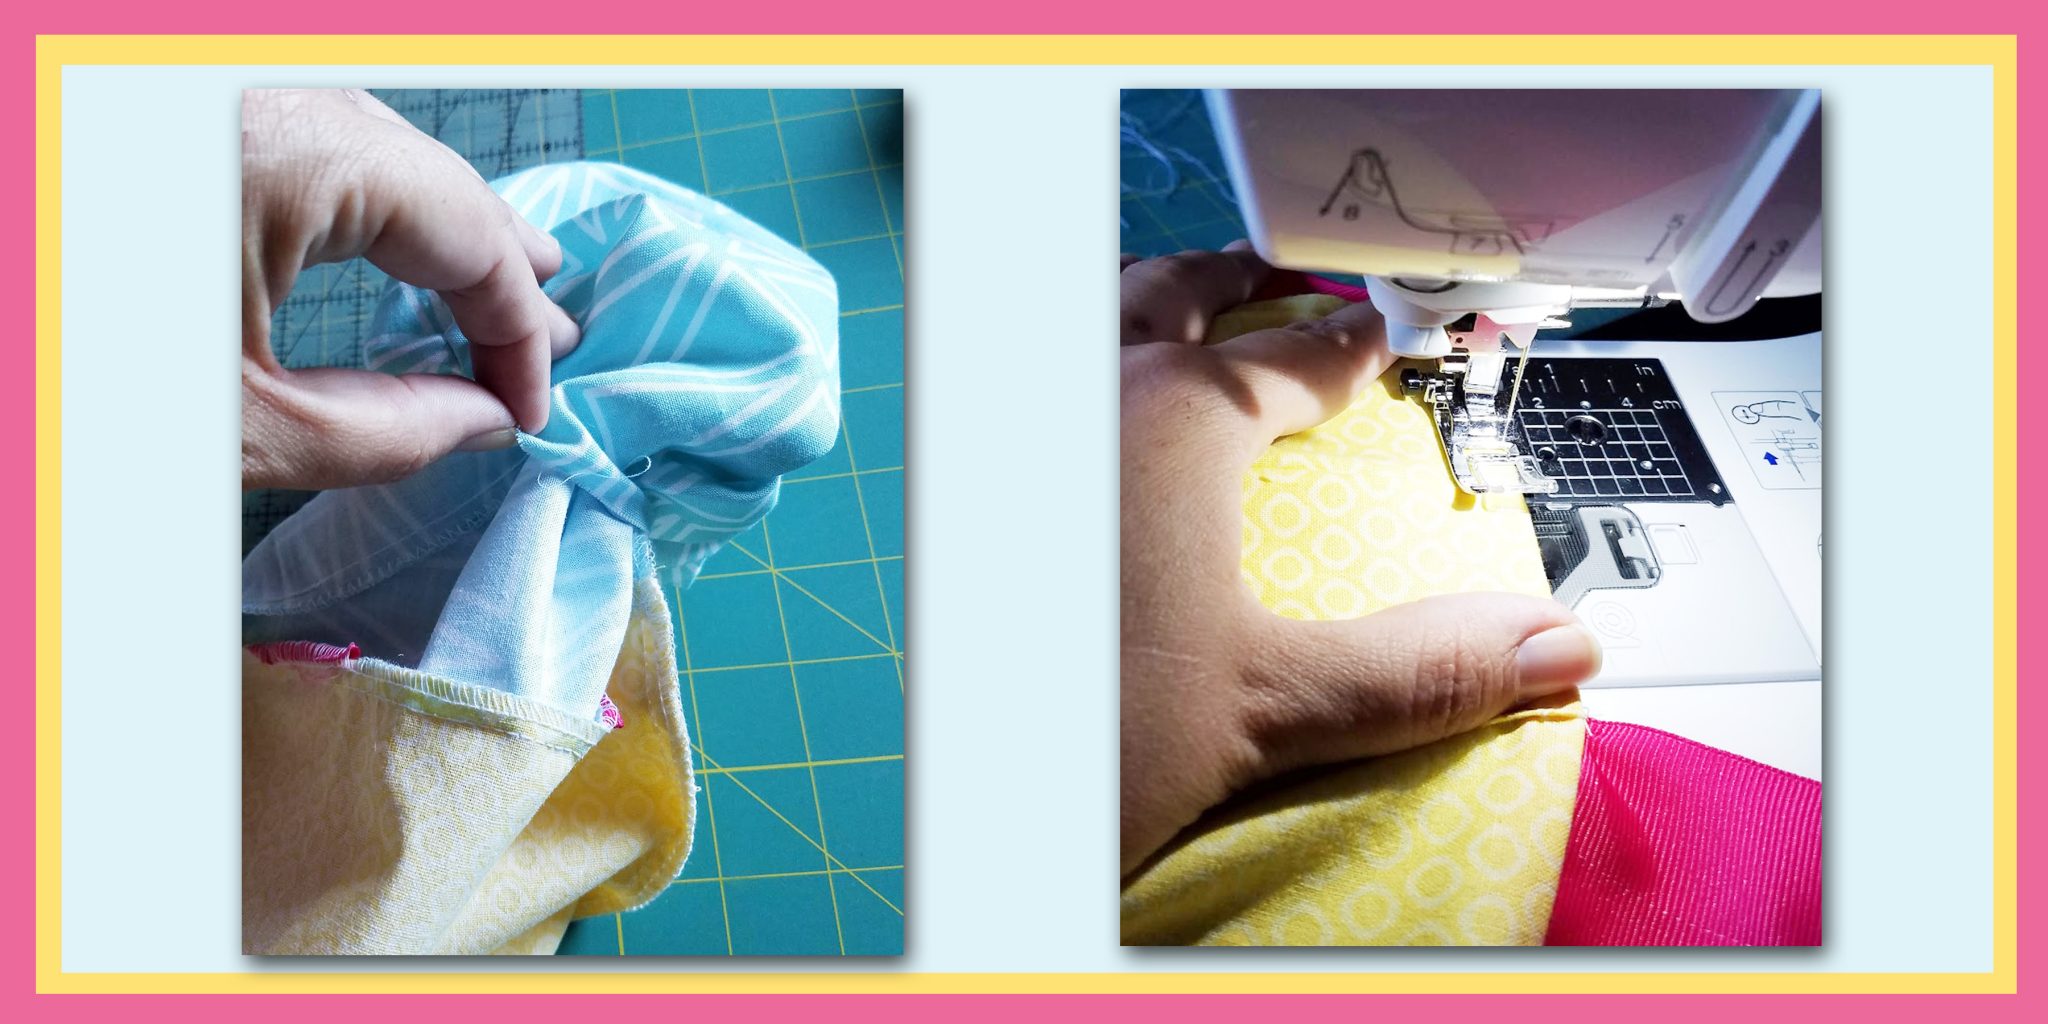
Now, use the hole you left in your lining to flip your tote right side out. You might need to use a pencil or something to help make your corners crisp. Sew up the hole in your liner, and stuff the liner inside the tote.
I like to topstitch my projects when I’m done, but that is totally optional also.
Personalizing your Tote Bag – The Painting Section
Step 5:
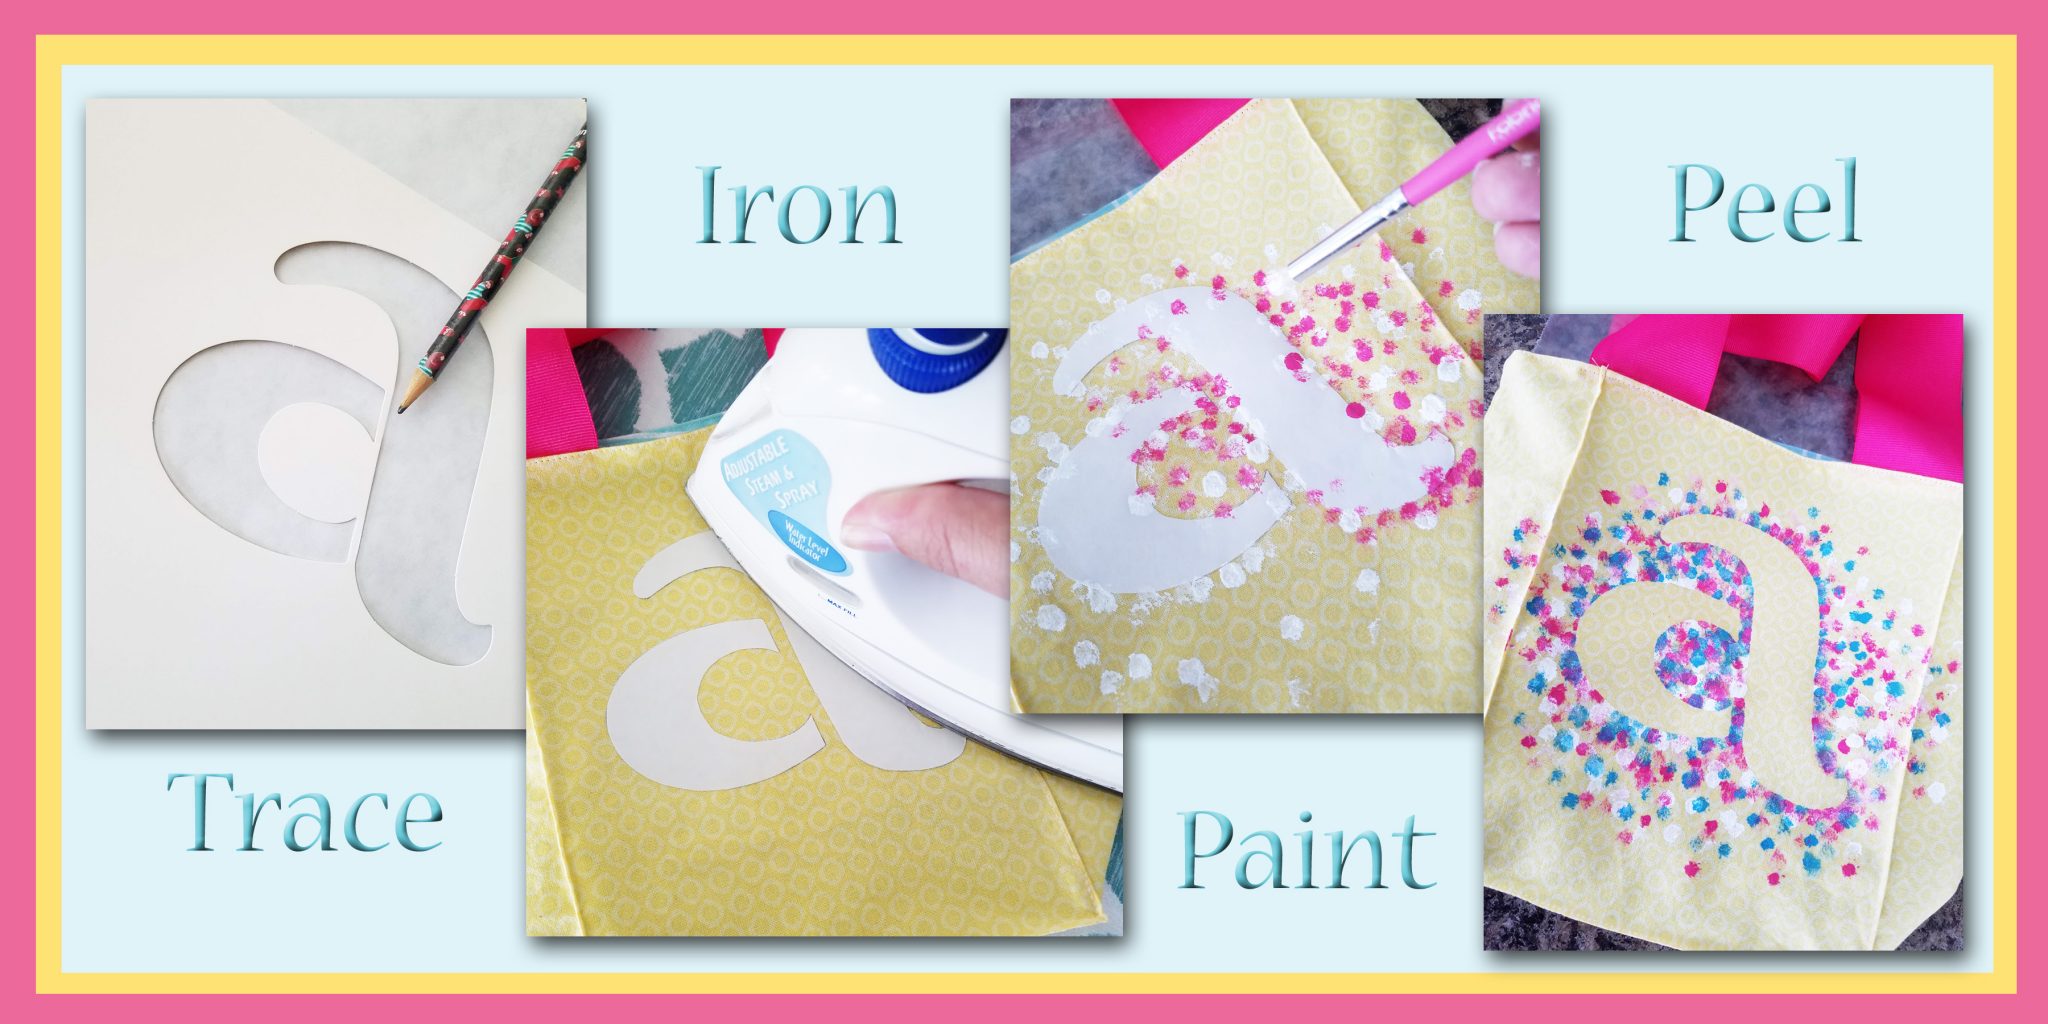
Now that your tote bag is finished, it’s time to add your monogram! Find the letter you want from the stencil kit, and trace it onto a piece of freezer paper (shiny side down – you want to draw on the papery side). Iron the freezer paper stencil onto the tote bag. Again, you want to iron the shiny side onto the fabric. Got it? Awesome, that means you’re ready to paint!
Before painting, I recommend putting a piece of wax paper or cardboard inside the tote, just to make sure that no paint bleeds through. With that done, though, pull out your fabric paints and stencil brushes and add dots all around your stencil.
The thing I love about freezer paper, is that it will iron on and create a solid seal along the edges of your stencil. When you’re finished painting, it’s super easy to just peel the freezer paper off, and you’re left with a nice, sharp edge.
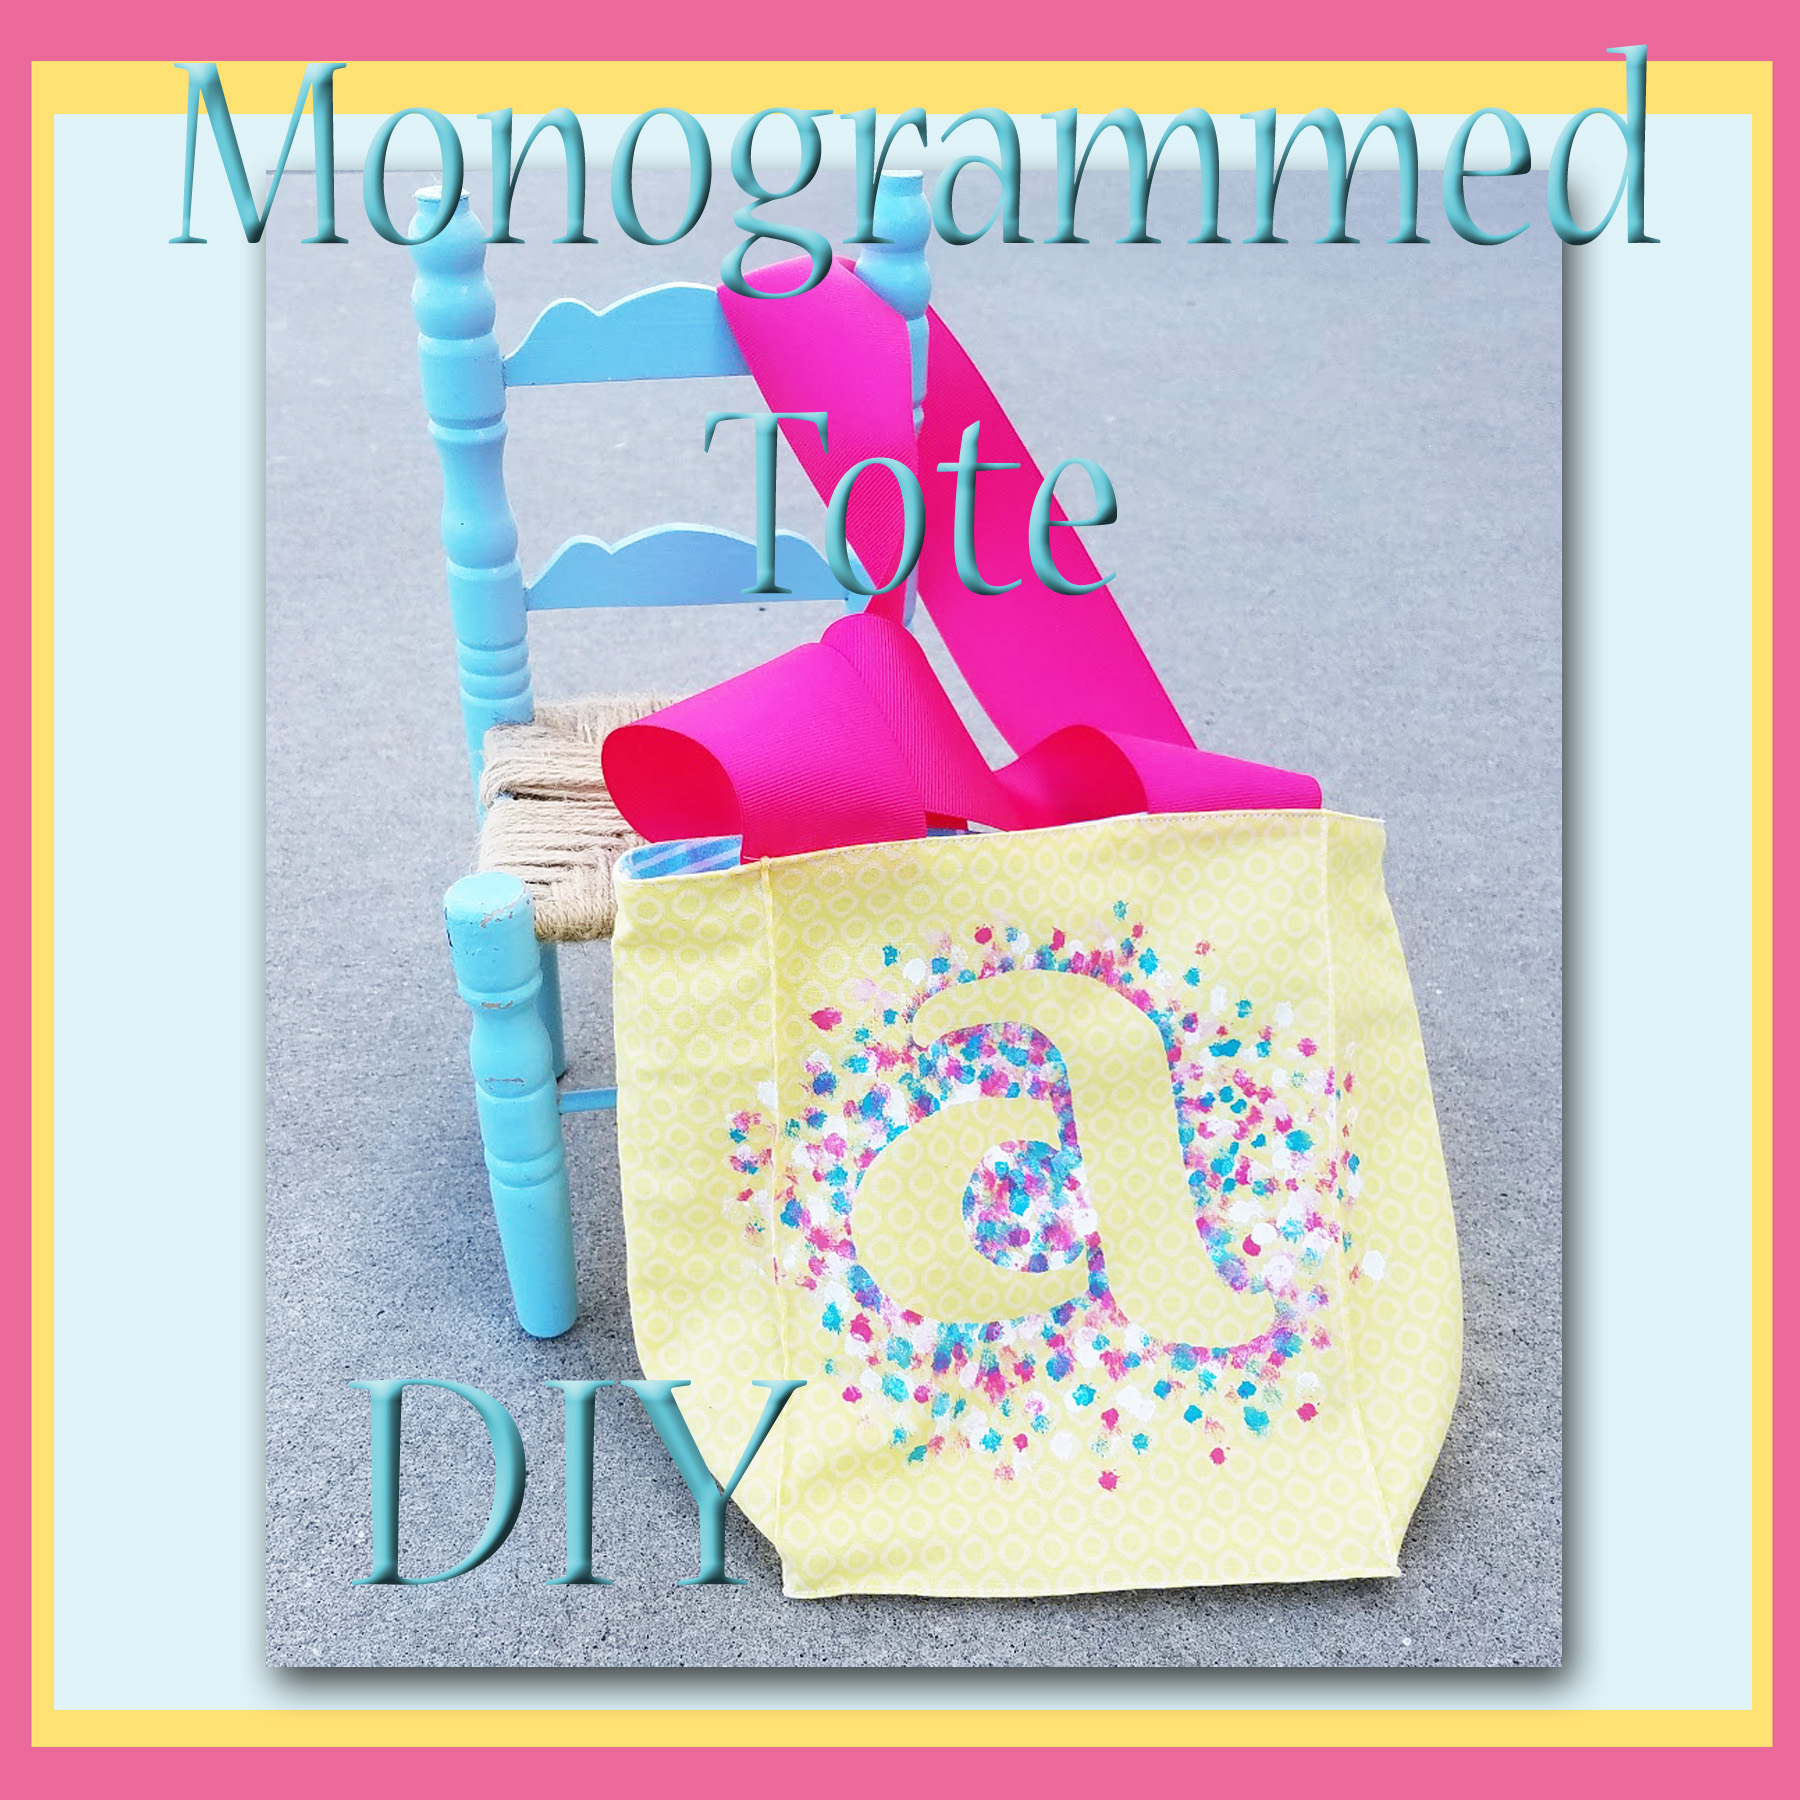
See? This tutorial was a little bit long, but something pretty much anyone can do. So, get those fabric scraps and paints together and . . .
Let’s Create!
This project was created for September 2019’s “Inspire My Creativity” link party. This month’s theme? Use the Stash! I’m lucky enough to co-host this link party with some pretty amazing ladies – make sure you check out their blogs (links below) for more fun projects!


I love that monogram! How cute! I have a tote bag that I could do this on. Love it!
I’m so glad you like it!
What a darling bag! I love how you made the monogram and the colors are wonderful! This would be so fun to make for a gift.
Thanks Christine! I’m so glad you like it!
I have so much fabric I should make a few of these. SO CUTE!
It’s a fun little project! I hope you make some!
Thanks for the inspiration & instructions Aimee – such a fun idea! Could you tell me if it’s machine-washable once the paint has dried (say, a couple of years down the road… after much use, of course!)?
Yes! After letting it dry for 24 hours, use a pressing cloth and iron (don’t use steam) to heat set the paint. It will be safe to hand wash in cold water after 72 hours . . . If you want to machine-wash it, I suggest turning it inside out and washing with cold water on a delicate cycle.