This post contains affiliate links. This simply means that if you purchase anything after clicking one of my links, I will receive a small commission. This comes at no extra cost to you. Thanks so much for your support!
A few weeks ago, I was sitting in the closing session of SNAP Conference 2019. I’d had a fantastic few days, and was excited to get home and start working on some of the things I had learned. At the end of the closing session, there were a few drawings for prizes, the last of which was a Brother Sewing / Embroidery machine. You guys . . . I had been drooling over this machine for the whole conference, and was shocked, amazed, and grateful beyond words when my business card was pulled as the winner! Since then, I’ve been playing around with embroidery . . . here’s my very first project with my new machine!

Machine Embroidery Supplies I Recommend:
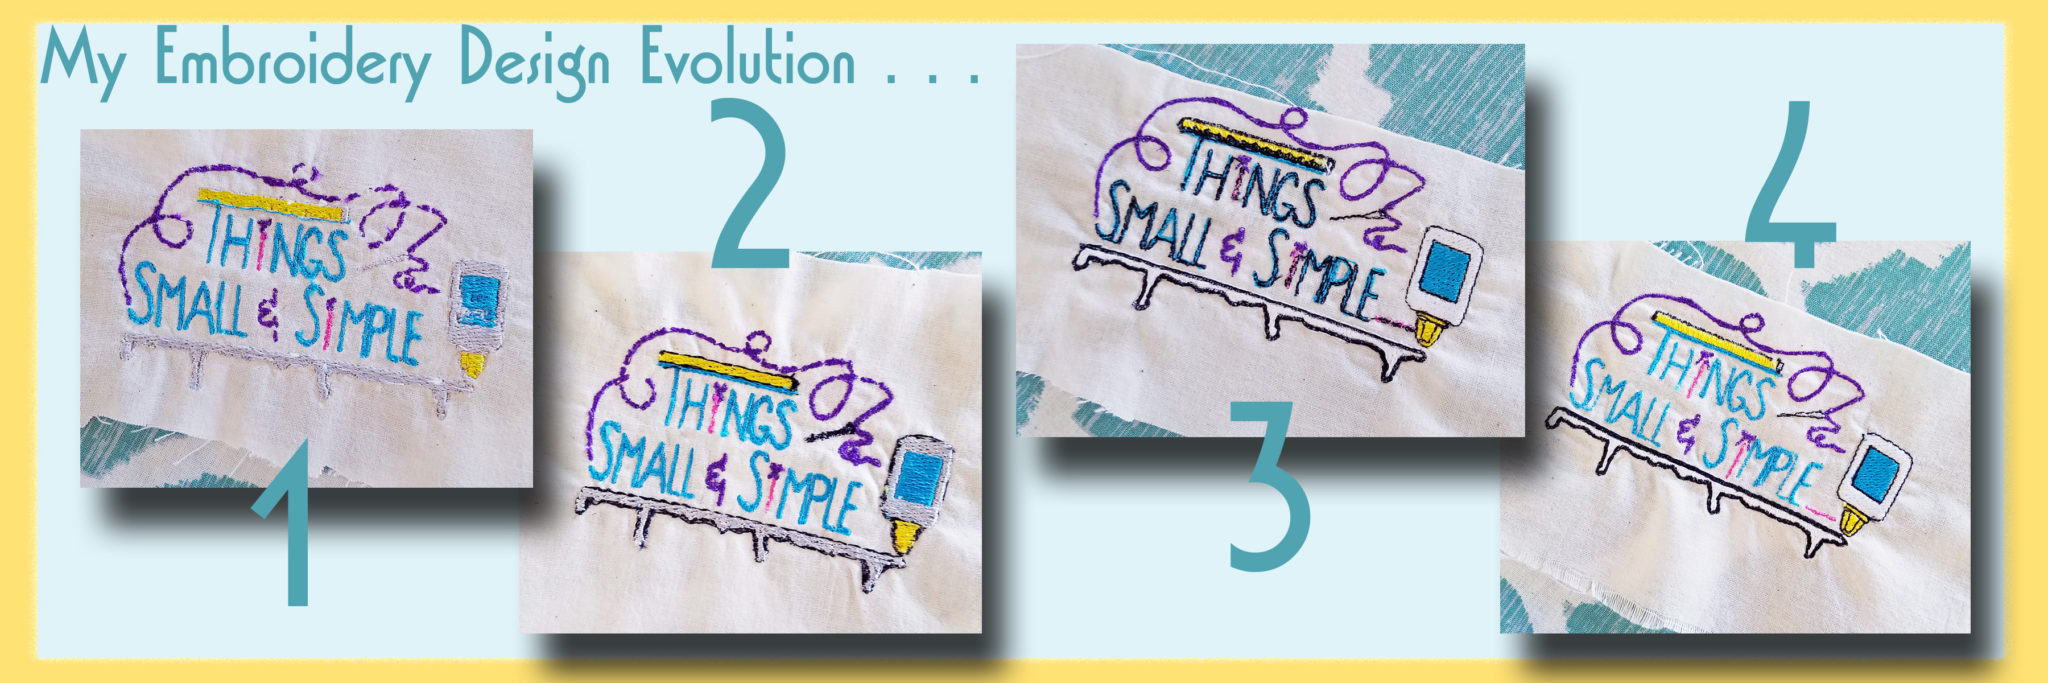
So . . . I have a hard time doing things “the easy way” sometimes. I get these big ideas, and tend to overestimate my abilities and underestimate the time required for these projects. This, my first embroidery project, (On my own. Ever.) was a conversion of my logo from an image file to an embroidery file. It seemed like such a simple idea, you know, embroidering my own logo so I could proudly display it. Because, I think it’s super cute! Here’s how it went:
Phase 1:
I did a “little” research, and discovered that it is possible to convert an image file to an embroidery file. Through my research, I found this embroidery software. I installed its free 30-day trial, uploaded a .jpg version of my logo, used the software wizard to consolidate colors, and let my machine go to work.
Phase 2:
I’ll be honest, watching my machine create the “Phase 1” embroidery was magical. However, the perfectionist in me wasn’t quite satisfied with the end result. So . . . I went back into the file I had converted, and used some of the editing tools included in the software to clean things up a bit.
Phase 3:
Phase 2 was definitely better, but it still looked pretty rough to me. So . . . I found THIS embroidery software, which is much more robust, and used a vector image instead of a .jpg hoping to get a cleaner look. I imported the vector file, and did a little bit of editing before turning things over to the machine.
Phase 4:
In Phase 4, I simply took out most of the black outlining stitches, as I thought they cluttered up the design too much. It only took me until 1:30 am to get this one finished!
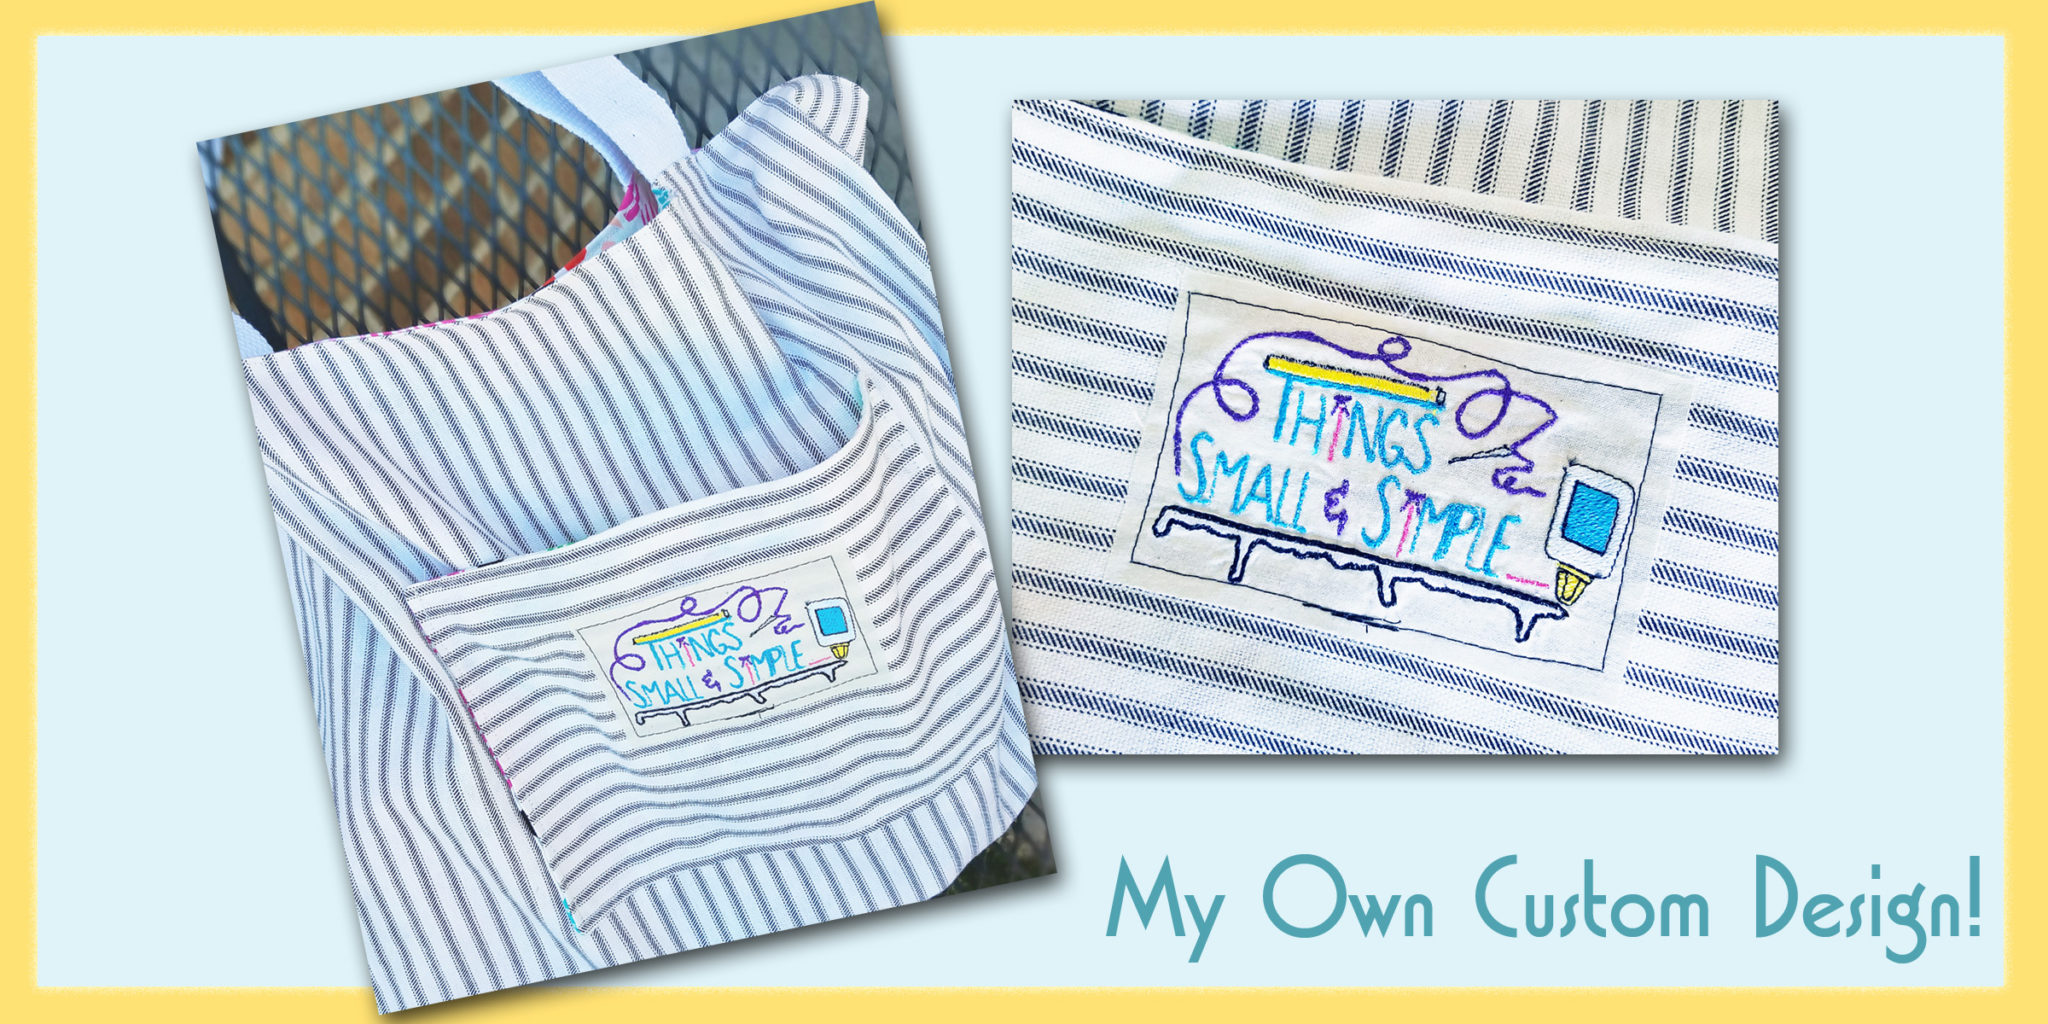
My cute friend over at SookEe Designs made this tote for me. Once I was happy with my finished embroidery project, I appliqued it to the front pocket. I love how it turned out! Now it’s your turn . . . you don’t need to completely design your own file. Find something out there that you like, thread your machine and . . .
