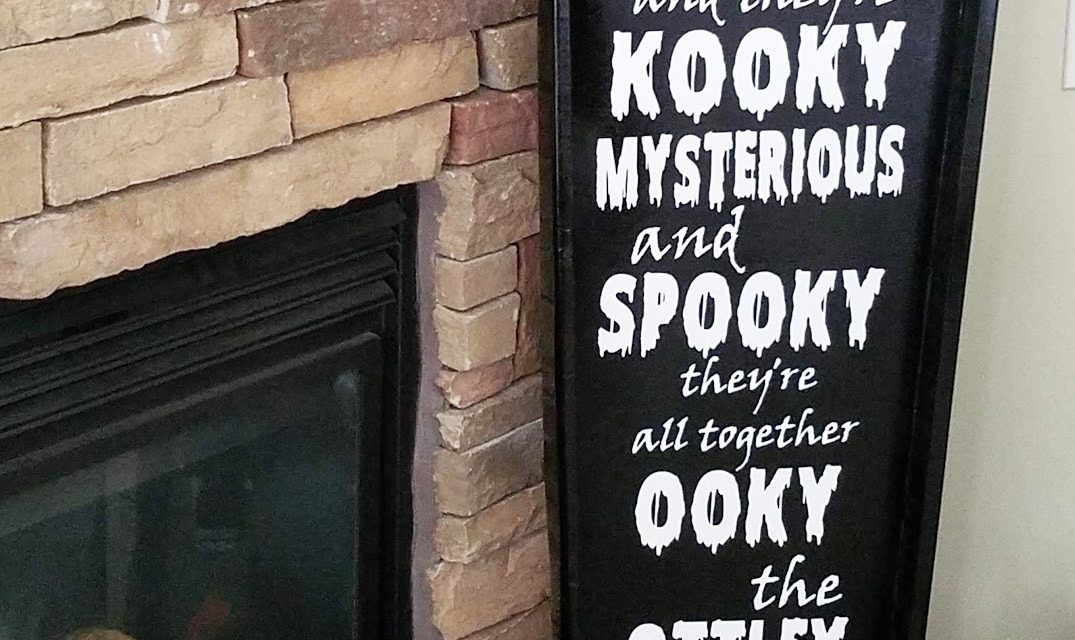
As Halloween Signs go, this is one of my favorites! Thanks to a good friend, who is also good with woodworking, and my Cricut Explore Air 2, this cute coffin now graces my fireplace. Happy Halloween!
Things Small and Simple is a participant in the Amazon Services LLC Associates Program, an affiliate advertising program designed to provide a means for sites to earn advertising fees by advertising and linking to Amazon.com.
This post contains some affiliate links. This simply means that if you purchase anything, or take other actions after clicking one of my links, I will receive a small commission. This comes at no extra cost to you. Thanks so much for your support!
I wish I could say I came up with this design on my own . . . but I didn’t. The inspiration for this project came from a post on the Cricut Design Space Facebook page by Kassandra Delaney. My cute friend, Jill, found it and we both loved it so much, we decided to see if we could recreate it.
Halloween Sign
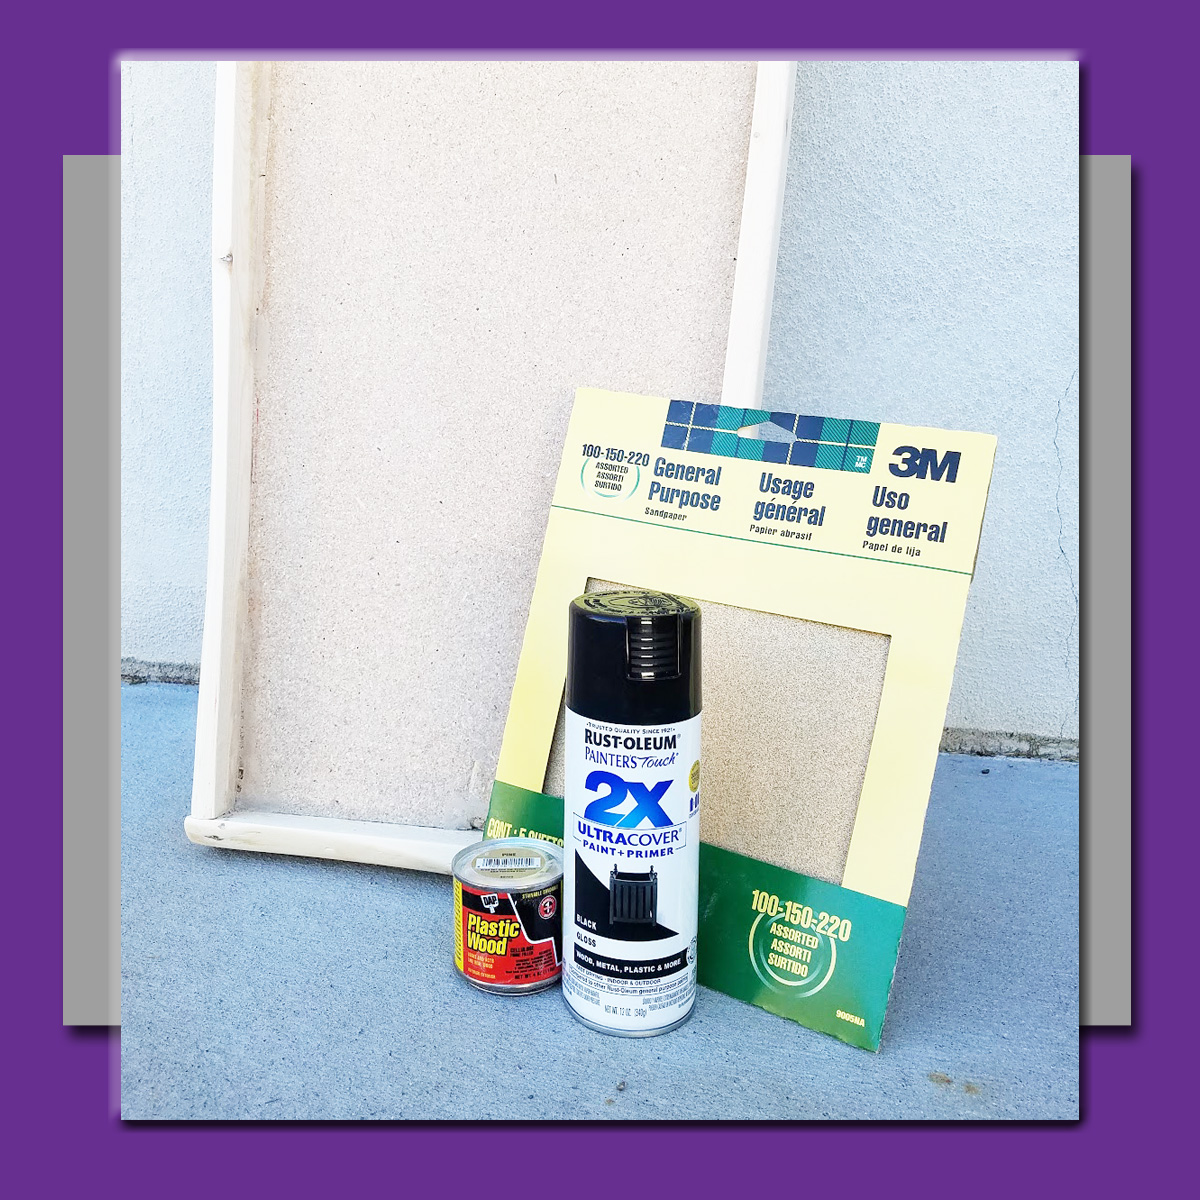
Suggested Supplies:
- Wooden “Coffin” – We made ours from mdf and 1×2’s
- Wood Filler – This Plastic Wood works great!
- Sandpaper – Get a variety of grit levels, this package comes with 3.
- Black Spray Paint – I love this paint from Rustoleum
- White Permanent Vinyl – I love Cricut Vinyl, and right now this bulk buy is on sale!
- Cutting Machine – I love my Cricut Explore Air 2.
Halloween Sign: Prepping the “Coffin”
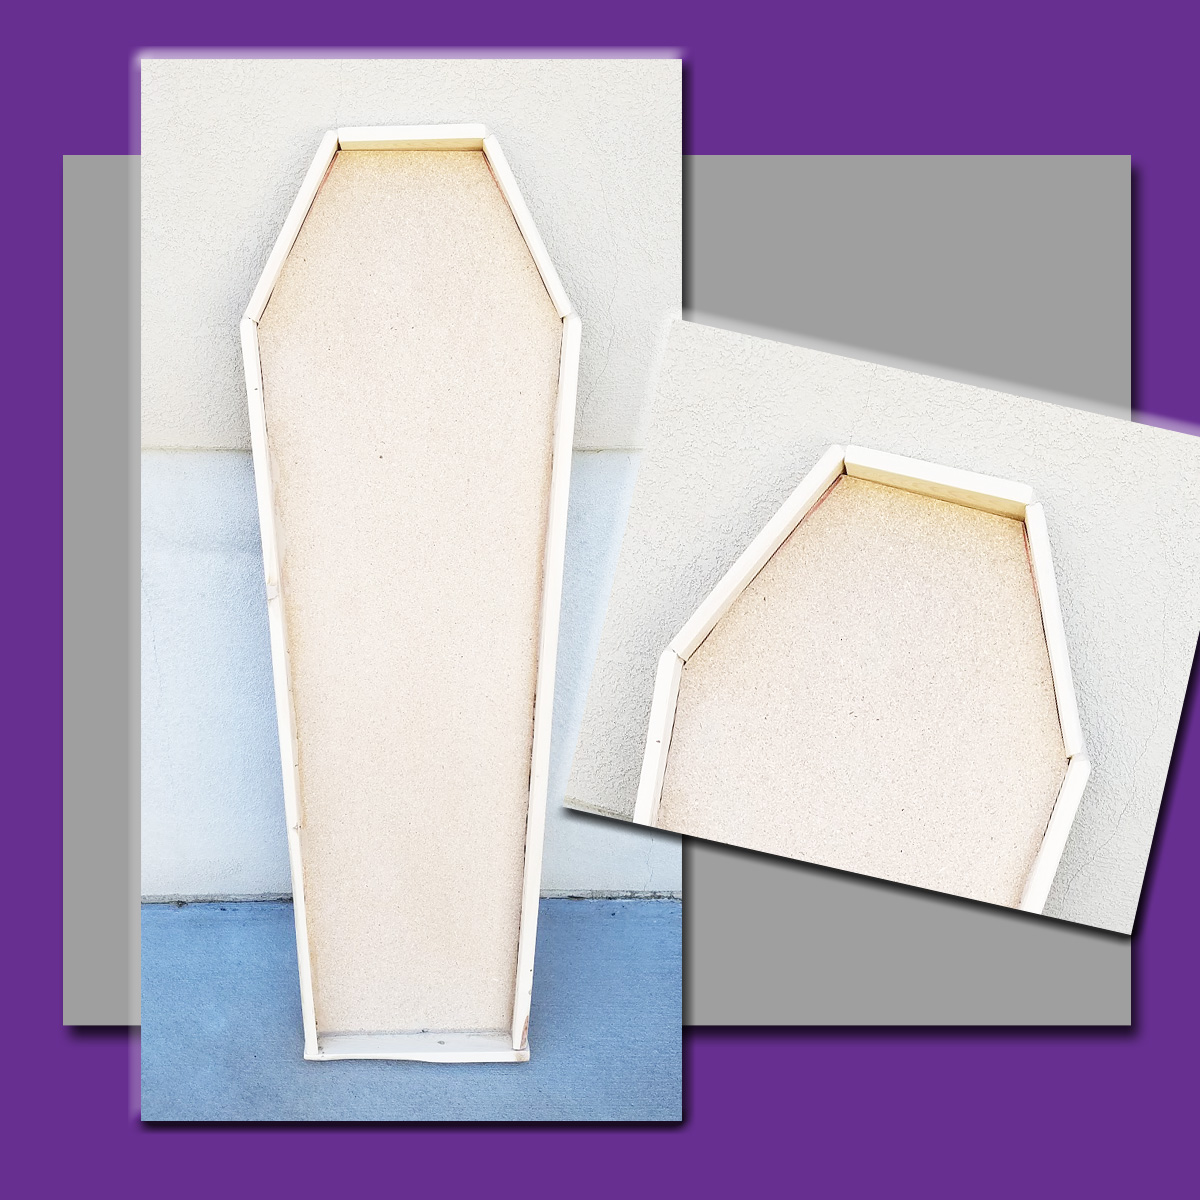
Step 1:
I didn’t build my coffin . . . my friend did that for me. Basically, she cut a coffin shape out of mdf, this one ended up being about four feet tall. Next, she cut some 1×2’s and used a finish nailer to attach them to each of the sides of the coffin. This is where I got to work.
With the coffin “built”, I had a choice to make in how much time I wanted to put into prepping it for paint. Basically, how rustic did my sign need to be? I opted for less-rustic, which means I used my wood filler to round out the corners and fill in some of the gaps left between the mdf and 1×2 edges. Once the wood filler was dry, I spent more time than I’d like to admit sanding and smoothing everything out. That’s the perfectionist in me . . .
Step 2:
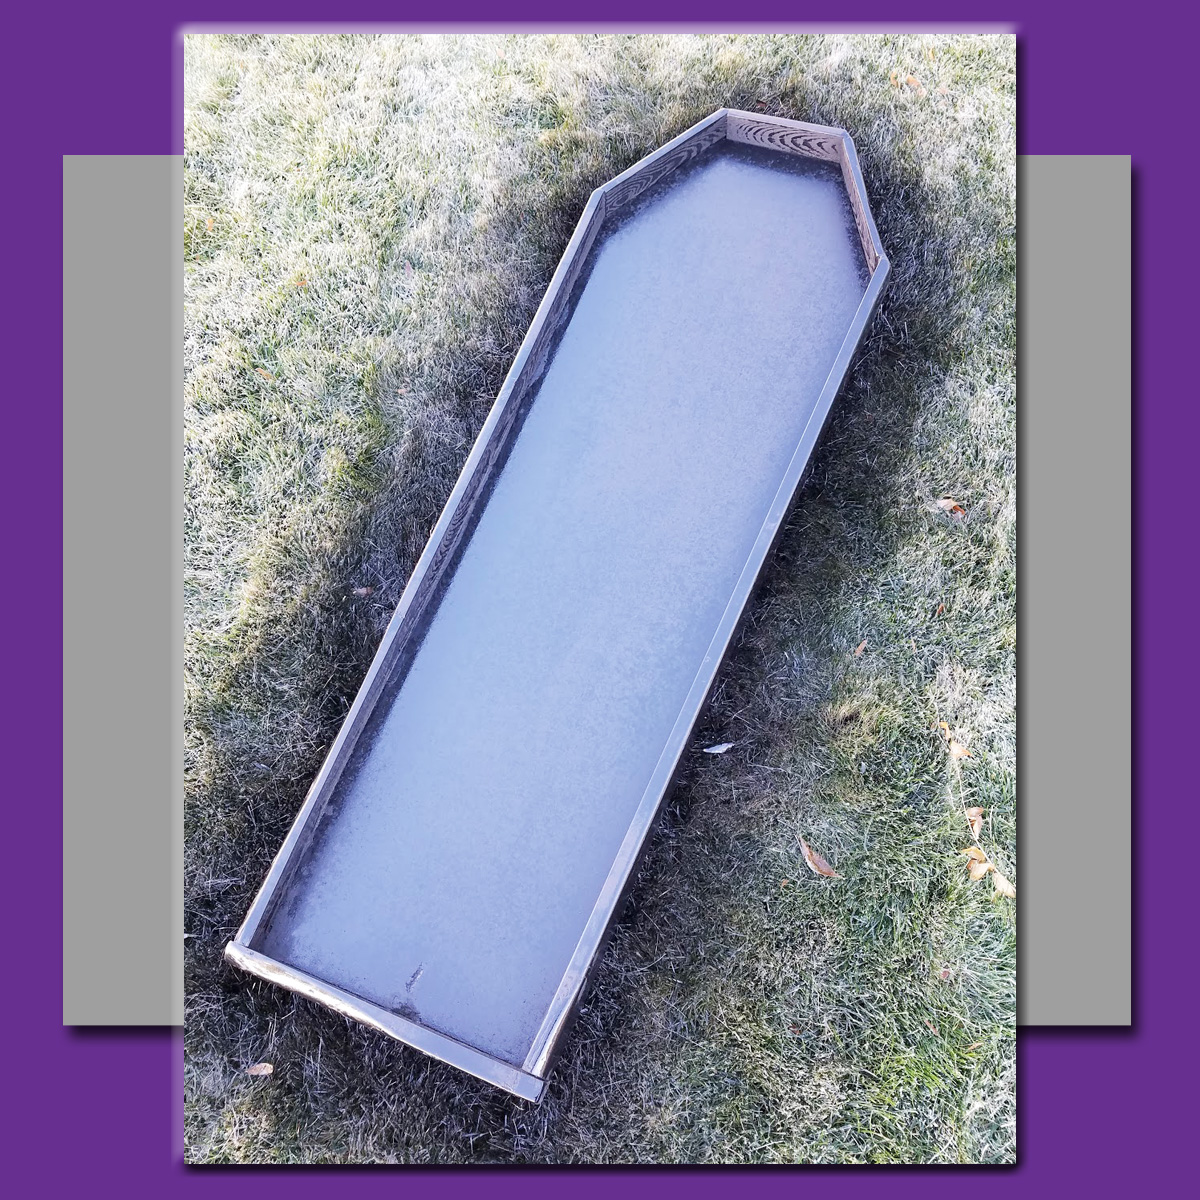
When my hands and arms were sufficiently worn out from sanding, I dusted everything off and got ready to paint. Yes, I remembered to paint in a well-ventilated area! Outside works, right? My kids were worried when I painted the grass, but the lovely thing about grass is . . . it grows! Eventually, the lawn mower will get rid of my black paint.
I know I mentioned this before, but I really love the Rustoleum paint I used for this project. It’s a primer / paint combo, and covers great! With one can, I was able to paint two full coats on the front and sides, and another coat around all the edges on the back. Just fyi . . . I took this picture as I was finishing up the first coat of paint.
Customizing Your Halloween Sign
Step 3:
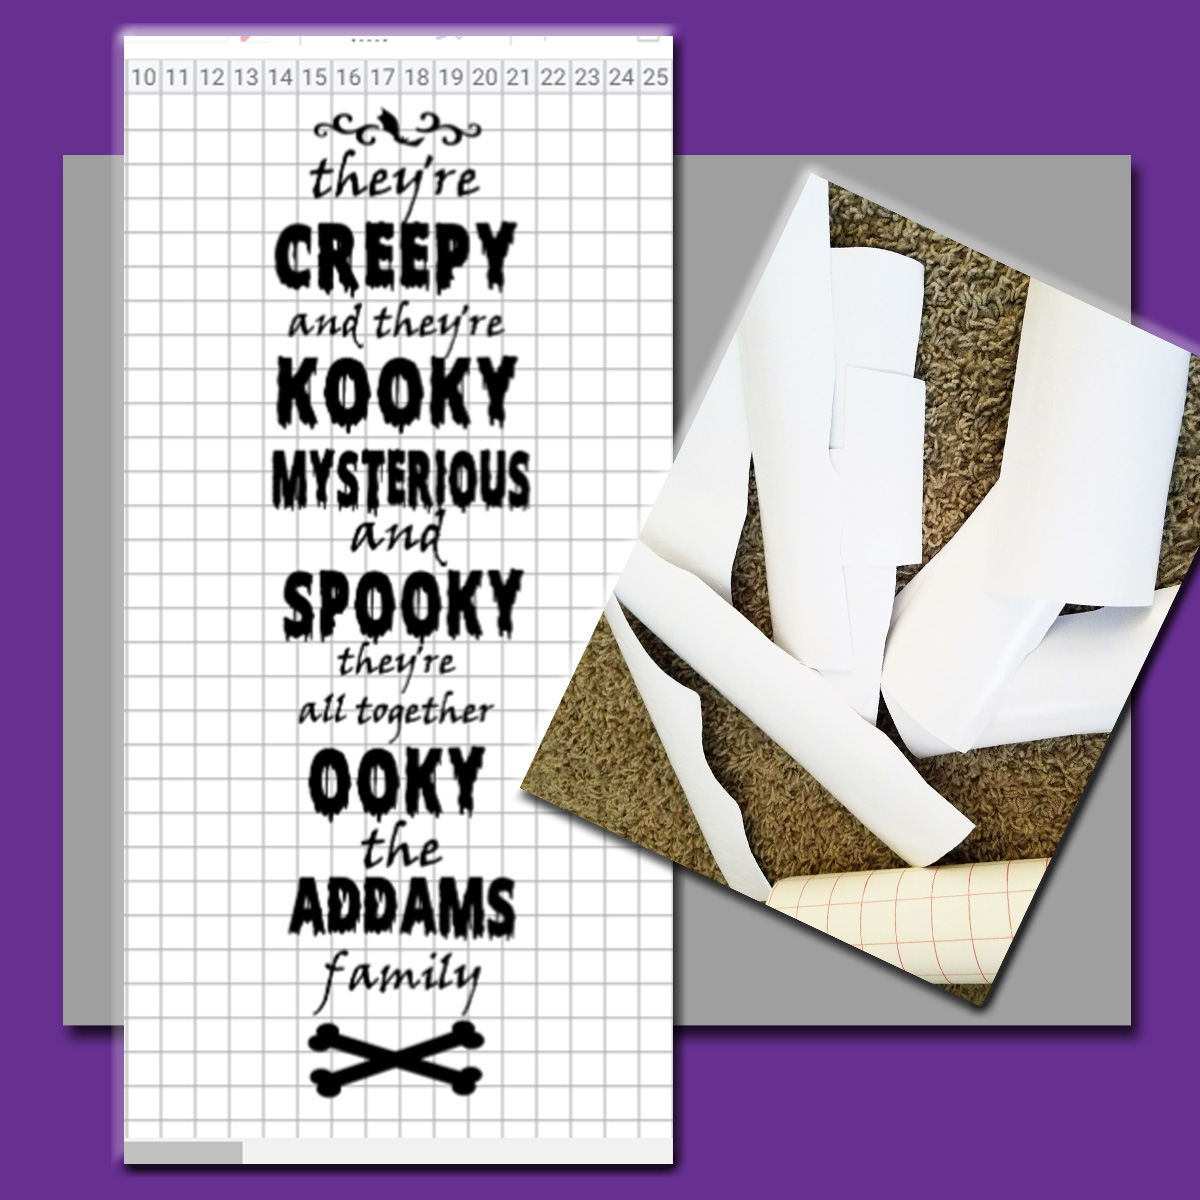
Using Kassandra Delaney’s Facebook image as a guide, I created the design for this Halloween Sign. I had to hunt down some new fonts, which is always fun. The two I used are “Viner Hand ITC”, and “Scary Halloween”. The little bat and flourishes at the top, as well as the bones at the bottom all came from images in Design Space.
Each of the elements I used in Design Space is included in a Cricut Access plan, something I definitely recommend if you spend much time creating with your Cricut. Not only does Cricut Access give you the use of tons of fonts and images, but you can also get discounts on materials, even the cutting machines!

Step 4:
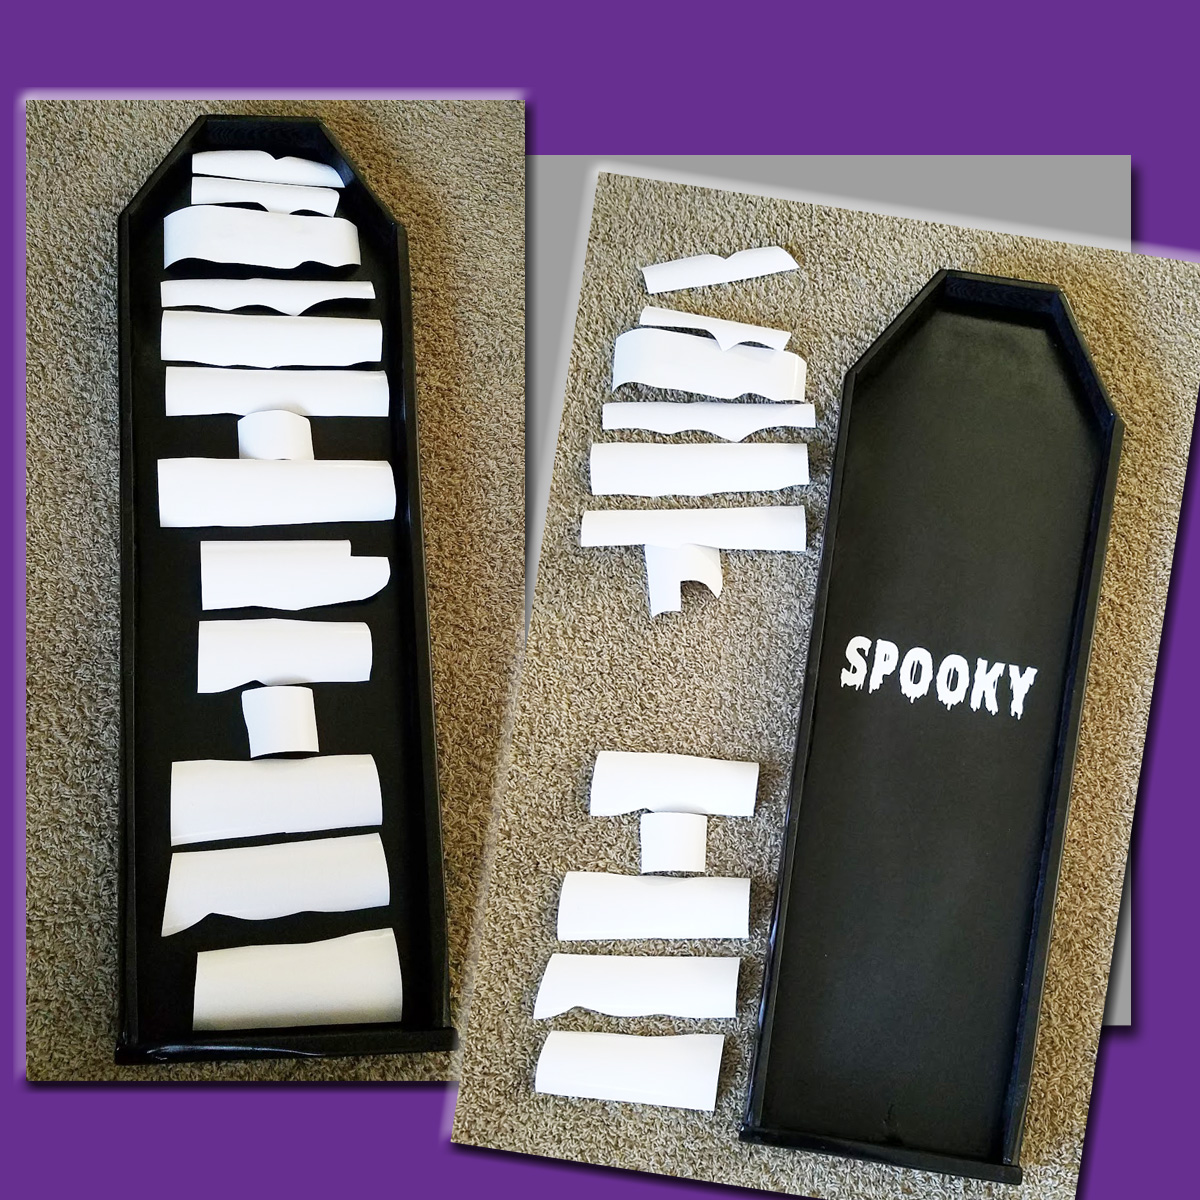
I know it’s hard to tell from the pictures, but each of those white strips is a row of vinyl lettering for my sign. White vinyl, with a white background is hard to see . . . Regardless, in real life, I could see what words were on each strip, and I took some time to lay each row out to make sure the spacing on my Halloween sign looked the way I wanted it to.
Once I had things lined up, I started placing the vinyl. I started in the middle, and went from there. In spite of all my planning, I did end up with a bigger space at the top than I wanted, but at least everything fit, right?

So, I’m pretty much in love with this sign. I think everyone should have one, which means it’s time for you to go get those supplies ready!
